
Homemade Jammie Dodgers
, Updated Sep 24, 2025
This post may contain affiliate links. Please read our disclosure policy.

Homemade Jammie Dodger Biscuits sandwiched with raspberry jam. Use my easy biscuit recipe to make these nostalgic jammy treats – because home baked is always best! You will also love my Jammie Dodger Blondies

Proust may have had his madeleines but, if you are British, nothings brings back memories faster than a biting into a Jammie Dodger… other than having a slice of my Retro School Cake 😉
There’s a reason these little jam-filled biscuits make people stop mid-scroll: nostalgia in cookie form. Whether you knew them as Jammie Dodgers or just “that jammy biscuit,” the combo of crisp shortbread, a peek-through window, and a sweet raspberry filling is pure comfort.
Making them at home means fresher flavor, no preservatives, and the joy of customizing shapes, sizes, or even fillings. Making a batch of Jammie Dodgers is very easy – and if you have these Classic British Biscuit Cutters they will definitely LOOK the part too.
But you don’t HAVE to have use these cutters of course, any cutter will work as long as you cut a little window in half of your biscuits so that the jam shows through. These Linzer Cookie cutters give you a few options!
Did You Know?

Jammie Dodgers were introduced in the 1960s, named after a character called “Roger the Dodger” from the Beano comics. They quickly became one of the UK’s most popular biscuits, up there with custard creams and iced rings! The originals are filled with raspberry-flavored jam, but feel free to play around with different fillings, from apple butter to salted caramel.
How to Make Jammie Dodgers
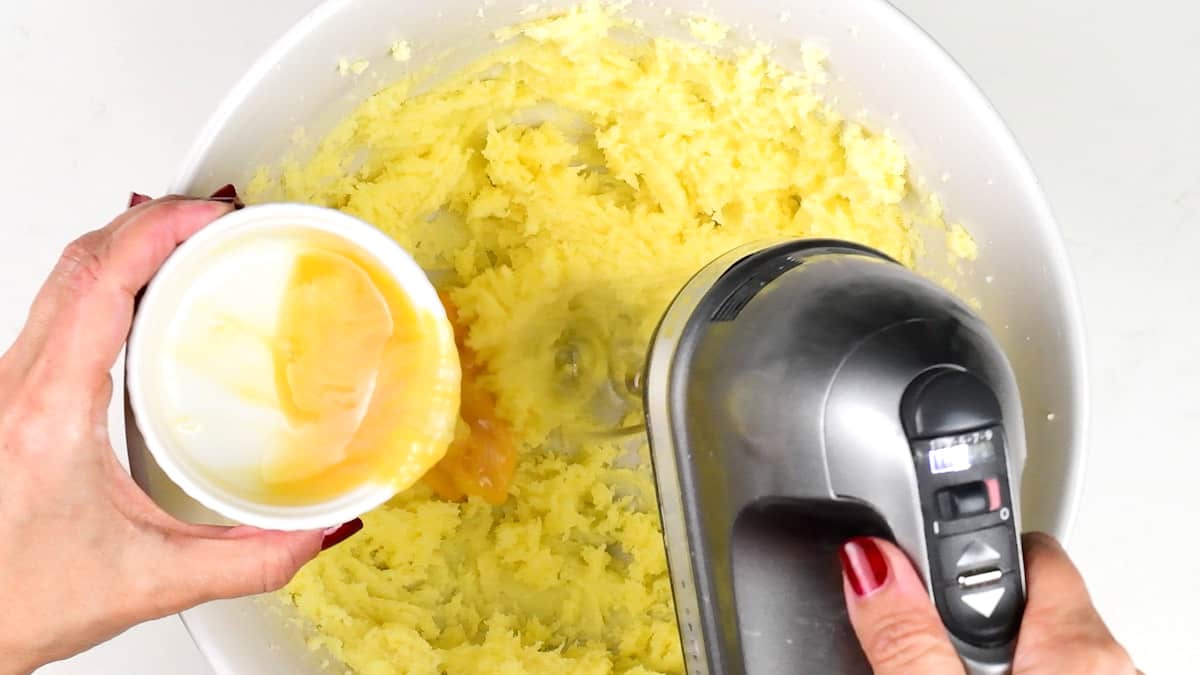
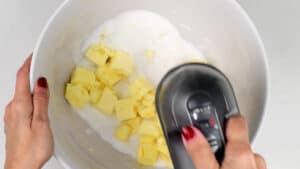
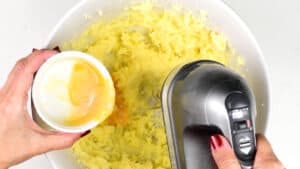
- Make the dough. Cream butter, sugar and vanilla until pale, creamy and fluffy, at least three minutes, scraping the bowl as needed. Mix in the egg.
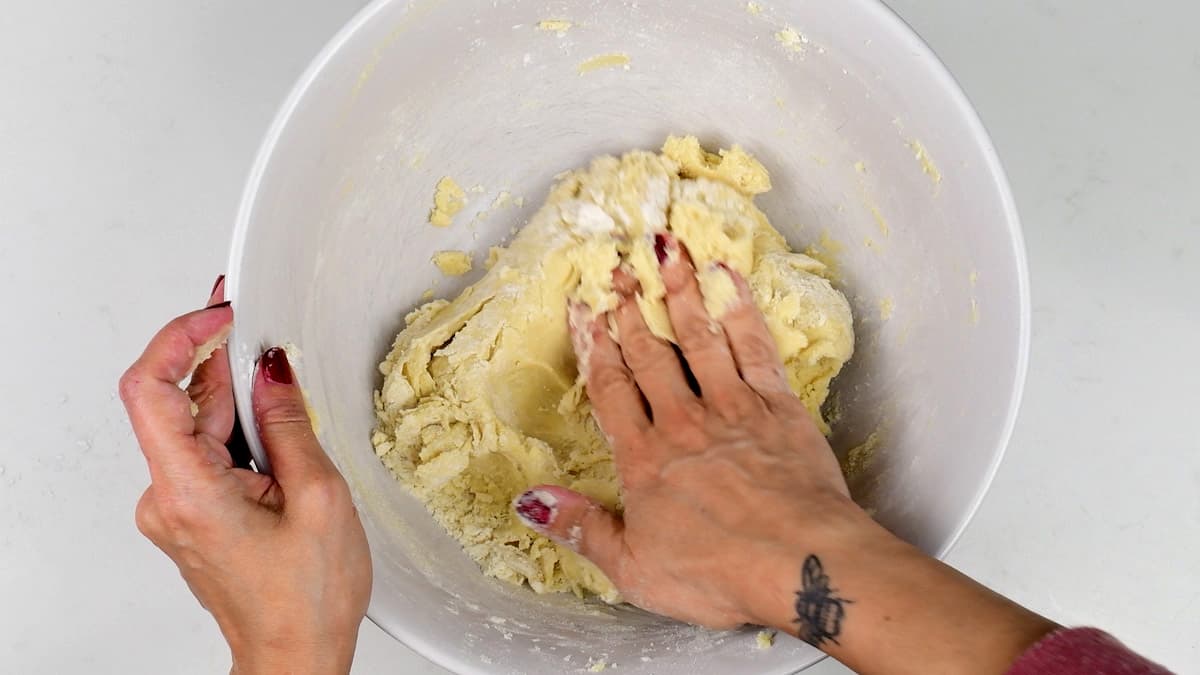
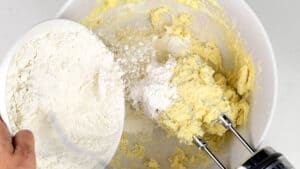
- Add the dry ingredients and beat them in, mixing in the last of the flour by hand. You should have a pliable dough that’s not sticky.
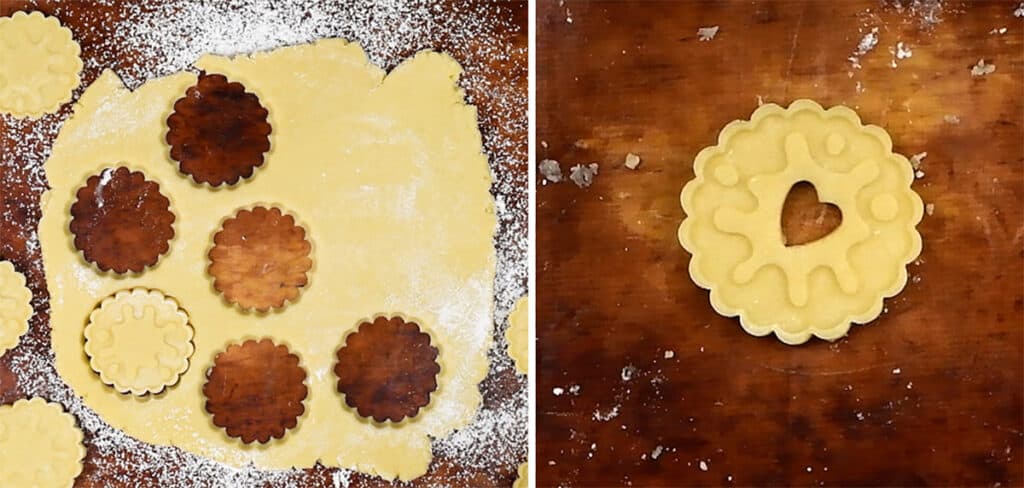
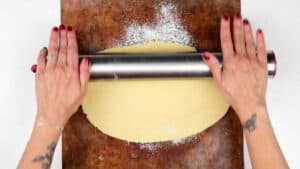
- Roll out the dough and use the cutters to cut out the biscuits. If you are using the Jammie Dodger cutter, press down with some force to impress the design. Cut out heart shapes in the middle of half the biscuits.
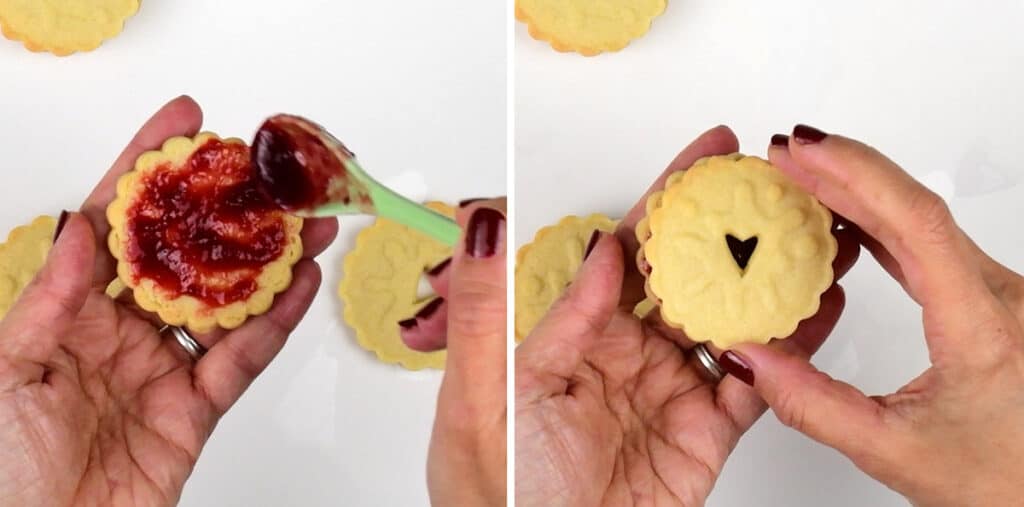
- Bake for 9-10 minutes or until the edges JUST start to color at the edges. Cool on a wire rack and sandwich with seedless raspberry jam. Store the Jammie Dodgers in a cookie tin and eat within a few days of baking.
Recipe Notes and Tips
- Store your Jammie Dodgers in an airtight cookie tin at room temperature for up to 4 days – though good luck making them last that long! The jam will soften these over time, so if you prefer extra crisp biscuits, store the baked cookies unfilled and sandwich them with jam just before serving.
- These biscuits are perfect for an Afternoon Tea spread, paired with scones and a classic Victoria Sponge. They also make a lovely edible gift wrapped in little cellophane bags and personalized with a salt dough ornament!
- If your dough is too warm it will be sticky and hard to roll out. Cover in plastic wrap and chill in the refrigerator for at least 30 minutes if want it to firm up.
- Useful tools: You will need a good quality cookie sheet, reusable liners or silicone mats. A rolling pin with thickness rings is very useful, and of course you will need these British biscuit cutters to recreate the classic look!

HAVE YOU MADE MY JAMMIE DODGERS RECIPE? Post a photo on my Facebook page, share it on Instagram, or save it to Pinterest with the tag #supergoldenbakes and make my day!

Homemade Jammie Dodgers
Video
Equipment
Ingredients
- ¾ cup + 2 tbsp (200g) unsalted butter softened
- 1 cup (200g) sugar ideally superfine / caster
- 1 tsp vanilla extract
- 1 large egg lightly beaten
- 3 cups (360g) flour all-purpose / plain, plus extra for rolling
- 2 tsp baking powder
- ½ tsp salt
- seedless raspberry jam as needed, to fill
Instructions
- Preheat the oven to 350°F (180°C).
- Put the butter, sugar and vanilla in the bowl of your stand mixer or a large mixing bowl. Beat together for at least three minutes, stopping halfway to scrape the bottom and sides of the bowl.¾ cup + 2 tbsp (200g) unsalted butter, 1 cup (200g) sugar, 1 tsp vanilla extract

- Add the egg and beat until incorporated.1 large egg
- Combine the flour, baking powder and salt in a bowl. Gradually add the flour, a little at a time, mixing it in until the dough comes together. Mix in the last of the flour using your hands and knead until you have a pliable dough.3 cups (360g) flour, 2 tsp baking powder, ½ tsp salt
- Lightly dust your liner or baking parchment with a little flour. Use your rolling pin with ⅛ (or ¼ inch) rings to roll out the dough.
- Dust the cutters with flour and shake out any excess. Place cutter on the dough and press down to cut the basic shape. Depress the central button on cutter (with some force!) to imprint the design and release the dough from the mould.

- Repeat until you have used up all the dough, gathering any scraps and rolling out again. Cut a central hole using a heart shaped cutter (or any shape you like) on half the biscuits.
- Place on lined trays, spaced slightly apart. Bake for 9-10 minutes – keep an eye on the biscuits and remove from the oven when the edges just start to colour.
- Transfer to a wire rack to cool. Fill the jammie dodgers with a little seedless raspberry jam and sandwich together.seedless raspberry jam


Notes
- Store your Jammie Dodgers in an airtight cookie tin at room temperature for up to 4 days – though good luck making them last that long! The jam will soften these over time, so if you prefer extra crisp biscuits, store the baked cookies unfilled and sandwich them with jam just before serving.
- These biscuits are perfect for an Afternoon Tea spread, paired with scones and a classic Victoria Sponge. They also make a lovely edible gift wrapped in little cellophane bags and personalized with a salt dough ornament!
- If your dough is too warm it will be sticky and hard to roll out. Cover in plastic wrap and chill in the refrigerator for at least 30 minutes if want it to firm up.
- Useful tools: You will need a good quality cookie sheet, reusable liners or silicone mats. A rolling pin with thickness rings is very useful, and of course you will need these British biscuit cutters to recreate the classic look!
Nutrition
Nutritional information is always approximate, and will depend on quality of ingredients and serving sizes.
ALL IMAGES AND CONTENT ON SUPERGOLDEN BAKES ARE COPYRIGHT PROTECTED. IF YOU WISH TO SHARE THIS RECIPE, THEN PLEASE DO SO BY USING THE SHARE BUTTONS PROVIDED. DO NOT SCREENSHOT / POST RECIPE OR CONTENT IN FULL.


Hi Barbara, I’ve just made the dough for Jammie Dodgers and resting it in the fridge. It has turned out great. I’ll make them tomorrow, can I freeze them?
I’d like you to send me the recipe for your custard creams please.
Mine turned out delicious however had to add a whole load more flour than recommended in the recipe vey odd
These baked up beautifully!
hello, I hope you’re all well. The recipe states one lightly beaten egg, however I cannot find this mentioned in the method? I intend to make this today and will omit the egg as I usually don’t add egg into basic shortbread biscuits I make often. I’m no expert though so please let me know if the egg should be included and at what stage?
many thanks from the UK
Hi – the instructions specify when to add the egg in step 3 x
Maybe it’s something to do with web page formatting on particular mobile browsers, but for step 3 I’m just getting a photo and a blank space. All the other steps look fine though.
Thanks will take a look
what sugar is used? granulated or caster?
Either can be used but caster is preferable x
I have been baking custard creams for 50years and use my grandmothers recipe whose family had a bakery in the north east of England ,They used to be cut out with an egg cup !
If you would like this recipe to try I will send it to you !
Since the advent of the cutters I make these on a regular basis and they are loved by all my family and friends . It’s worth a try so let me know if you want me to forward the recipe .
Barbara Mason
I’ve just received the biscuit cutters this morning 27/7/20 & would love your Grandmas recioe❤️
These are absolutely brilliant! I saw the cutters a while ago, but am waiting until I come to the UK again to get them. LOVE all of these biscuits that I grew up with. Lovely photos of your baking, too!