
Biscoff Cheesecake (No Bake)

, Updated Aug 03, 2025
This post may contain affiliate links. Please read our disclosure policy.
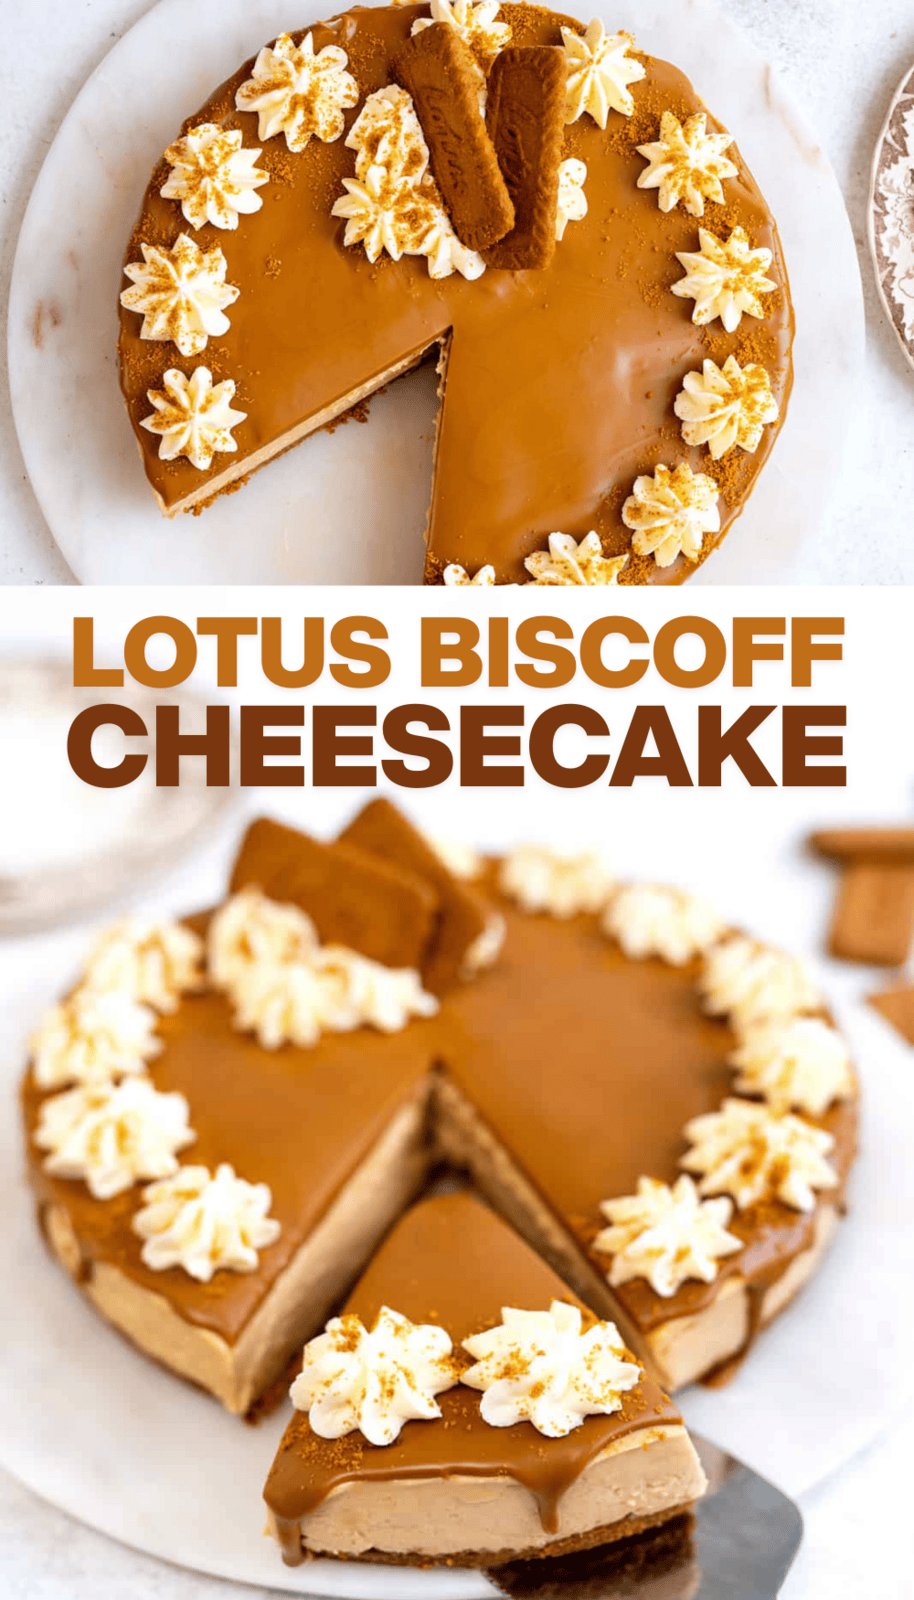
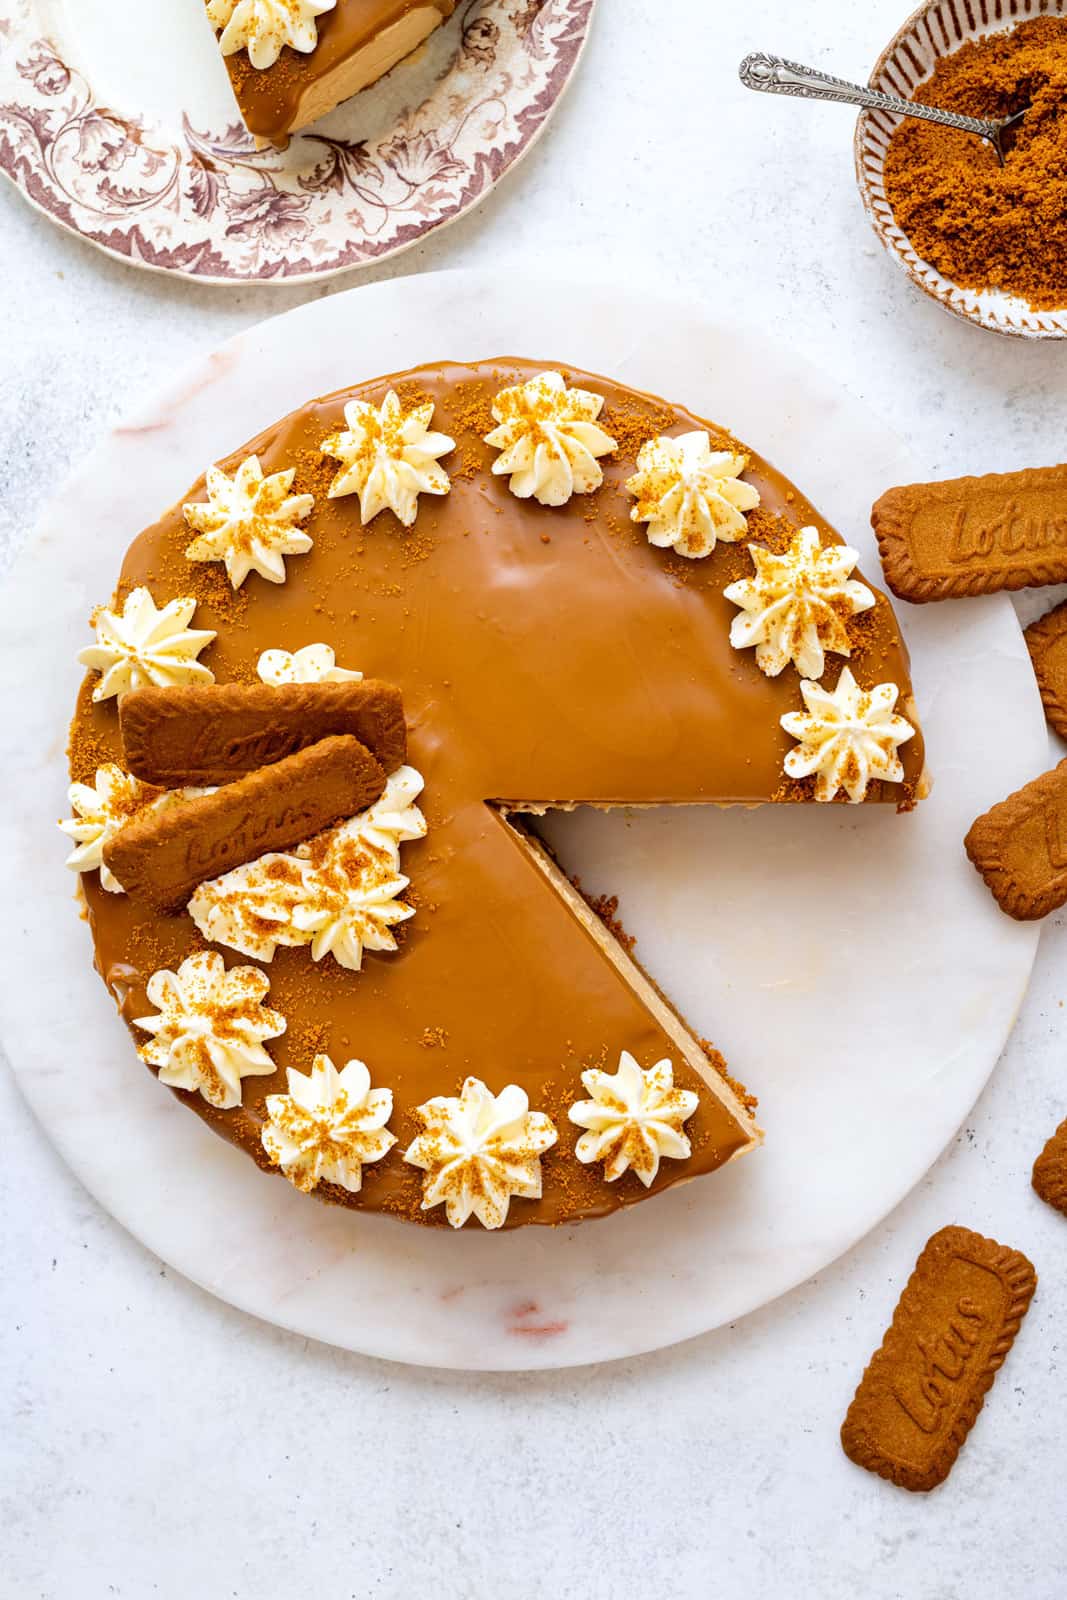
This Biscoff Cheesecake is the ultimate no-bake dessert—creamy, rich, and loaded with cookie butter flavor in every bite. A dreamy cheesecake for holidays, birthdays, or any day you’re craving something extra special.
Love Biscoff as much as I do? Try my Chocolate Biscuit Cake, Biscoff Layer Cake, easy Biscoff Traybake and insanely delicious Biscoff Brownies

Hands up who LOVES Biscoff? 🙋♀️ I am borderline obsessed with the cookies and the Lotus cookie spread has overtaken my love of Nutella. Especially the crunchy one! OMG, that stuff is super addictive.
Both my kids are also huge fans so when I told them I would be making a Biscoff Cheesecake they literally whooped! It is, hands down, one of the easiest and most delicious desserts you will ever make with a creamy almost mousse-like texture.
What’s Biscoff then?
Lotus Biscoff spread is the impossible to resist cookie spread made from the famous Belgian Biscoff biscuits (traditional crispy spiced Speculoos cookies).
It is super creamy and has a smooth texture with a distinct caramel / cinnamon taste. Some people like to spread it on toast… I just need a spoon and some alone time with the jar 😉 You can buy both the Lotus Biscoff cookies and Biscoff spread on Amazon.

Here’s what you will need
- Biscoff Cookies: These golden, caramelized cookies are the backbone of this recipe. Crushed into fine crumbs, they make the most irresistible cheesecake base—crunchy, buttery, and packed with those signature warm spices. If you’re a fan of graham cracker crusts, get ready to fall in love with this upgrade.
- Melted Butter: Binds the cookie crumbs together and adds rich flavor to the crust. Once chilled, it helps everything firm up into that perfect sliceable layer.
- Mascarpone or Cream Cheese: The creamy heart of this cheesecake! Go for full-fat cream cheese (the kind that comes in blocks, not tubs) for the best texture. Mascarpone cheese is another excellent option – it’s less tangy and perfect for desserts.
- Biscoff Spread (Cookie Butter): This dreamy spread is made from ground-up Biscoff cookies and it adds that unmistakable flavor to the cheesecake filling. You’ll mix it into the batter and then drizzle more on top for a glossy, decadent finish. Trader Joe’s Speculoos Spread is a good substitution.
- Cream: Whipped cream keeps the filling light and airy, adding mousse-like softness that really sets this cheesecake apart.
- Powdered Sugar and Vanilla Extract: Sweetness and a splash of real vanilla extract brings out the toasty caramel notes and gives the cheesecake that rich, bakery-style flavor.

How to Make Biscoff Cheesecake
Make the cookie crust
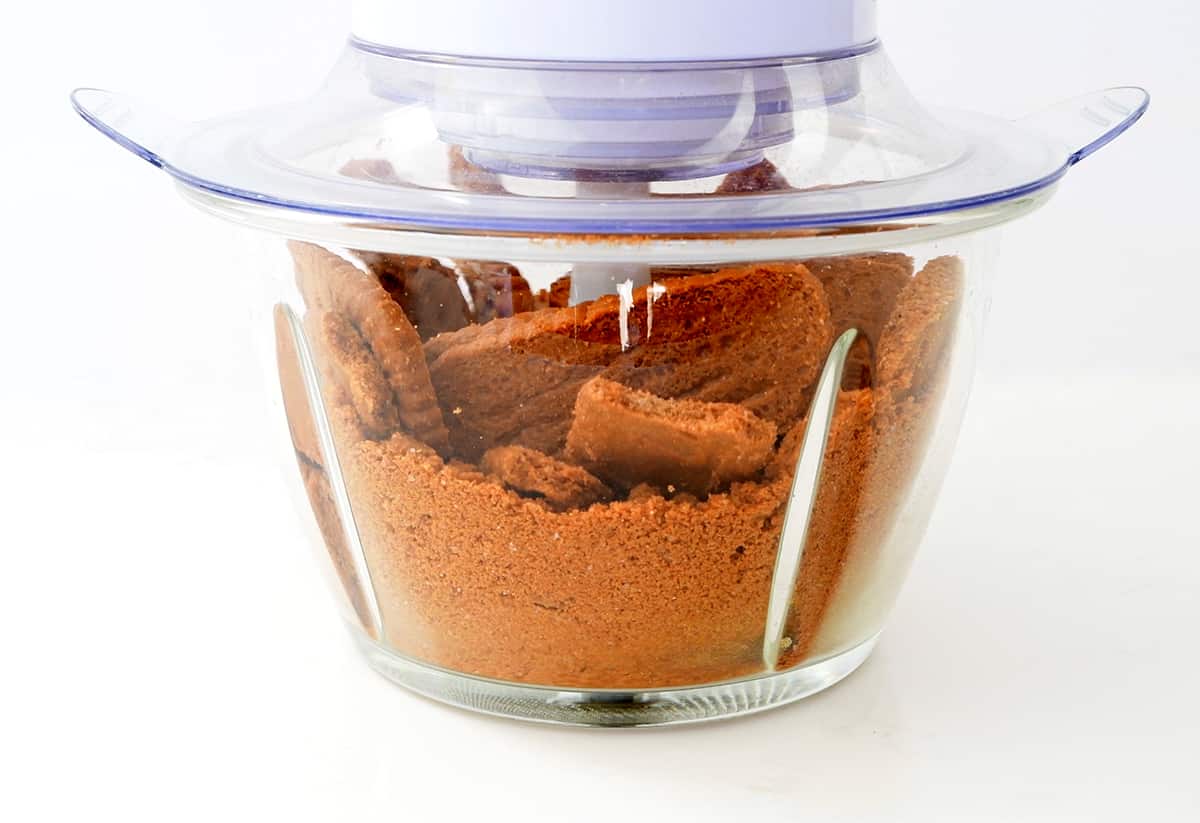
- Put an entire pack of Biscoff cookies (minus 4 which you will use later) into a mini chopper and pulse until you have fine crumbs. Reserve a tablespoon of the crumbs to decorate the cheesecake later.
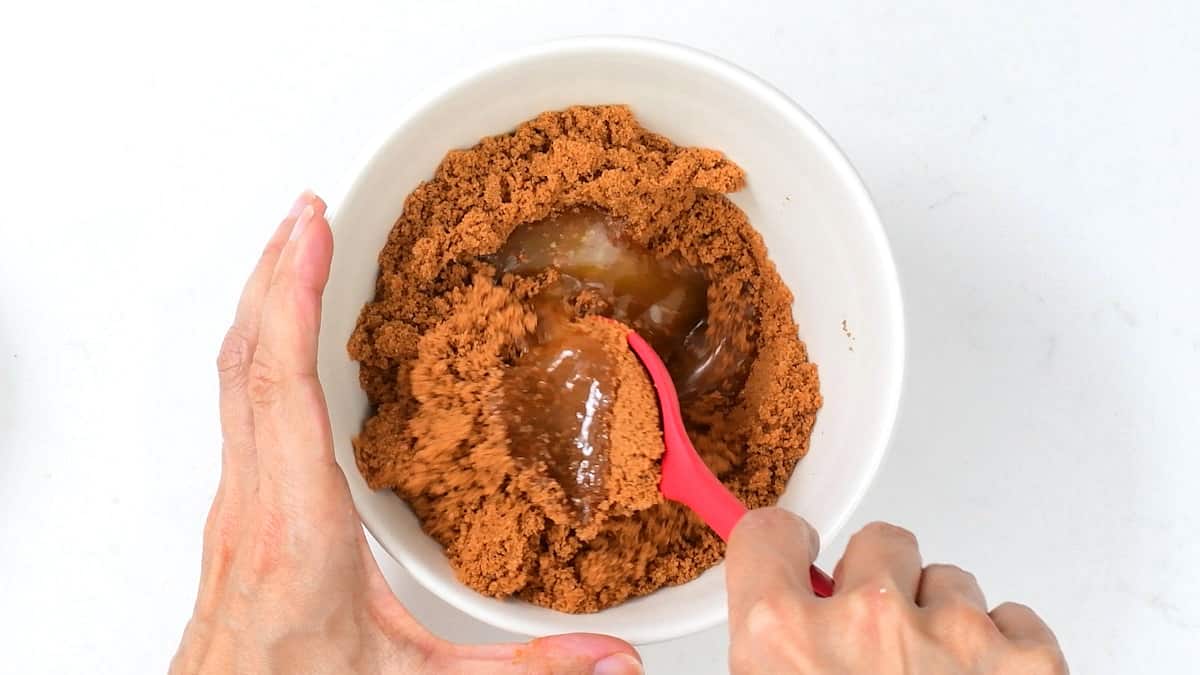
- Put the remaining crumbs in a bowl and add the melted butter. Mix together until they resemble wet sand.
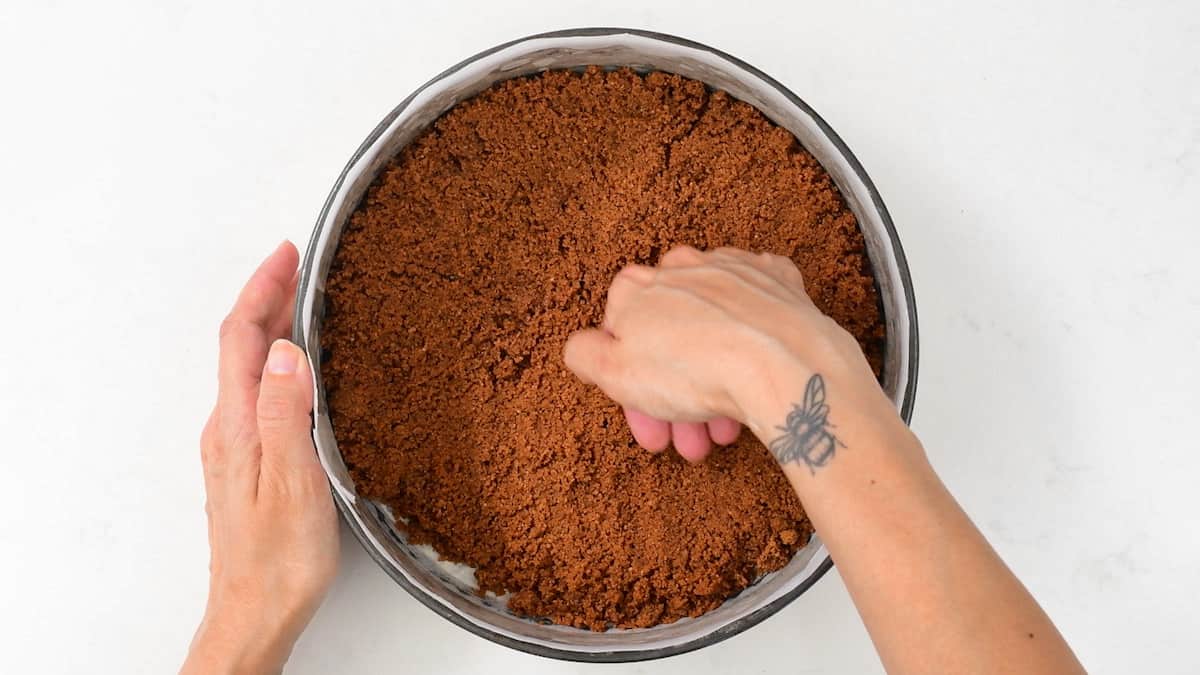
- Tip the cookie crust into a 23cm (9inch) springform cake tin lined with baking paper. Press down with your fingers to create an even base for your cheesecake. Chill in the freezer while you prepare the cheesecake filling.
Make the cheesecake filling
- Add the double cream into a large bowl (ideally a chilled metal bowl) and whisk on medium speed until peaks form. Keep an eye on the cream to avoid overwhipping. Put the cream in the fridge to chill while you make the filling.
- Put the cookie spread, mascarpone cheese, icing sugar, vanilla extract and salt in a mixing bowl. Beat together with a hand or stand mixer on low -medium speed until combined. Stop the mixer and use a spatula to scrape the bottom and sides of the bowl then beat again, briefly.
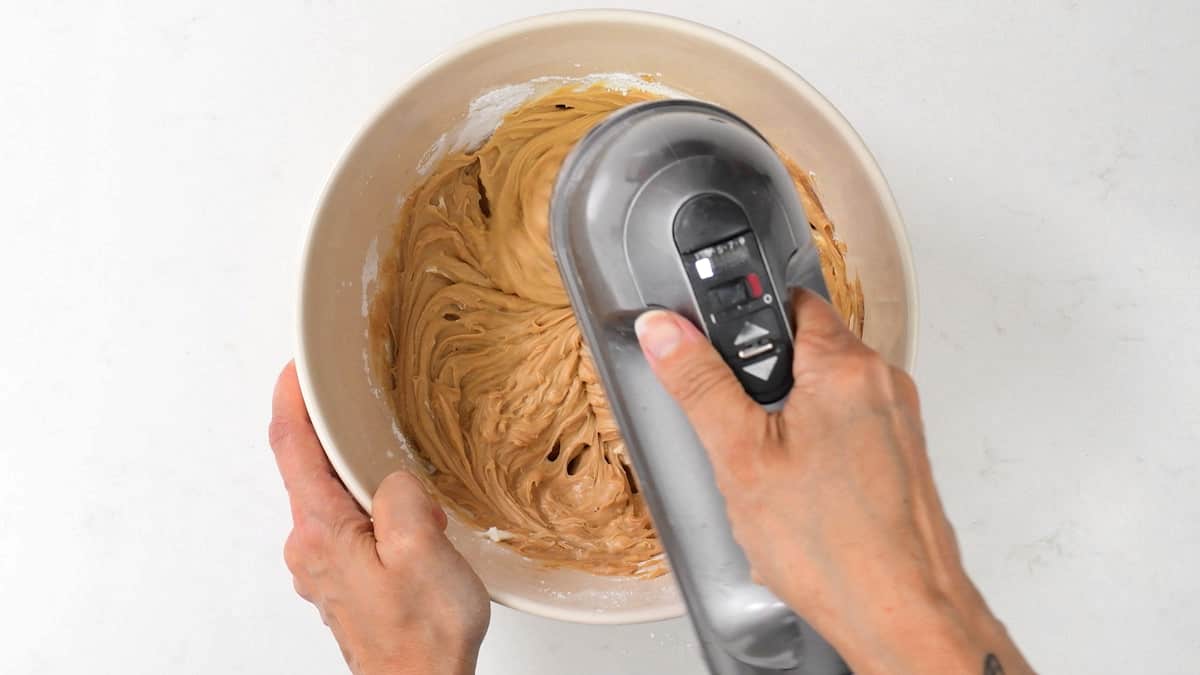
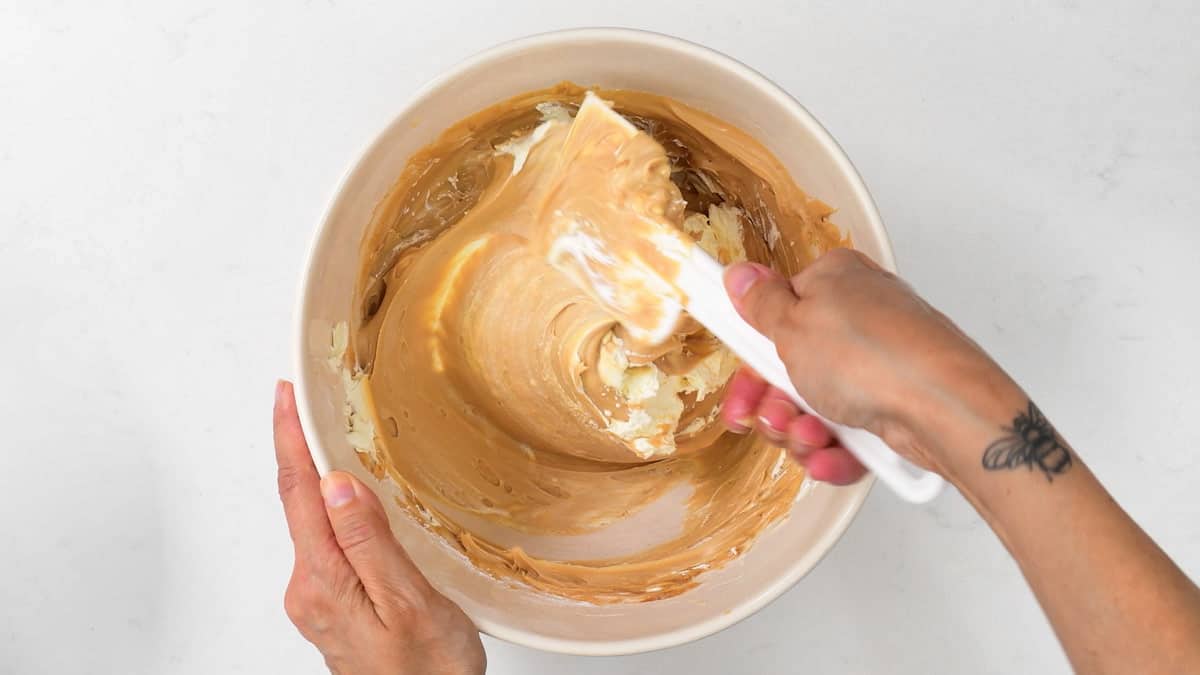
- Use a spatula to gently fold the whipped cream into the cheesecake filling until no white streaks remain. The texture should be thick and fluffy, not runny.
Assemble the cheesecake and chill
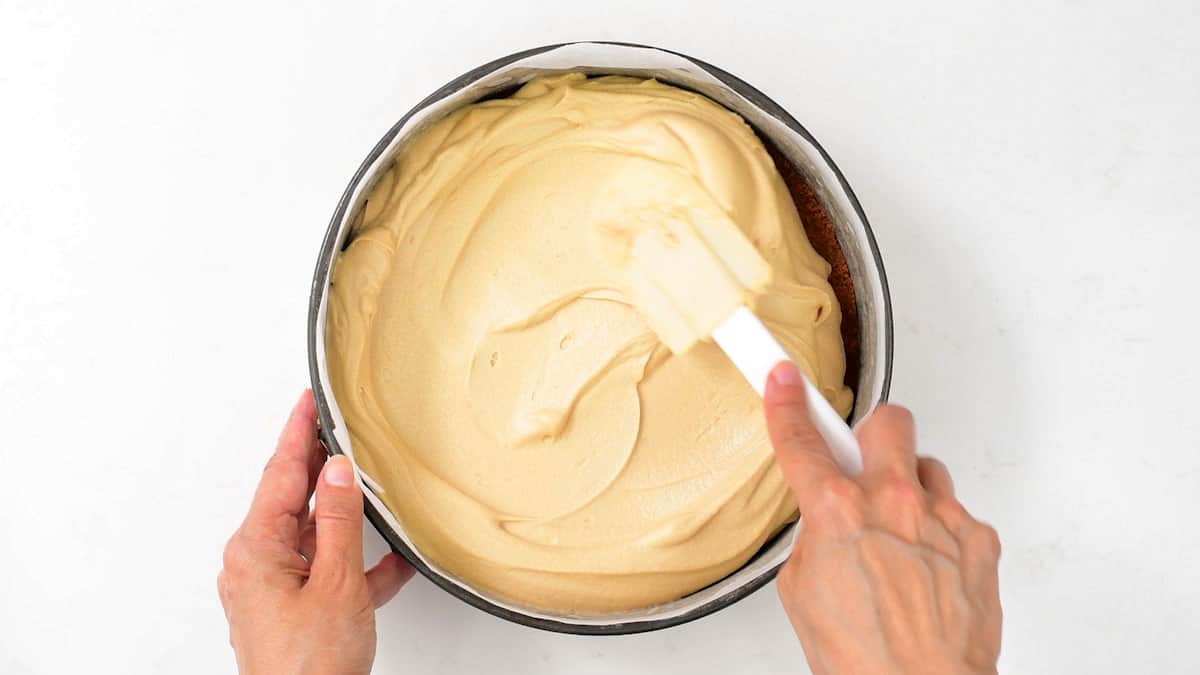
- Pile the filling on top of the chilled base and level with a spatula. Tap the tin gently on the counter so that filling settles. Chill in the fridge overnight or for at least 8 hours to allow the cheesecake to set.
Decorate your cheesecake
- The following day run a hot knife around the edge of the tin to loosen the cheesecake and gently remove the cake ring. Use the tip of a knife to loosen the cheesecake from base of tin and then transfer cheesecake onto a platter using a cake lifter. Place the cheesecake in the freezer for 30 minutes.
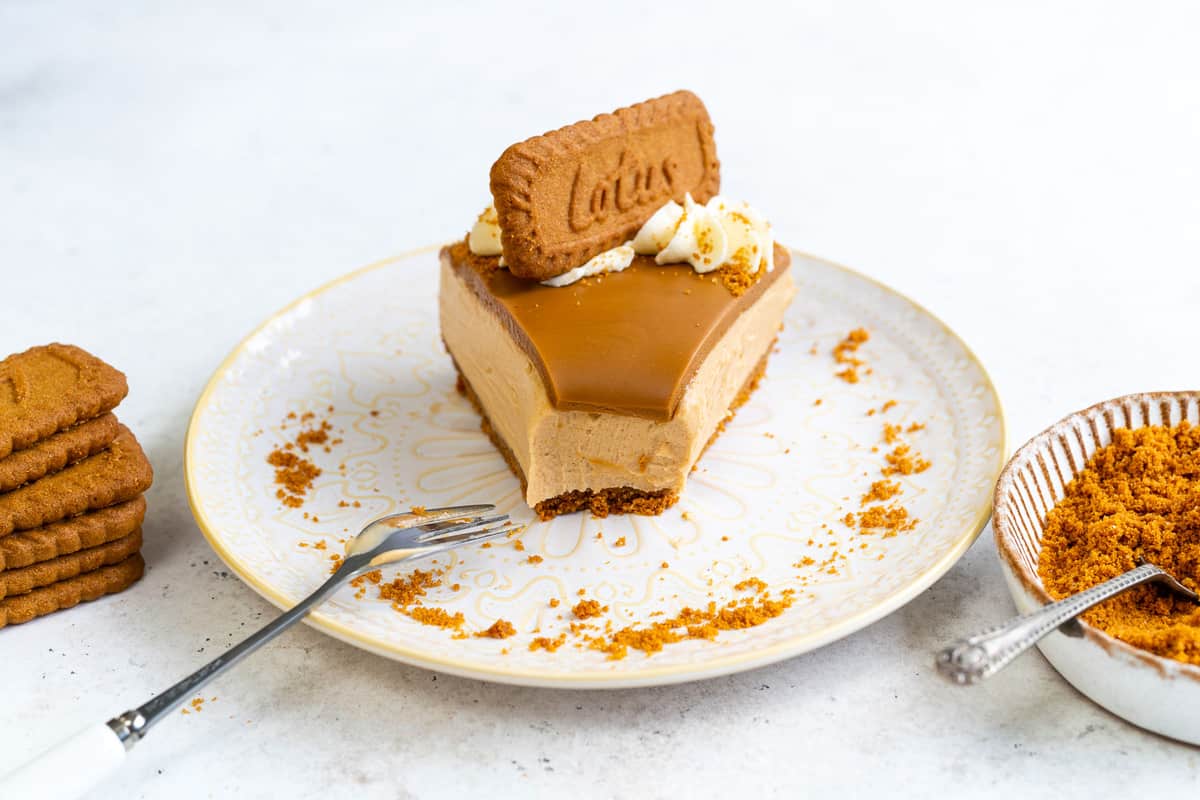
- Heat the remaining Biscoff spread in the microwave for 40 seconds and stir until it is runny and smooth. Take cheesecake out of the freezer and pour the Biscoff over the centre of the cake, quickly spreading it outwards with an offset spatula so that it covers the whole cheesecake.
- Whisk the cream and pipe around the edge of the cheesecake (this is optional) and decorate with the reserved Biscoff crumbs and biscuits.
- Keep chilled until ready to serve. Run a knife under hot water, wipe dry and slice the cheesecake, wiping the knife clean with each slice. This cheesecake is very rich so I would suggest you cut small slices!


Recipe Notes and Tips
- You can use a springform tin or a loose-bottom pan to make your cheesecake. I like to line both the bottom and sides of the tin with baking paper so I can easily remove the cheesecake.
- Do not grease the baking paper or tin with butter as it will harden in the fridge and make removal difficult.
- Always use FULL FAT mascarpone cheese or block cream cheese and cold heavy cream. Now is not the time to use low fat products, you are relying on the high percentage of fat for the cheesecake to set.
- Take the mascarpone or cream cheese out of the fridge to soften slightly so that is cold room temperature when you beat it.
- The cream needs to be COLD so that it whips properly. If you can, put it in a metal bowl and chill before whisking.
How to Store Biscoff Cheesecake (If You Have Any Left!)
This cheesecake is a make-ahead dream and keeps really well—if you can resist eating it all in one go!
- In the fridge: Store any leftovers in an airtight container or cover the pan tightly with plastic wrap for up to 4 days. The cookie crust might soften a touch over time.
- In the freezer: Want to save some for a future sweet craving? You can absolutely freeze it, whole or in slices. Place into a freezer-safe container and freeze for up to 1 month. Let it thaw overnight in the fridge before serving. Make sure the cheesecake is fully set before freezing otherwise the texture may be affected.
You can never have enough cheesecake recipes…
- No Bake Malteser Cheesecake
- No Bake Cheesecake Bars with Blueberry Compote
- Instant Pot Peanut Butter Caramel Cheesecake
- Light Quark Cheesecake
- No Bake Strawberry Cheesecake
This no-bake Biscoff Cheesecake is the ultimate treat. If you give it a try, I’d love to hear your thoughts! Leave a comment, rate the recipe and tag me on Instagram Instagram @supergolden88 and TikTok . Don’t forget to save this to Pinterest—it’s one dessert you’ll want to make again and again.

No Bake Biscoff Cheesecake
Video
Equipment
Ingredients
For the base
- 1 pack (235g/ 35) Lotus Biscoff Cookies
- 6 tbsp (85g) unsalted butter, melted
- pinch salt
For the filling
- 1 cup (250ml) cream heavy / double
- 1 cup (250g) Lotus Biscoff spread or Trader Joe's Speculoos Cookie Butter
- 1 pound (500g) mascarpone cheese or brick style cream cheese
- 1 cup (125g) powdered sugar (=icing sugar)
- 1 tsp vanilla extract or vanilla bean pasta
- Pinch sea salt
For the topping
- ½ cup (125g) Biscoff cookie spread , melted
- ½ cup (125ml) cream heavy / double (optional)
- Reserved cookies and crumbs
Instructions
Make the Biscoff cookie crust
- Put an entire pack of Biscoff cookies (minus 4 which you will use later) into a mini chopper and pulse until you have fine crumbs. Reserve a tablespoon of cookie crumbs to decorate the cheesecake later.1 pack
- Put the remaining crumbs in a bowl and add the melted butter and salt. Mix together until they resemble wet sand.6 tbsp (85g) unsalted butter, melted, pinch salt
- Tip the crumbs into a 9-inch springform cake pan lined with baking paper.
- Press down with your fingers to create an even base for your cheesecake. Chill in the freezer while you prepare the cheesecake filling.
Whip the cream
- Put the cream in a bowl (ideally a chilled metal bowl) and whisk on medium speed until peaks form. Keep an eye on the cream to avoid overwhipping. Put the cream in the fridge to chill while you make the filling.1 cup (250ml) cream
Make the cheesecake filling
- Put the cookie spread, mascarpone cheese, sugar, vanilla extract and salt in a mixing bowl. Beat together with a hand or stand mixer on low -medium speed until combined. Stop the mixer and use a spatula to scrape the bottom and sides of the bowl then beat again, briefly.1 cup (250g) Lotus Biscoff spread, 1 pound (500g) mascarpone cheese, 1 cup (125g) powdered sugar, 1 tsp vanilla extract, Pinch sea salt
- Use a spatula to gently fold the whipped cream into the cheesecake filling until no white streaks remain. The texture should still be thick and fluffy, not runny.
- Pile the filling on top of the chilled base and level with a spatula. Tap the tin gently on the counter so that filling settles. Chill in the fridge overnight.
Decorate your cheesecake
- The following day run a hot knife around the edges of the tin to loosen the cheesecake and gently remove the cake ring. Transfer the cheesecake onto a platter (I use a cake lifter to do this). Place the cheesecake in the freezer for 30 minutes.
- Heat the remaining Biscoff spread in the microwave for 30-40 seconds and stir until it is runny and smooth.½ cup (125g) Biscoff cookie spread
- Take cheesecake out of the freezer and pour the Biscoff over the centre of the cake spreading it quickly outwards with an offset spatula so that it covers the whole cheesecake and drips down the sides. Place in the fridge to set.
- Whip the cream and pipe around the edge of the cheesecake (optional). Decorate with the reserved Lotus Biscoff crumbs and cookies.½ cup (125ml) cream, Reserved cookies and crumbs
- Keep the cheesecake chilled until ready to serve. Run a knife under hot water, wipe dry and slice the cheesecake, wiping the knife clean with each slice.
Notes
- You can use a springform tin or a loose bottomed cake tin to make your cheesecake. I like to line both the bottom and sides of the tin with baking paper so I can easily remove the cheesecake.
- Do not grease the baking paper or tin with butter as it will harden in the fridge and make removal difficult.
- Always use FULL FAT mascarpone cheese or block cream cheese and double (heavy) cream to make cheesecake. Now is not the time to use low fat products, you are relying on the high percentage of fat for the cheesecake to set.
- Take the mascarpone cheese out of the fridge to soften slightly so that is room temperature when you beat it.
- The cream needs to be COLD so that it whips properly. If you can, put it in a metal bowl and chill before whisking.
- Allow the cheesecake to set overnight in the fridge. It is not ready to serve until it has been chilled for at least 8 hours.
Nutrition
Nutritional information is always approximate, and will depend on quality of ingredients and serving sizes.


Hi! I’m playin making this cheesecake but am unclear why in the listed ingredients (in the recipe) does it say to double the heavy whipping cream in the filling and the topping?
Many thanks! Renee
Hi Renee – in the UK, heavy cream is known as double cream, so the ingredient list includes both for the different audiences. You don’t have to double the amount! Also, use the cream with the highest percentage of fat for the best results. Hope that makes sense and good luck with the cheesecake!
lovely and greet recipe! The cheesecake tasted absolutely devine! Although I overmixed the filling as it looked grainy in the end. I think using a different head to mix the filling probably would have helped get rid of the white cream patches.
Hi where in Australia can I find lotus spread ?. Thanks in advance 🙂
I believe Woolworths and Coles stock it
Looked yummy and easy , will try is soon 🙏