
Ultimate Chocolate and Nutella Cake
, Updated Oct 14, 2022
This post may contain affiliate links. Please read our disclosure policy.
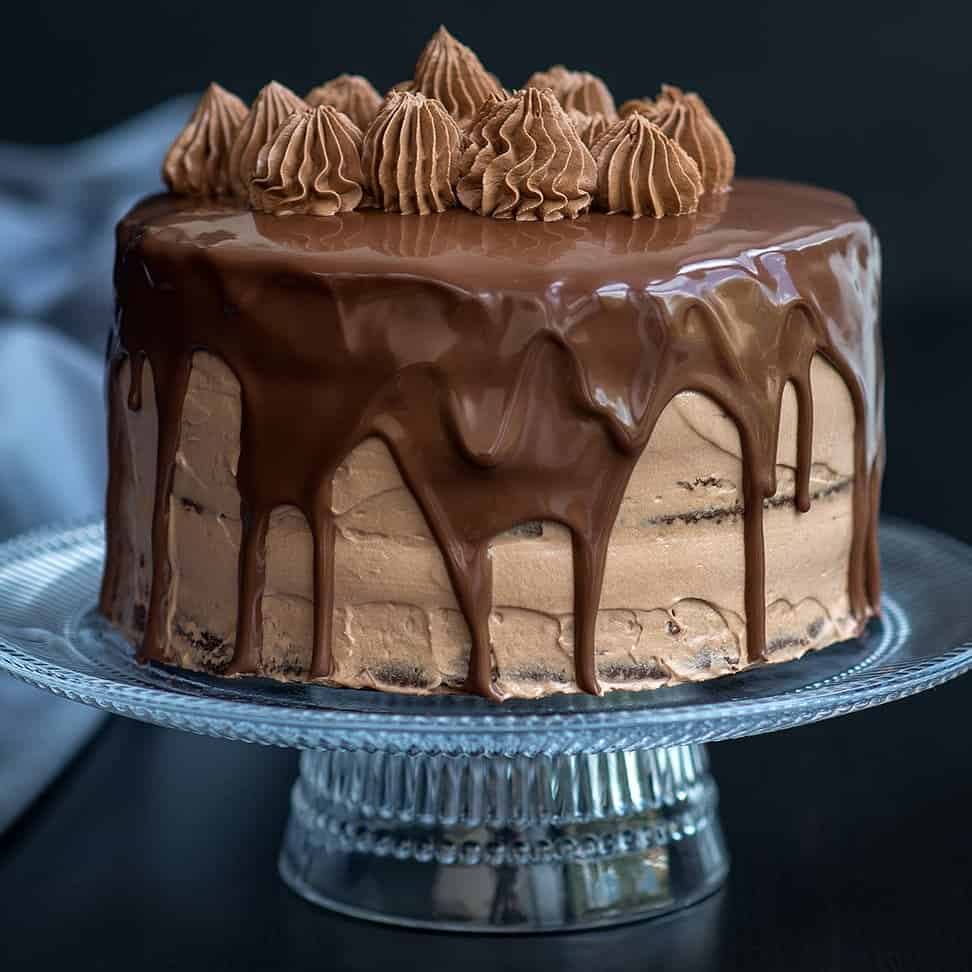
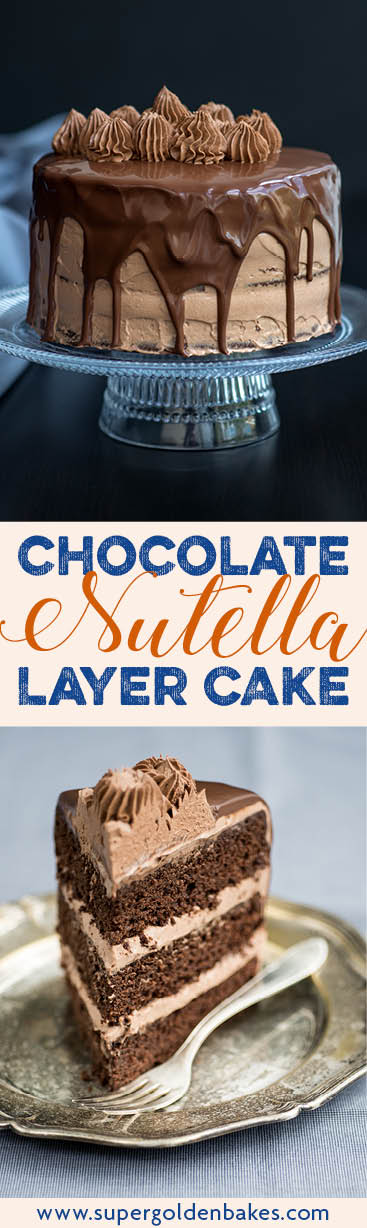
This really is the Ultimate Chocolate Cake, with three fudgy layers of chocolate sponge, whipped Nutella filling and glossy rich chocolate glaze. Perfect for birthdays and celebrations and a delight to chocaholics everywhere!
You will also love… my Salted Caramel Cake

I first made this stunning chocolate cake back in 2007 for my daughter’s first birthday. Back then food blogging wasn’t even remotely on my radar and taking dozens and dozens photographs of a cake would seem rather preposterous!
My, how times have changed… The cake recipe however, first published on BBC Good Food in 2004, remains hugely popular.
It has thousands of overwhelmingly positive reviews published on the site. But if you scroll through the reviews you will spot more than a handful incredibly disgruntled bakers who complain that this is the ‘worst recipe ever!’ among the hundreds of five star ratings.
The truth is that this recipe definitely needs a few tweaks. Having made this cake five (!) times in the past couple of months I feel I have nailed those changes and that this is, truly, one of the most amazing chocolate cakes out there.
The texture and taste are wonderful and you don’t even need a stand mixer to make the cake layers. Add a very simple whipped Nutella filling and a glossy chocolate fudge glaze and you have a crowd pleasing showstopper on your hands!

Ultimate Chocolate Cake step by step
Full measurements and instructions can be found on the printable recipe card at the bottom of the page. Please take a look at the steps and video before attempting this recipe!
STEP 1. Preheat the oven to 160C (325F). Grease and line three 20cm (8in) cake tins and dust with flour, shaking any excess. Alternatively spray with Cake Release.
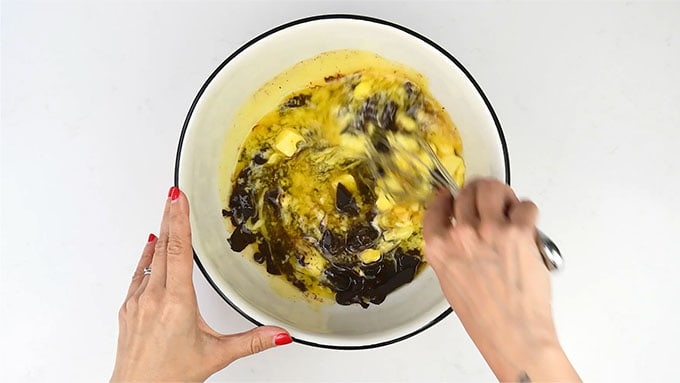
STEP 2. Place the chocolate and butter in a bowl and set over a pot of barely simmering water. Allow them to gradually melt and stir together until smooth. Alternatively microwave in 40 second bursts, stirring in between, until melted and smooth.
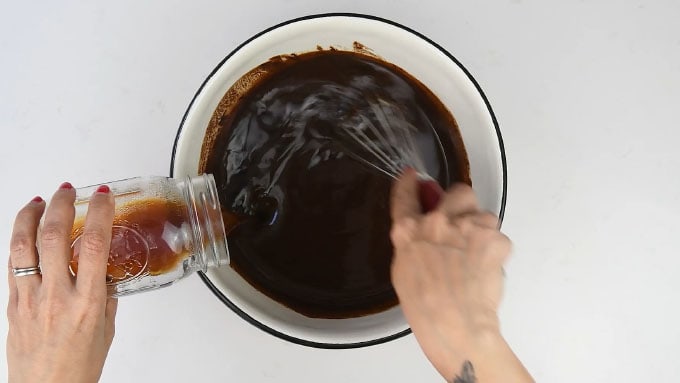
STEP 3. Add the hot coffee and use a small balloon whisk to mix it in.
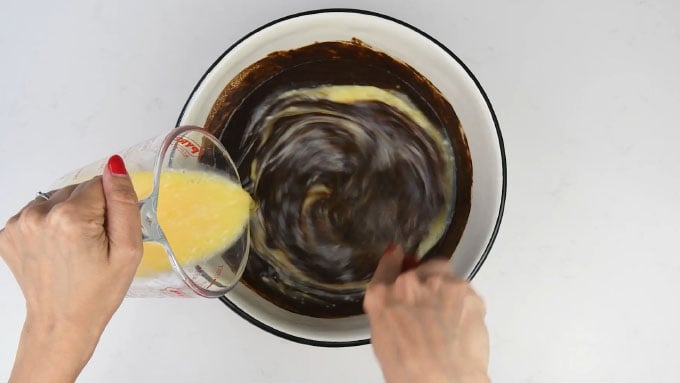
STEP 4. Combine the eggs and buttermilk in a measuring jug and briefly whisk together to combine. Add to the chocolate and whisk it in – the batter will thicken.
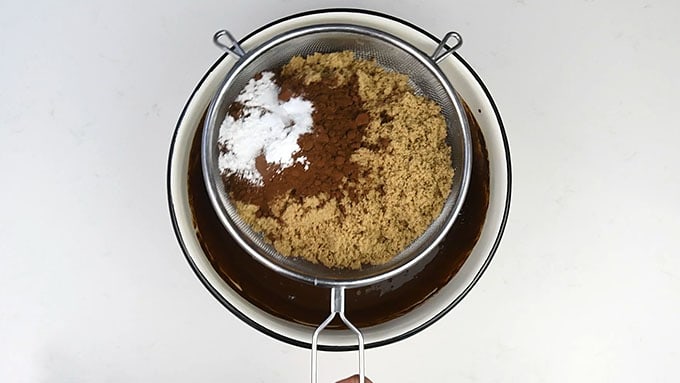
STEP 5. Combine all the dry ingredients and then sift them over the chocolate.
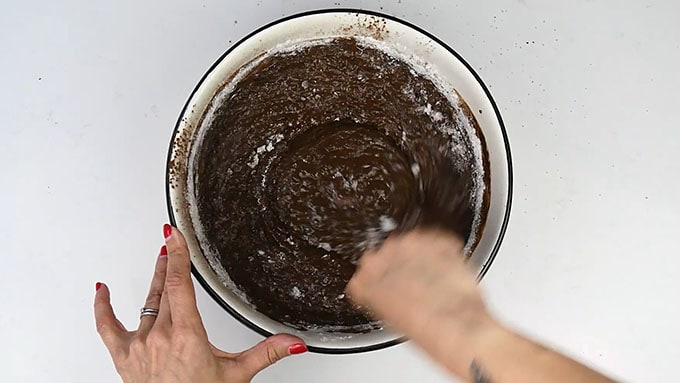
STEP 6. Use a hand whisk to mix the batter together until completely smooth.
STEP 7. Divide evenly between your prepared cake tins and bake for 20-25 minutes until the cakes are firm on top and a skewer inserted in the centre comes out clean.
STEP 8. Cool in the tins for 15 minutes and then carefully remove from the tins and cool on a wire rack. Be gentle as the cakes can be a little fragile.

Nutella cake tips
• It is advisable to pipe the filling rather than spread it since the layers can be a bit fragile.
• The cake layers can be prepared a couple of days in advance. Once the cake is filled it is best consumed on the same day as it contains fresh cream. It will however keep in the fridge for another day or two.
• Replace the Nutella filling with whipped ganache, American buttercream or Italian meringue buttercream especially if you need to prepare the cake in advance for an event.

Have you made my Nutella Cake? Post a photo on my Facebook page, share it on Instagram, or save it to Pinterest with the tag #supergoldenbakes. I can’t wait to see your take on it!
MORE RECIPES FOR CHOCOLATE LOVERS
- No-bake salted caramel chocolate tart
- Baileys chocolate ice cream
- Vegan chocolate gingerbread layer cake
- One-bowl chocolate cake

Ultimate Chocolate and Nutella Cake
Video
Ingredients
- Makes 3x20cm 8inch layers
- 200 g | 7oz 70% dark chocolate chopped, or chocolate buttons
- 200 g | 7oz unsalted butter cubed
- 125 ml | 4fl oz | 1/2 cup filter coffee or water
- 75 ml | 5tbsp buttermilk
- 3 large eggs
- 200 g | 7oz soft light brown sugar
- 100 g | 3.5oz caster sugar
- 100 g | 3.5oz plain flour
- 100 g | 3.5oz self-raising flour
- 25 g | 4 level tablespoons cocoa powder
- ¼ tsp bicarbonate of soda
Nutella whipped cream
- 250 g | 8.8oz Nutella or generic hazelnut spread
- 600 ml | 20 fl oz double cream heavy cream
- 1 tsp vanilla extract or paste
Chocolate fudge glaze/icing
- 200 g | 7oz 70% dark chocolate finely chopped
- 250 ml | 8.4fl oz | 1 cup double cream
- 60 ml | 2fl oz milk
- 3 tbsp golden syrup or honey
- 75 g | 5 tbsp unsalted butter cubed
Instructions
- Preheat the oven to 160C (325F). Grease and line three 20cm (8in) cake tins and dust with flour, shaking any excess.
- Place the chocolate and butter in a bowl and set over a pot of barely simmering water. Allow them to gradually melt and stir together until smooth.
- Add the coffee and use a hand whisk to mix it in.
- Combine the eggs and buttermilk in a measuring jug and briefly whisk together to combine. Add to the chocolate and whisk it in.
- Combine all the dry ingredients and then sift them over the chocolate. Use a hand whisk to mix the batter together until completely smooth.
- Divide evenly between your prepared cake tins and bake for 20-25 minutes until the cakes are firm on top and a skewer inserted in the centre comes out clean.
- Cool in the tins for 15 minutes and then carefully remove from the tins and cool on a wire rack. Be gentle as the cakes can be a little fragile.
- Make the filling: put the Nutella and vanilla to the bowl of your stand mixer. Whisk for 3-4 minutes on high speed and then use a spatula to scrape the bottom and sides of the bowl.
- Lower the speed and add the cream in a steady stream. Increase the speed to maximum and whip until you have firm peaks – be watchful as the cream will split if you overdo it.
- Transfer to a piping bag fitted with a round tip and pipe over the cake layers. Sandwich together and pop in the freezer (or fridge) for 10 minutes.
- Use a palette knife to add a crumb coating of the Nutella cream over the entire cake. Return to the freezer (or fridge) while you prepare your glaze.
- Make the glaze: put the cream, milk and golden syrup in a medium saucepan and bring to the boil over medium-low heat.
- Put the chopped chocolate in a bowl and as soon as the cream comes to the boil pour it over the chocolate and set aside for a couple of minutes.
- Use a small balloon whisk and stir very gently in the centre of the bowl using very small motions. Be patient and keep stirring very gently until the chocolate melts and turns into a glossy glaze.
- Add the butter and stir together until completely smooth. By now the glaze should be still warm enough to be runny but not so hot that it melts your crumb coating.
- Take your cake out of the freezer and then pour the glaze over it until it starts to drip down the sides. You can cover the entire cake or reserve some of the glaze for decoration. Let the glaze cool and set slightly before adding any decorations.
- If you have reserved some of the glaze leave it to cool completely (in the fridge) then transfer to your stand mixer and whisk until it forms firm peaks. Put in a piping bag fitted with a large star tip and pipe some rosettes on the cake (be careful if the glaze is still wet).
- Serve the cake at room temperature but keep in the fridge until 30 minutes before you are ready to serve.
Notes
• The cake layers can be prepared a couple of days in advance. Once the cake is filled it is best consumed on the same day as it contains fresh cream.
• Replace the Nutella filling with whipped ganache, American buttercream or Italian meringue buttercream especially if you need to prepare the cake in advance for an event.
Nutrition
Nutritional information is always approximate, and will depend on quality of ingredients and serving sizes.


Great recipe, I've shared!
O M G !!!
This is such a fabulous cake !! Every bite is like a peace of heaven 🙂
Definitely pinning it
Stunning!
Swoon… This is gorgeous!
well i'm convinced….or I would be if you came and delivered a slice to me! What an absolutely gorgeous cake. LOVE those layers and love how light the sponge looks. I am bookmarking this recipe for a rainy day!
This looks really good! Do you think if I made the cake the night before as is (with the nutella filling) and store it in the fridge, it will be okay to serve the next day?
Yes I think that would be fine. The glaze (if using) will lose some of the shine if it is stored in the fridge.
Make sure to bring back to room temp before serving otherwise it won't taste as good. Hope you like it!
Thanks! I'll make the glaze on the day of then 🙂 I can't wait to try this recipe out!
Hope it turns out well! You can definitely do the glaze the day before as well – it won't be as shiny but it will taste just as good.
This looks so delicious. I love the video and the photos! The portable hob is a great idea. I will definitely be looking into one of these.
Oh god cut me a slice now. This cake is amazing Lucy! Xx
I saw a portable hob the other day and seriously considered buying it just for photos (and maybe videos in future) but I wasn't sure if it was over the top. Now I know I wouldn't be the only one so I might have to reconsider!
This cake looks absolutely amazing. I'll have to add it to my long long list of things to try.
The hob I am reviewing is only £30 – and it really is very good value for money. I wouldn't want to have an induction hob for general cooking (still too attached to my gas stove) but it is perfect for food blogging stuff – I have even taken it on location.
Oh my god. This cake nearly had me in tears at how good it looks. I want it. NOW!
It tastes as good as it looks. Better, actually : )