
No-Knead Dutch Oven Bread (In Two Hours!)
, Updated Sep 26, 2025
This post may contain affiliate links. Please read our disclosure policy.

Discover the easiest way to bake artisan bread at home with this two-hour No-Knead Dutch Oven Bread. No stand mixer, no complicated folding, no fuss – in under 2 hours, you’ll have a golden, crusty loaf with a chewy interior that tastes just like bakery bread. Perfect for beginners and seasoned bakers alike!
Take a look at my Easy Wholemeal Bread Recipe

Fresh bread in two hours flat? Yes, it’s possible! This No-Knead Dutch Oven Bread recipe gives you a bakery-quality loaf with almost no effort. Forget complicated shaping, endless folding, or overnight rises — all you need are a few pantry staples, a bowl, and a Dutch oven.
The result is a golden, crisp crust and a tender, chewy crumb that looks like it came straight from an artisan bakery. Best of all, it’s perfect for beginners: no fancy equipment, no kneading, no stress. And better still, YOU baked it – bragging rights 😉

No Knead Bread Ingredients
- Flour – White bread flour or all-purpose flour (plain flour). You can also experiment using a mix of wholemeal and plain flour.
- Yeast – Dry active yeast or fast acting yeast (rapid rise yeast)
- Salt – moderates how fast the yeast produces gas, which is especially important since we’re using more yeast to speed up the process. It also contributes to crust color, chew and of course, final flavor.
- Lukewarm water – Helps activate the yeast and create a quick rise. Do not use hot water – it will kill the yeast!
- Honey or sugar – optional, I always add some for extra flavor.
- Olive oil or neutral oil for greasing the bowl.

How to Make No-Knead Dutch Oven Bread Step-by-Step
Make the dough
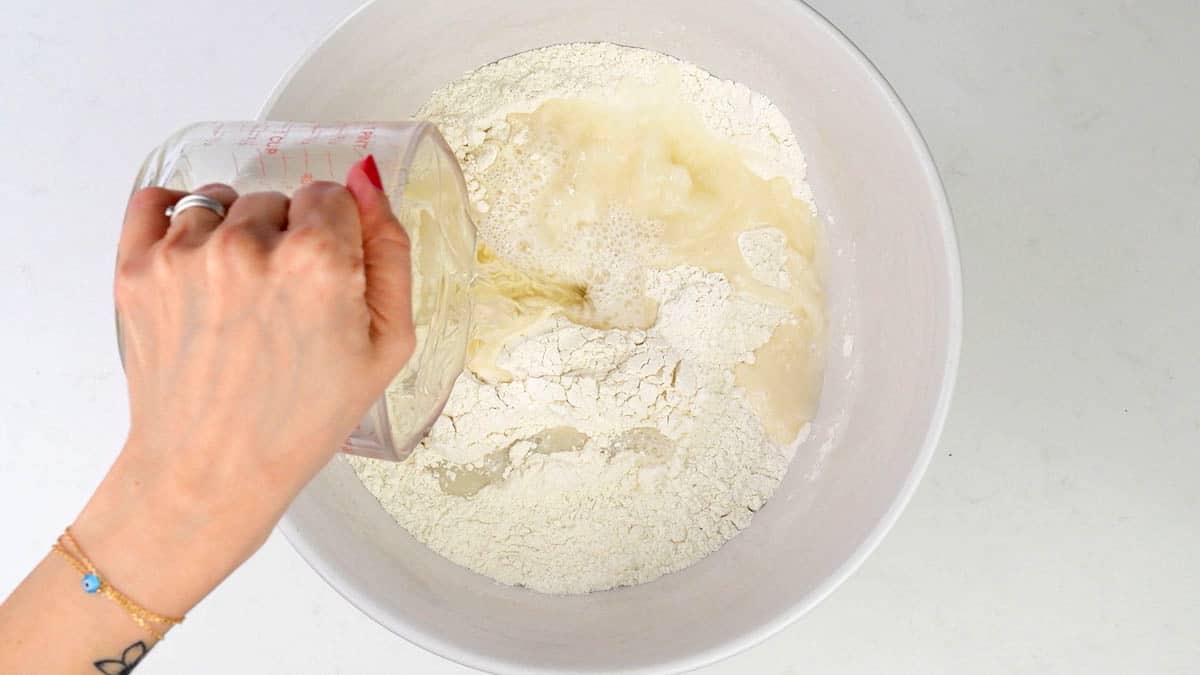
- Mix the honey with lukewarm water in a measuring jug, stirring to combine. Make sure the water is just tepid and not hot, otherwise it will kill the yeast.
- Combine the flour, instant yeast, and any herbs or seasonings in a large mixing bowl. Stir to combine.
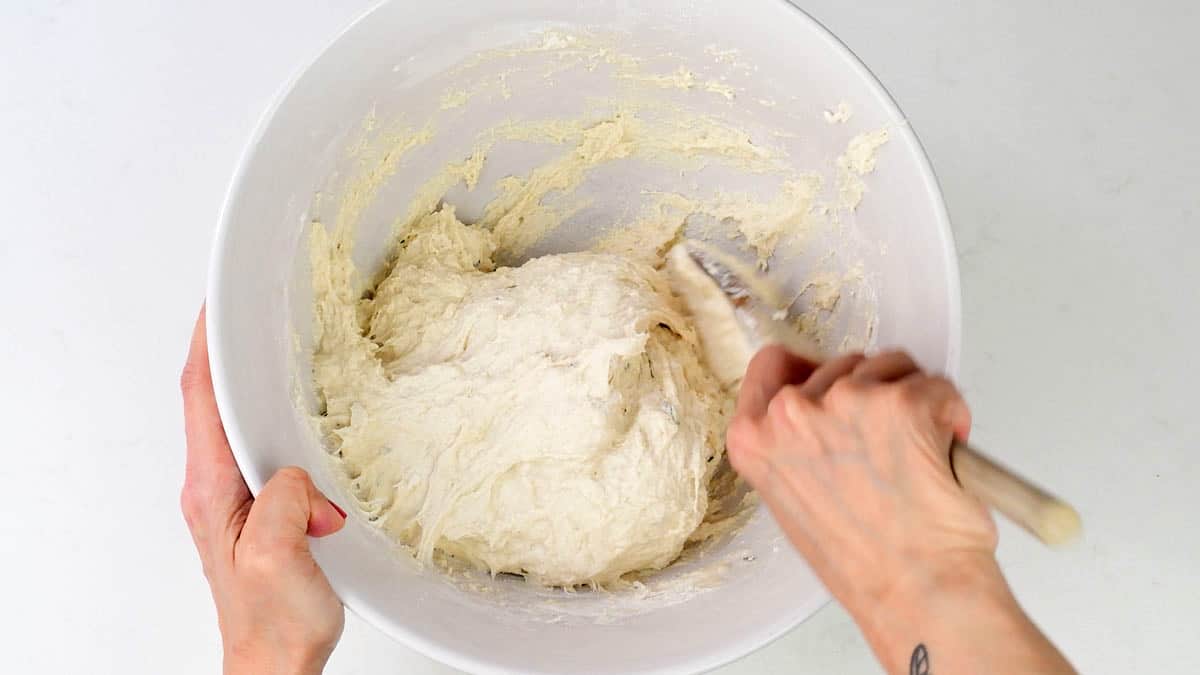
- Make a well in the center ingredients and pour the water in. Use a wooden spoon to stir together, making sure no dry pockets of flour remain. Mix in the salt, stirring once again until it is distributed in the dough. Sprinkle a little flour over the top.
- Cover the bowl with a clean towel and leave to dough to rise for 1 – 2 hours, or until almost doubled in size. The rising time will depend on how warm your kitchen is, you can speed it up by putting in a warm oven.
Shape and Second Rise
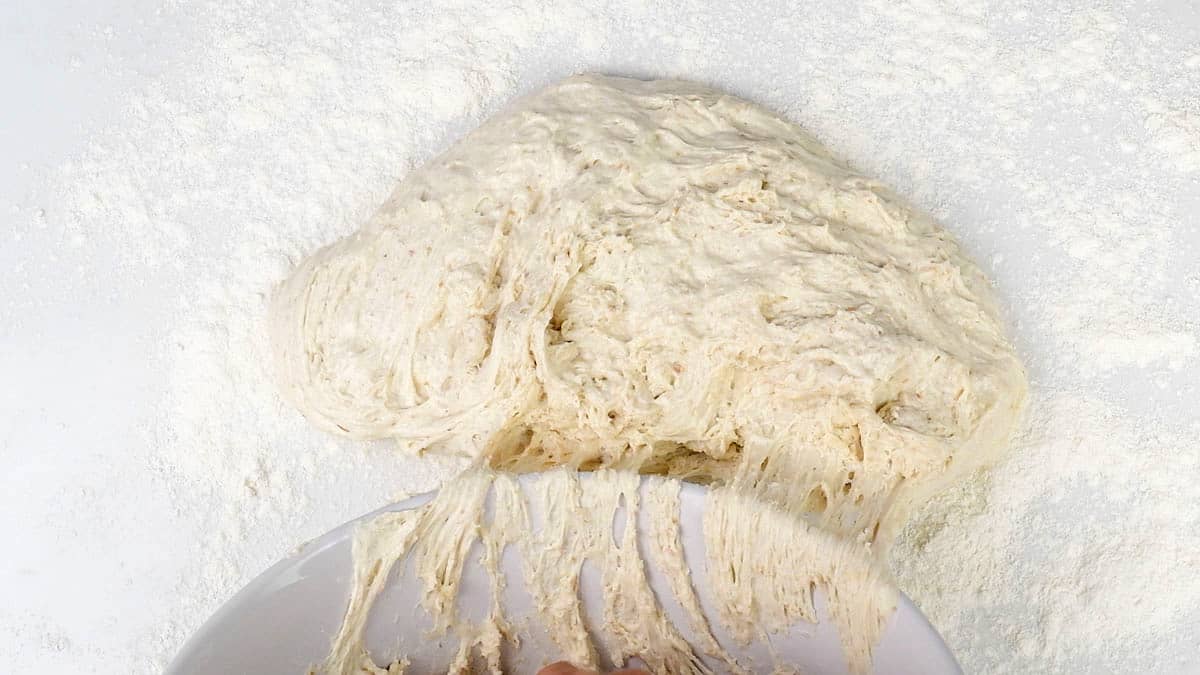
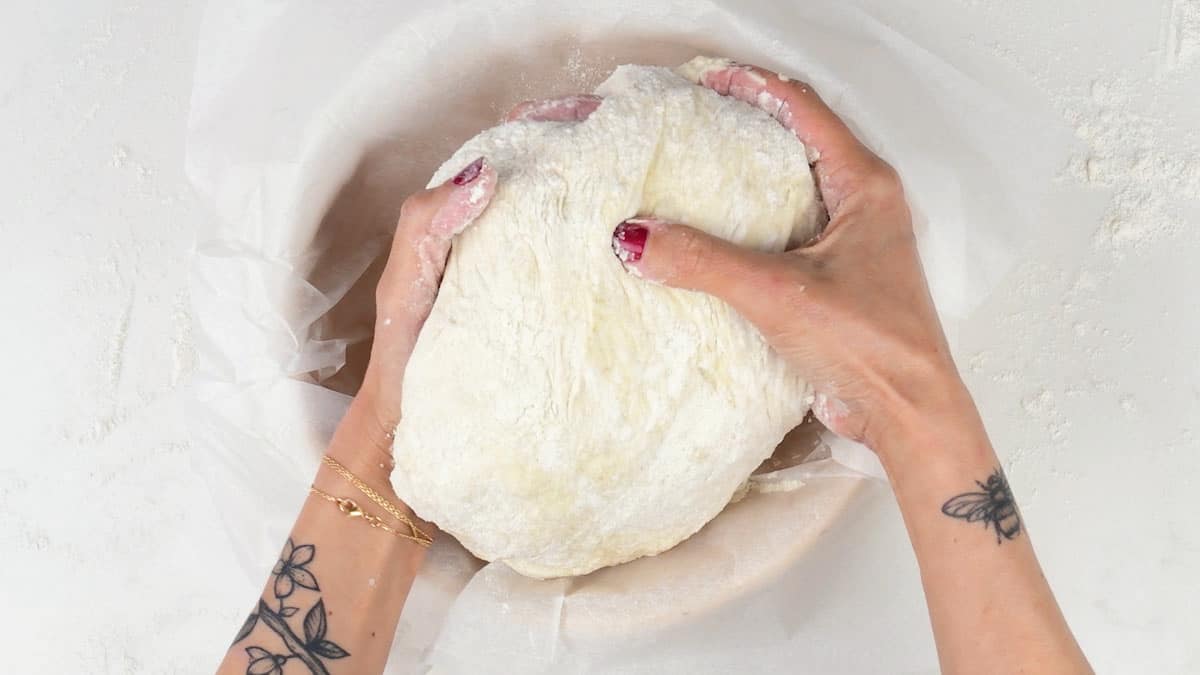
- Tip the dough out onto a well-floured worktop and sprinkle with a little more flour – the dough will be very sticky. Line a bowl or banneton basket with baking paper and dust with a little flour.
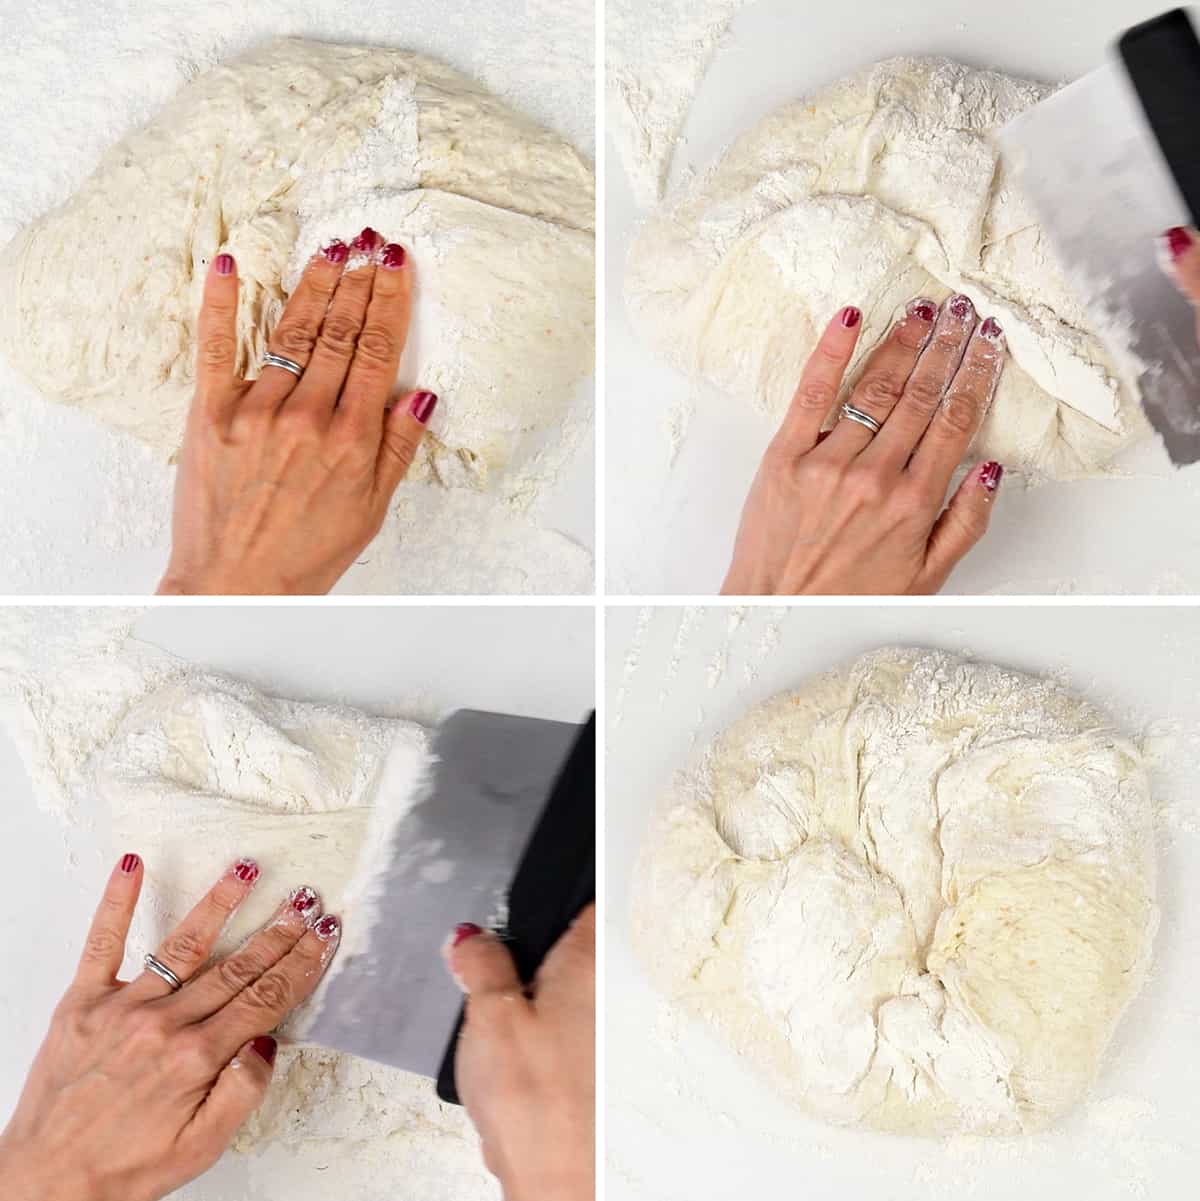
- Use a floured dough scraper to fold the edges over towards the middle to create a round loaf – the dough will be quite loose so don’t expect it to be perfect.
- Cup the loaf into your hands and carefully transfer the loaf into the prepared bowl seam side down. Loosely cover with a plastic bag and leave to rise for 30 minutes while the oven is heating up.
Bake in a Dutch Oven
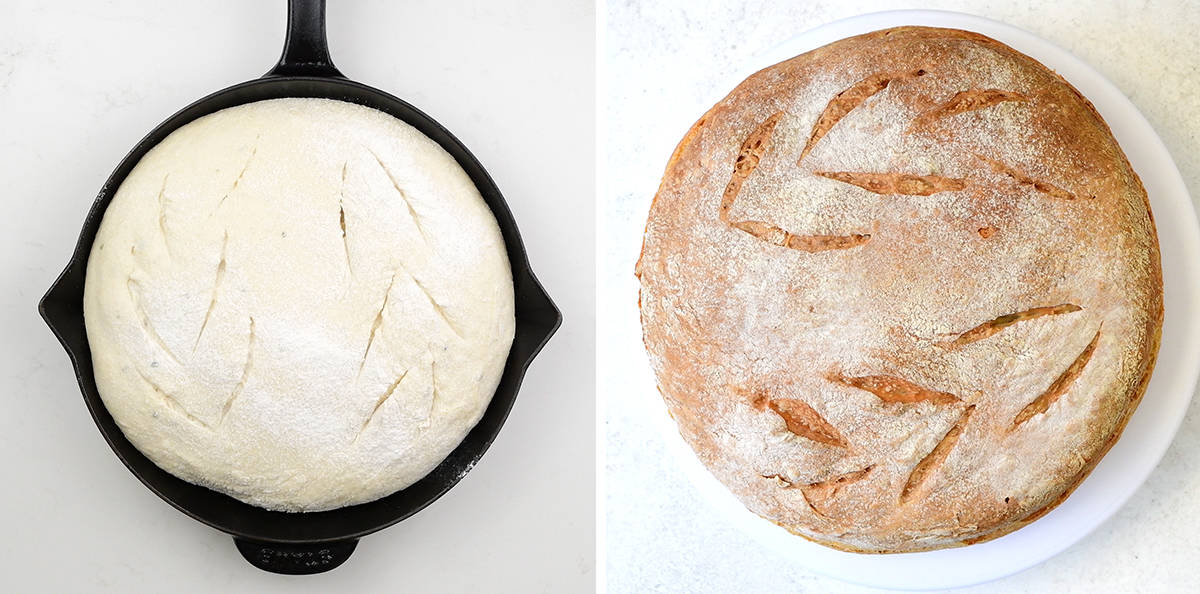
- Preheat the oven to 220C (420F) and place a 24cm (4L/4.25 Quart) Dutch Oven on low shelf to preheat for 30 minutes while the bread is having its second rise.
- Score the loaf using a sharp knife or a dough scoring lame or sharp knife (this helps the bread to rise so don’t skip it).
- Carefully remove the pot from the oven (it will be very hot so use oven mitts or pot holders). Lift the bread out of the bowl using the baking paper and drop gently into the pot (or better yet, invest in a silicone bread sling).
- Cover and bake for 30 minutes – the bread will have risen but is not baked all the way through yet.
- Uncover and bake for a further 10 minutes. Remove from the pot and bake directly on the oven shelf for 5-7 minutes until golden and crusty. The bread is ready when you hear a hollow sound when you tap the underside.

No Knead Bread Without Dutch Oven
A Dutch oven is best for steam, but you can use a heavy oven-safe pot with lid. Alternatively, bake in a cast iron skille. The bread will have a slightly different shape, a bit more spread out, but will still taste just as delicious!
- Prepare the dough as per instructions up to the first rise. Oil your cast iron skillet and sprinkle with a little semolina. Shape the loaf and transfer into the skillet for the second rise (30 minutes) while you preheat the oven.
- Slice the loaf. Place a roasting tray on the lowest oven shelf and the skillet on a shelf above it. Throw a handful of ice cubes into the roasting tin you placed on bottom shelf. Place the skillet on shelf above. The steam created by the melting ice cubes will help your bread to rise. I found that the bread baked quicker in a skillet, needing 30-40 minutes overall.
Storing and Freezing Instructions
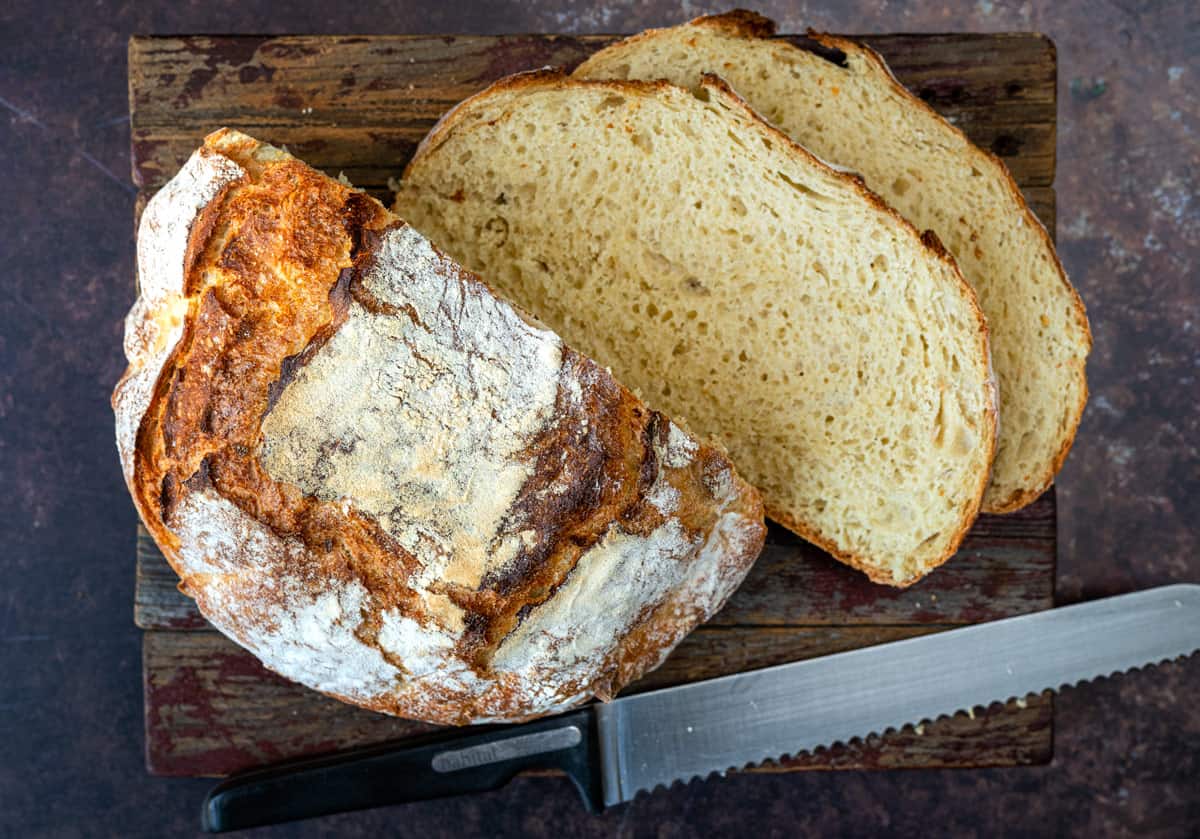
The bread will have a wonderfully crisp crust when fresh out of the oven. Leave the bread to cool on a wire rack, uncovered, at room temperature for at least 30 minutes (don’t leave it in the Dutch Oven).
Once the bread has cooled down, it will need to be stored in a paper bag or linen bread bag. It will lose some of its crispness but can be refreshed if placed in a hot oven or the air fryer for a few minutes.
The best way to store this bread is to slice it and freeze it as soon as it is cool enough. Place in freezer bags and use within 3 months. Toast the bread slices straight from the freezer and you will have wonderfully fresh bread!
Recipe Notes and Troubleshooting
- What’s makes No-Knead Bread so great? Traditional bread recipes require kneading the dough by hand or in a mixer to develop the gluten. No-knead bread skips all that by using more yeast and water (it’s a higher hydration dough) encouraging gluten strands to form naturally as it rises.
- Why You Shouldn’t Slice Bread While It’s Still Warm! I know, I know, the intoxicating scent of fresh-baked bread is torture. But be strong and resist slicing for at least 20–30 minutes after baking. Cutting into bread straight from the oven can ruin the texture as inside it is still full of steam – slice too soon and you’ll end up with a gummy, squashed loaf. Leaving bread to cool allows flavors to develop and makes it much easier to slice cleanly.

Customizing No-Knead Bread
Consider adding herbs such chopped rosemary is a favorite) spices, seeds, nuts or dried fruit to your bread. Experiment by folding in grated cheese, olives or sun-dried tomatoes for a delicious twist – the bread might have a slightly different crust but it will be delicious!

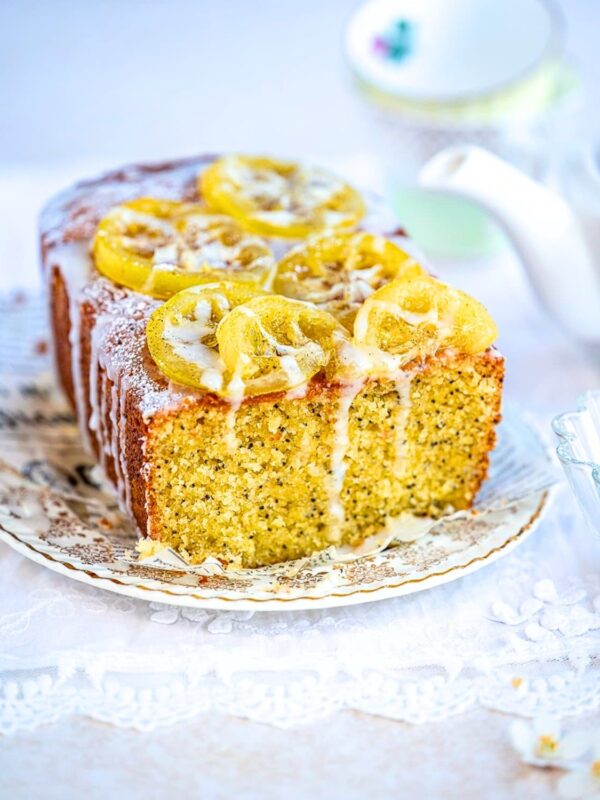
You can also variations using added ingredients such as pumpkin purée – try my No Knead Pumpkin Bread (pictured above). Use your sourdough discard in this no knead Quick Sourdough With Yeast recipe.
Dry Active Yeast vs Instant Yeast
You can use either type of yeast in this recipe but the method is slightly different. Always make sure the yeast is within date before using – an old pack that’s been gathering dust for years won’t cut it!
- INSTANT YEAST (a.k.a rapid rise, fast action) – Doesn’t require activation and is mixed directly in with the flour and other dry ingredients. Instant yeast is suitable for use in bread machines.
- DRY ACTIVE YEAST Requires activation, you need to mix it with water and leave it to get bubbly before using in your recipe.
This No Knead Bread Recipe proves that homemade bread doesn’t have to be complicated or time-consuming. Please leave a comment and rating if you try this recipe, follow me on Pinterest for more easy recipes and don’t forget to tag me on @Instagram or TikTok so I can see your creations.

No-knead Dutch Oven Bread
Video
Equipment
Ingredients
- 4 ½ cups (570g) white bread or all purpose flour plus extra for dusting and worktop
- 2 tsp instant yeast (rapid rise yeast) see notes if using dry active yeast
- 2 cups (500ml) lukewarm water
- 1 tbsp runny honey or sugar
- ½ tbsp salt sea salt or Kosher salt
- olive oil as needed, for greasing
Instructions
- Mix the flour and instant yeast together in a large bowl.4 ½ cups (570g) white bread or all purpose flour, 2 tsp instant yeast (rapid rise yeast)
- Add the water and honey and mix together with a wooden spoon or dough whisk until you have a shaggy, very sticky dough. Add the salt and mix it in to distribute into the dough.2 cups (500ml) lukewarm water, 1 tbsp runny honey, ½ tbsp salt
- Transfer to a bowl or pyrex dish greased with a little olive oil. Cover with a damp tea towel and leave to rise for 1 ½-2 hours, or until almost doubled in size.olive oil
- Dust your worktop with flour. Tip the dough on it and sprinkle with a little flour – it will be sticky (that's how it should be). Line a bowl or banetton basket with baking paper and dust with flour.
- Use a pastry scraper to fold the edges over towards the centre to create a round loaf.
- Carefully cup the loaf in your hands and transfer into the prepared bowl seam side down. Loosely cover with a plastic bag.
- Preheat the oven to 420F (220°C) and place a Dutch Oven on low shelf to preheat for 30 minutes while the bread is having its second rise.
- Score the top of the loaf using a sharp knife or lame. Carefully remove the pot from the oven (it will be very hot so use oven mitts or pot holders).
- Lift the bread out of the bowl using the baking paper and drop into the pot. Cover and bake for 30 minutes.
- Take the lid off. bake for 10 more minutes then take out of the Dutch Oven and bake directly on the oven shelf for 5 minutes for extra crisp crust. Leave the bread to cool on a wire rack for 30 minutes before slicing.
Notes
- USING DRY ACTIVE YEAST Combine 1/4 cup (60g) of the water specified in the ingredients and the honey in a measuring jug. Add the yeast, stir together and leave for 5-10 minutes until bubbly (if the yeast doesn’t bubble up it might not be active any more!). Stir the flour, salt and rosemary in a large mixing bowl, add the remaining water and then the activated yeast. Mix well until a sticky dough forms and proceed with method.
- NO DUTCH OVEN? You can use a cast iron skillet to bake the bread instead of a Dutch oven. The bread will have a slightly different shape, a bit more spread out, but will still taste just as delicious!
- Prepare the dough as per instructions up to the first rise. Oil your cast iron skillet and sprinkle with a little semolina. Shape the loaf and transfer into the skillet for the second rise (30 minutes) while you preheat the oven.
- Slice the loaf. Place a roasting tray on the lowest oven shelf and the skillet on a shelf above it. Throw a handful of ice cubes into the roasting tin you placed on bottom shelf. Place the skillet on shelf above. The steam created by the melting ice cubes will help your bread to rise. I found that the bread baked quicker in a skillet, needing 30-40 minutes overall.
Nutrition
Nutritional information is always approximate, and will depend on quality of ingredients and serving sizes.


easier to pour dough onto floured parchment paper for shaping and 2nd rise, then pick up parchment with the dough and place directly into the hot pot
..for clarity you mean score the top of dough not slice as this means something else.
although I have never scored the top and it comes out just fine.
also I put salt to stir with dry flour, tastes perfect.
I have played with adding different flour mixes and wheat germ etc. and add oats the the top after 2nd rise. It seems nothing can hurt this recipe. It is always good.
Made this for a friend, there were 5 people and it was gone before I could could a picture. I have made a couple of no knead bread that took 18 hours or more this was so much easier and absolutely delicious. Will definitely make it my to go to bread. Oh yes I brushed it with olive oil and sprinkled everything bagel seasoning on it, so good.
Mmm the seasoning sounds like a fab addition!!
I love this recipe and it came out just as the picture described. I”m not a super talented bread maker, and this one was easy to follow and was crusty on the outside, soft on the inside. The cast iron pot really helped with the browning which I often find hard to create without drying out the bread. Thank you so much! I will try some of your other recipes, too.
This is such a great bread recipe! So easy and quick to make but with plenty of yeasty flavor!
hi, I made this with cranberries and wallnuts the bread was fine but the baking paper was completly stuck to the bread. Any ideas as of what may have happened?
thank you
Hmm sounds like the paper is not suitable for baking, best grease it next time.
If one wanted to knead the bread, would that be fine?
Hi Danielle, no this is a very wet dough it is not suitable for kneading.
okay! thank you. i love the recipe. i’ve gotten many friends and family making it!
Glad to hear that! xxxx
Can you add nuts and cranberries to this and have the same results?
Yes I think that would work just fine
Can I use another type of pan? I don’t have either one you mentioned in the recipe.
You can use any lidded pot that is suitable for use in the oven. You can also use a skillet, although the bread will spread out a bit more.
I have never Been able to make bread ever. I made cinnamon rolls once, every since the first time they have failed. I’m making this bread again today for the third time. Its great, perfect every time! Love this recipe!
Thanks,
Jill
So glad Jill! It’s so easy isn’t it?!
Wow! Made this tonight with an Italian Sausage and Kale soup. Amazing! The bread was easy to make. It was crunchy on the outside and soft and chewy on the inside. I used a cast iron Dutch oven. I did not put in the rosemary. Everyone in my family loved it and we ate the whole loaf!
Hi Carrie – I am so so glad you enjoyed it! I love making this bread, so easy. Thanks for your lovely comment 🙂