
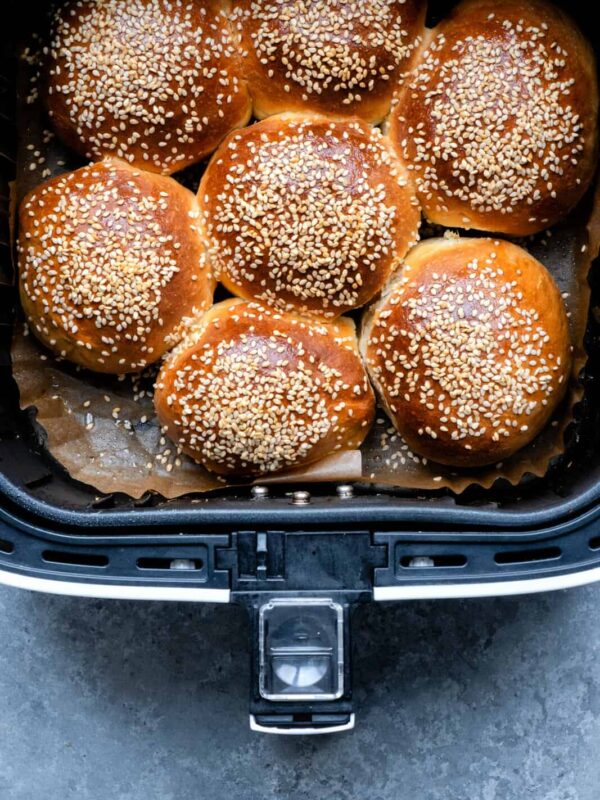
Easy Air Fryer Bread
, Updated Jul 07, 2025
This post may contain affiliate links. Please read our disclosure policy.
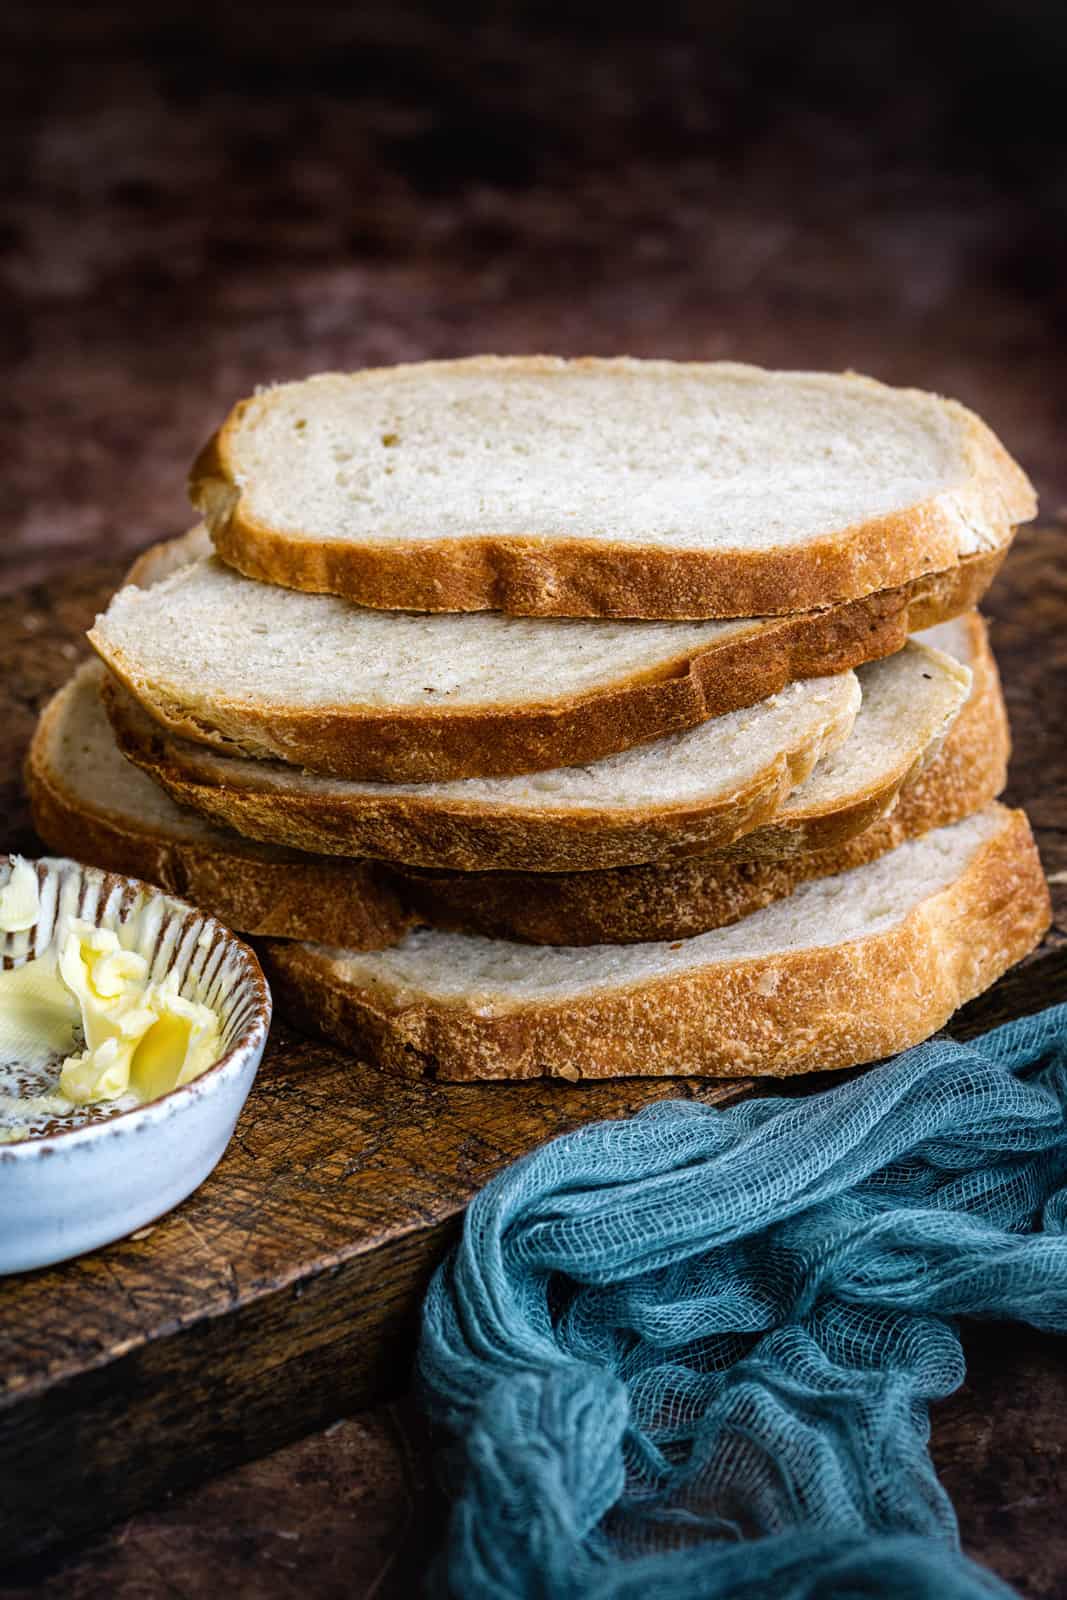
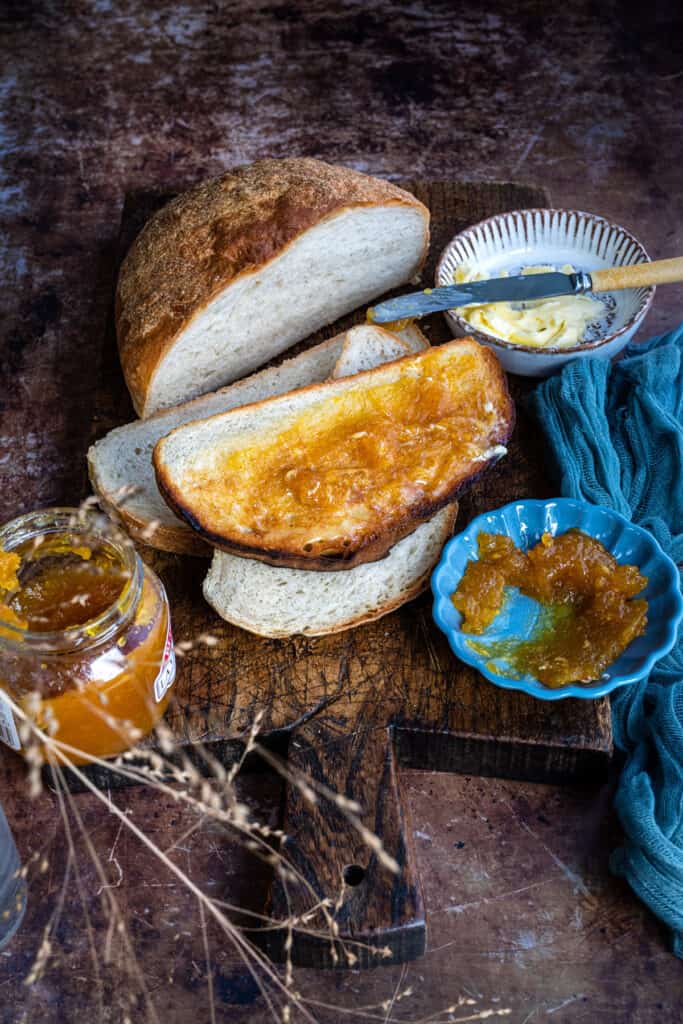
Making Air Fryer Bread is super simple, no kneading needed, and it tastes amazing! Check out my easy no-knead air fryer bread recipe to whip up some fluffy bread with a nice golden crust and soft inside. It’s perfect for toast or sandwiches!
Want to bake Sourdough Bread in your air fryer? Check out my recipe!
Air fryers are easy to use, take up little space and are much cheaper to run than the oven. No wonder they are flying off the shelves and no surprise that more and more people are looking for air frying recipes.
I’ve been using my air fryer every day to make roast beef, cook chicken, bake cakes, and recently, I’ve started making bread. And guess what? You CAN bake bread in an air fryer! It’s super easy, and it can help you save on your energy bills too. So, what are you waiting for?


Air Fryer Bread Ingredients
Like any bread recipe, you’ll need just four essential ingredients: flour, yeast, salt, and water. To boost the flavor, I’ve included a bit of sugar and some melted butter. You’ll also need a deep cake pan that fits comfortably in your air fryer, like a cake barrel or a 7-inch cake tin for this. Let’s break down the key ingredients:
- FLOUR: To begin with, you’ll need some bread flour as the primary ingredient for your dough, which gives the bread its structure and chewy texture. If you don’t have bread flour on hand, you can use all-purpose flour (plain flour), but keep in mind that the texture will be slightly different.
- YEAST: I always use fast action, a.k.a rapid rise yeast, which is a type of yeast that allows for quicker rising times and does not need to be activated in advance. You simply stir the yeast granules in the flour and other dry ingredients.
- SALT: Don’t forget to add salt to your mixture, as it plays a critical role in enhancing the overall flavor of the bread. Salt also helps to strengthen the dough and slows down the fermentation process.
- WATER: Adding water to the dry ingredients activates the yeast and forms our bread dough. Make sure the water is not too hot as it will kill the yeast – tepid is best.
- SUGAR OR HONEY: Adding a little sweetness enhances the flavor of the bread and helps to create a beautiful golden crust. This is entirely optional however so feel free to leave out!
- BUTTER: A little melted butter add richness and flavor to your dough and helps create a tender crumb.
How to make Air Fryer Bread
Full measurements and instructions can be found on the printable recipe card at the bottom of the page. Please take a look at the steps and video before attempting this recipe!
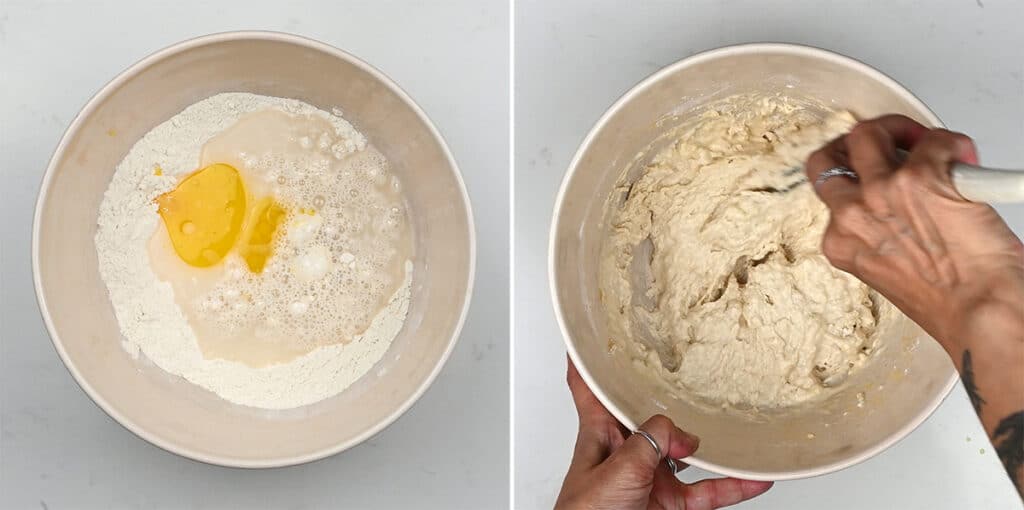
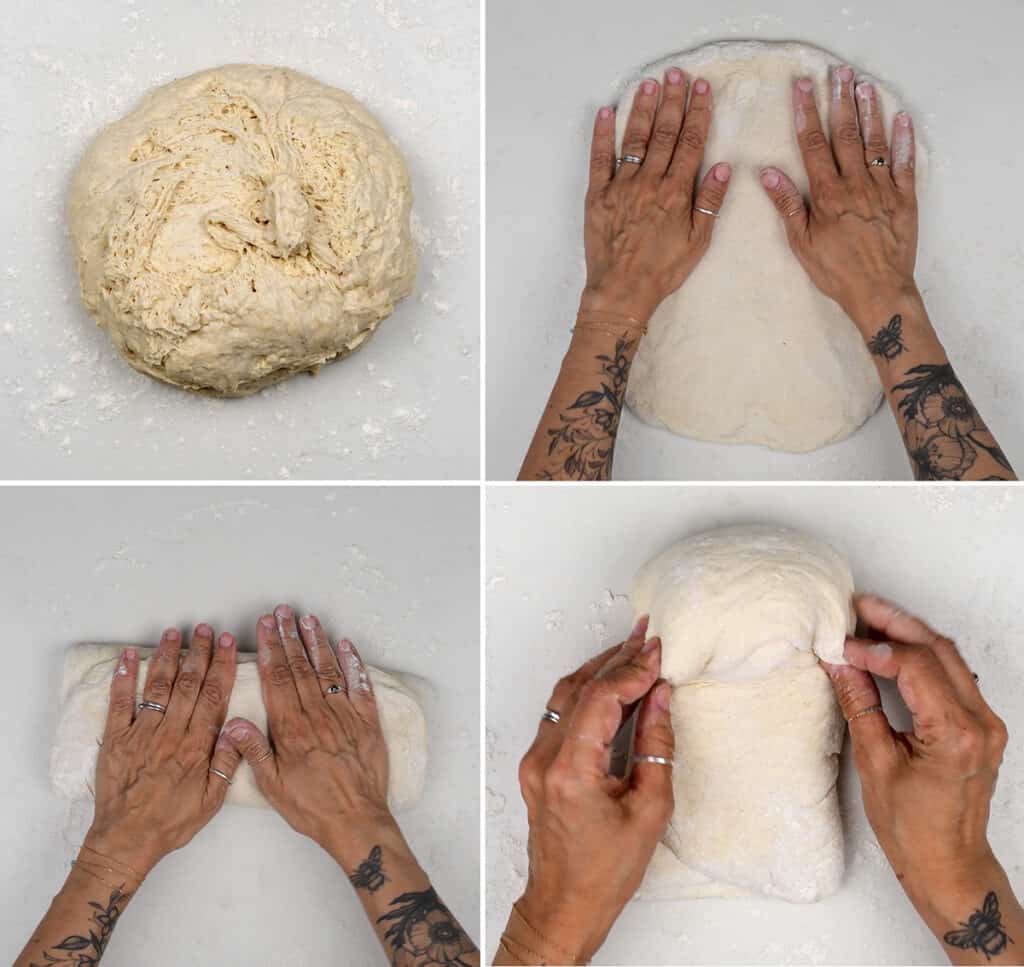
- Measure the flour, sugar, salt and yeast into a mixing bowl and stir to combine. Add the water and melted butter and mix together with a spoon or a dough hook until there are no dry streaks of flour. You will have a shaggy, sticky dough.
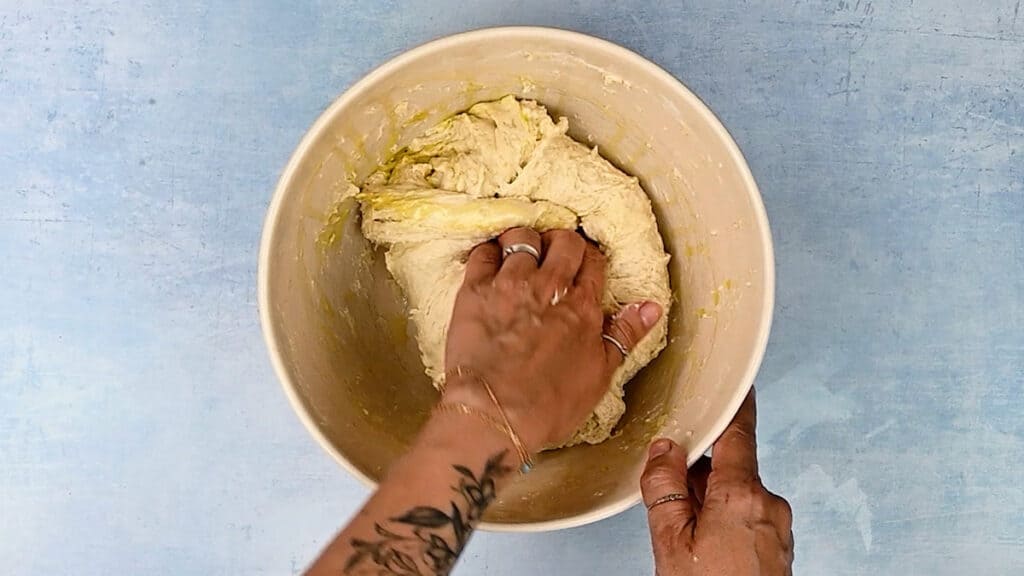
- You don’t need to knead this dough, but if you’ve got a bit of time, you can do a few “stretch and folds” after letting it rest for 15 minutes. Just grease your hands with a little oil and stretch one corner of the dough from the bottom over to the center. Turn the bowl and do this a few times.
First Rise
- Cover the bowl with a clean towel. Place it in a warm spot to rise for an hour. I often put the bread in the turned-off microwave or oven to prove.
Shape the bread
- Tip the dough onto a lightly floured worktop. Gently stretch the dough to a rectangular shape. Fold the top towards the middle then the bottom over that, as you would fold a letter to place in an envelope.
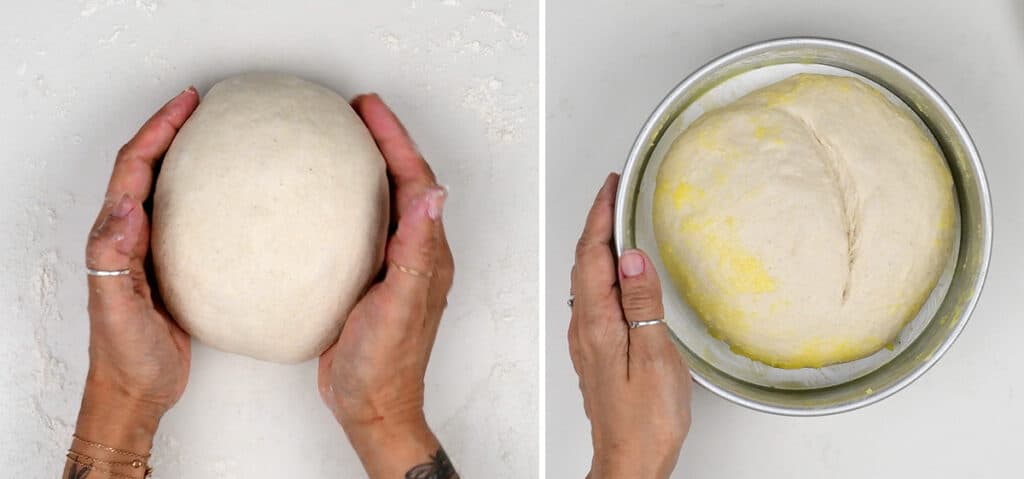
- Turn sideways and fold into a roll. Use your hands to shape the bread into a ball shape (also known as a “boule”) dusting with flour as needed.
Second Rise
- Transfer the shaped loaf into a greased cake barrel or pan, loosely cover with plastic wrap, and let it rise for about half an hour. While that’s happening, go ahead and preheat your Air Fryer to 400°F (200°C) for five minutes. Give the top of the bread a little score with a knife and brush the sides with some melted butter so it doesn’t stick.
Bake in the Air Fryer
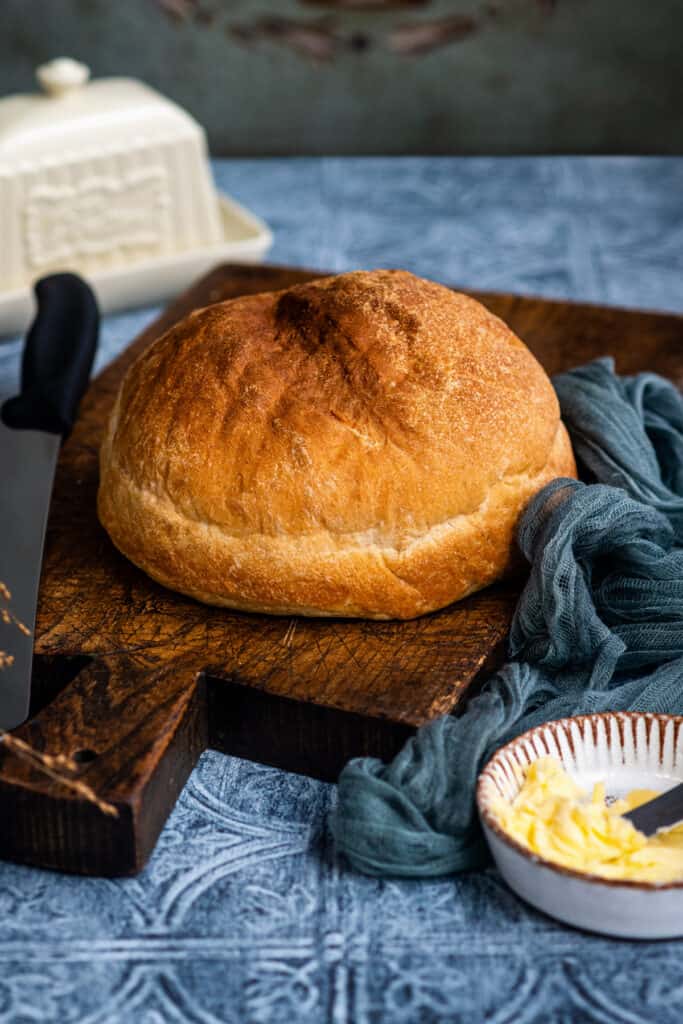
- Put the pan in your air fryer. Cook it for 15 minutes at 400°F (200°C). Then, lower the heat to 350°F (180°C) and bake for another 30 minutes.
- Carefully take the pan out of the air fryer using pot holders. Remove the bread from the pan. Place the loaf back in the air fryer bottom side up. Cook it for an extra 5-10 minutes to bake the bottom evenly. Let it cool on a wire rack before slicing with a bread knife.
Air Fryer Bread Tips
- Adjust for your air fryer model – Air fryers can differ greatly in wattage and size. These differences will affect how the bread bakes. You may need to adjust the time or temperature to suit your air fryer model.
- Avoid a soggy bottom! Another challenge with air fryer bread is that the bottom can often remain somewhat doughy, even though the top is beautifully baked. To solve this problem, remove the bread from the pan and cook it directly in the air fryer basket for a few extra minutes.
- How can I tell my Bread is Baked? Tap on the bottom of the bread and if you hear a hollow sounds then the bread should be cooked all the way through. Alternatively use an instant read digital thermometer to check if the internal temperature at the core is about 200°F (over 95°C).
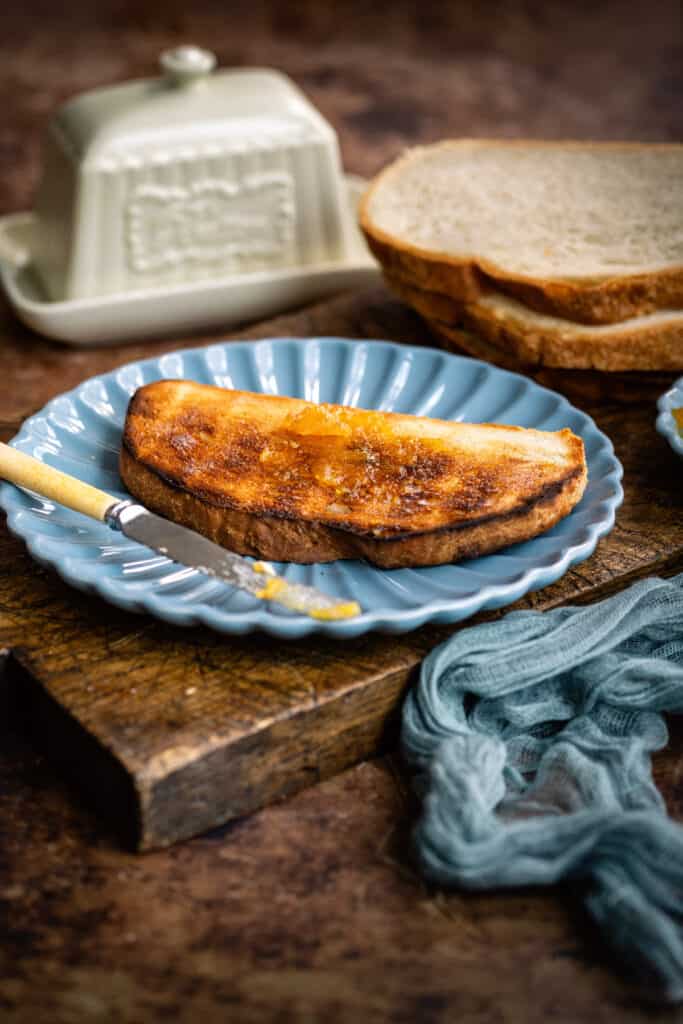
- Storing Air Fryer Bread The best way to store bread is to slice it and freeze it. You can then toast slices from frozen as and when you need them. The bread can also be placed in a bread bag or wrapped in a linen towel for up to three days.
New to Air Fryer Baking? Try these recipes!


I hope this Air Fryer Bread becomes your go-to loaf—it’s crunchy, fluffy, and simple enough for everyday baking. Please leave a rating and a comment—I love celebrating your baking wins! Share your creations on Instagram @supergolden88 or TikTok @supergoldenbakes—can’t wait to see your easy air fryer bakes!

Air Fryer Bread
Video
Equipment
Ingredients
- 3 cups (360g) white bread flour or see notes
- 1 tbsp sugar
- 2 tsp salt
- 2 ¼ tsp rapid rise yeast (one packet)
- 1 cup (240ml) water , lukewarm
- 2 tbsp melted butter , plus extra for greasing
Instructions
- Measure the flour, sugar, salt and yeast into a mixing bowl. Stir to combine the dry ingredients.3 cups (360g) white bread flour, 2 ¼ tsp rapid rise yeast, 1 tbsp sugar, 2 tsp salt
- Pour in the water and melted butter. Mix together with a spoon or a dough hook until there are no dry streaks of flour and you have a shaggy, sticky dough.1 cup (240ml) water, 2 tbsp melted butter
- You do not have to knead this dough but you can, if you have time, do a couple of “stretch and folds”. Grease your hands with a little oil and stretch one corner of the bread from the underside over to the middle. Turn the bowl and repeat this action a few times.
- Cover with a clean towel and place someplace warm to rise for an hour.
- Tip the dough onto a lightly floured worktop. Gently stretch the dough to a rectangular shape. Fold the top towards the middle then the bottom over that, as you would fold a letter to place in an envelope.
- Turn sideways and fold into a roll. Use your hands to shape the bread into a ball shape (also known as a “boule”) dusting with flour as needed.
- Place it in a greased 7 inch cake pan, cover and leave to rise for half an hour.
- Preheat the Air Fryer to 400°F (200°C) for five minutes. Score the top of the bread with a knife and brush the sides with a little melted butter so it doesn’t stick.
- Place the pan in your air fryer and cook for 15 minutes at 400°F (200°C). Lower the heat to 350°F (180°C) and continue to cook for 25 minutes.
- Remove the pan from the air fryer (using pot holders) and take the bread out. Place the bread back in the air fryer to cook for a further 5 minutes to allow for the bottom of the bread to bake evenly.
- Check the bread is done by tapping the underside – it should sound hollow. If the bread still feels doughy, continue to air fry for a few more minutes (Air Fryers can vary from brand to brand so keep that in mind).
- Cool on a wire rack before slicing.
Notes
- HOW CAN I TELL IF THE BREAD IS BAKED? Tap on the bottom of the bread and if you hear a hollow sounds then the bread should be cooked all the way through. You can also use an instant-read digital thermometer. Check if the internal temperature in the center is about 200°F (over 95°C).
- AVOID A SOGGY BOTTOM! Once challenge about air fryer bread is that the bottom tends to be a bit doughy while the top looks perfectly baked. Flipping the bread over or cooking directly in the air fryer basket for a few minutes gets around this issue.
- STORING YOUR BREAD The best way to store bread is to slice it and freeze it. You can then toast slices from frozen as and when you need them. The bread can also be placed in a bread bag or wrapped in a linen towel for up to three days.
- USING ALL-PURPOSE FLOUR You can use all-purpose flour (plain flour) if you need to. 3 cups is 385g.
Nutrition
Nutritional information is always approximate, and will depend on quality of ingredients and serving sizes.


Wow, I was absolutely blown away by the result of this recipe! I had tried another air fryer bread recipe before and wasn’t impressed, as it had too little liquid for the amount of flour, which resulted in a dry, gummy bread.
This recipe, however, turned out perfectly. I’ll definitely be using it many times over. Thank you so much for sharing it!
You’re very welcome Tania, thanks very much!
The recipe seems very easy but I am a little confused with the cooking time of 2 hours 25 Minutes and the total time of 4 hrs 5 min.
Hi Marilyn – the total time includes prep (10 minutes), proving (1 hour and 30 minutes) and cooking time (2 hours and 25 minutes). Hope that makes sense! Thx very much for the comment.
Can I use gluten free flour ?
I am afraid I haven’t tested it. If you have a recipe you trust, you can certainly try it in the air fryer. No reason it shouldn’t work – just make sure there’s space for the bread to rise
hi dear
i would like to add sesame seed or flaxseed or almond when should add itthanks
If you are adding almonds in the dough you can fold them in after mixing the ingredients together. Flaxseed may affect the bread texture as it absorbs a lot of water and swells up so I would not recommend. You can brush the bread with a little milk and sprinkle on the sesame seeds just before baking.
Looka really cool.
Can I substitute the flour for something else? E.g gluten free flour or other types of flour? If so, how much more or less flour can I use?
I’m gluten and wheat intolerance
I can’t say for sure as I have not tested this recipe with GF flour. If you have a recipe you use normally, you can probably adapt it for the air fryer. Let me know if you need help with that.
dead easy
Soft fluffy bread that tastes superb, I made mine slightly healthier by addind some seeds to the dough. this is now my go to recipe.
So glad to hear it!
I like this receipe seems easy to follow.thank you.