
Best Homemade Apple Pie From Scratch
, Updated Sep 10, 2021
This post may contain affiliate links. Please read our disclosure policy.

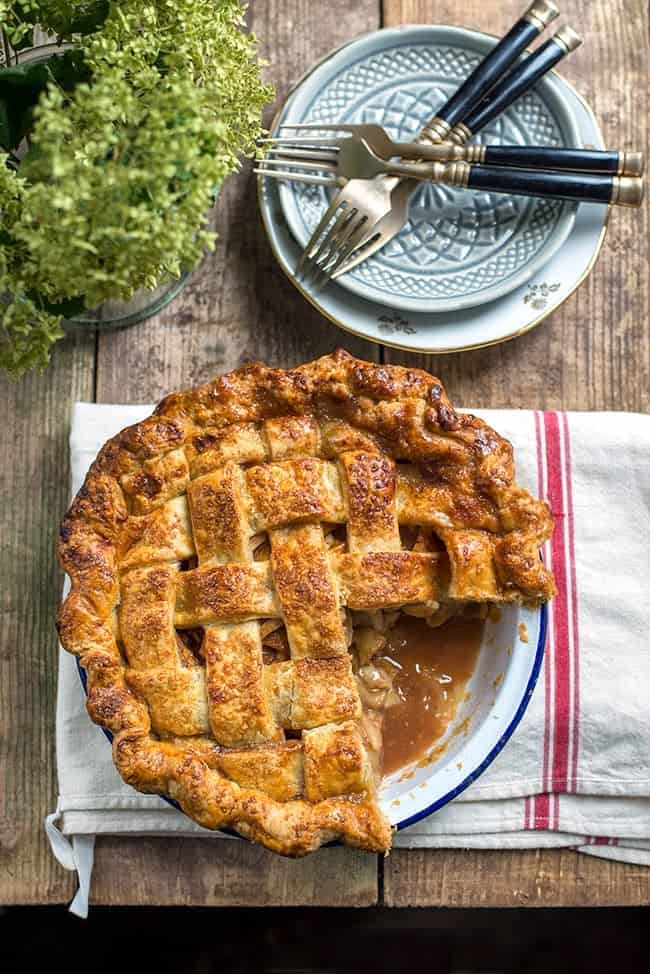
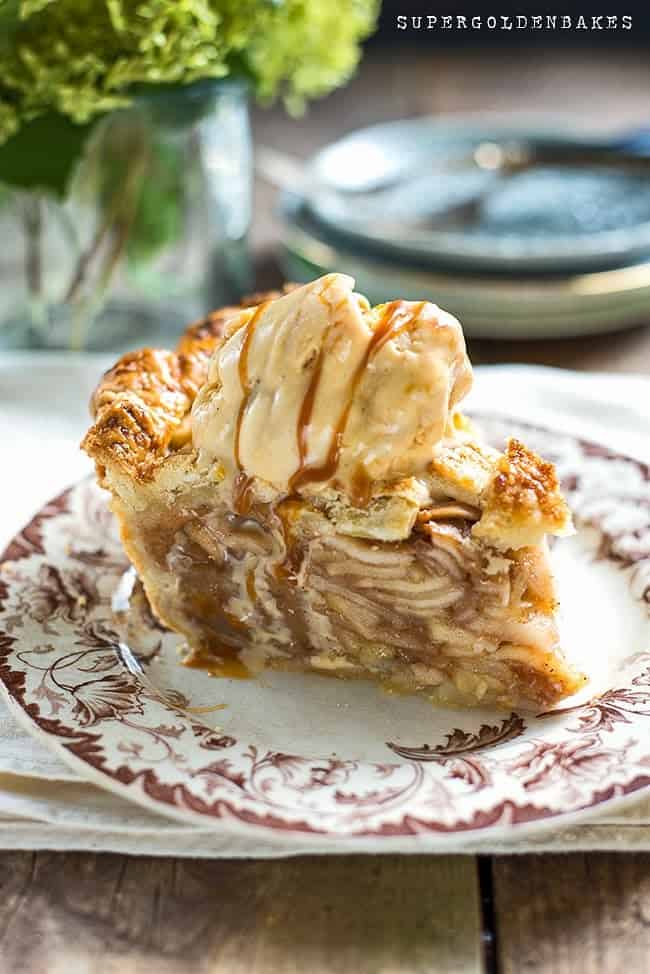
Simply the Best Homemade Apple Pie From Scratch! American style ‘mile high’ apple pie with crisp and buttery pie crust. Delicious served with vanilla ice cream!
Who doesn’t LOVE homemade apple pie! The crisp pie crust yielding to the sweet fragrant apple filling… My mouth is watering typing this! I have updated my 2014 recipe to include more detailed instructions.
Post may contain affiliate links. For more information, check my disclosure

Making apple pie from scratch is a bit of a project but the results are amazing! The apples are sliced thinly, mixed with lemon, then left to render some of their juices. That way there are a little softer and less likely to cause the dreaded soggy bottom.
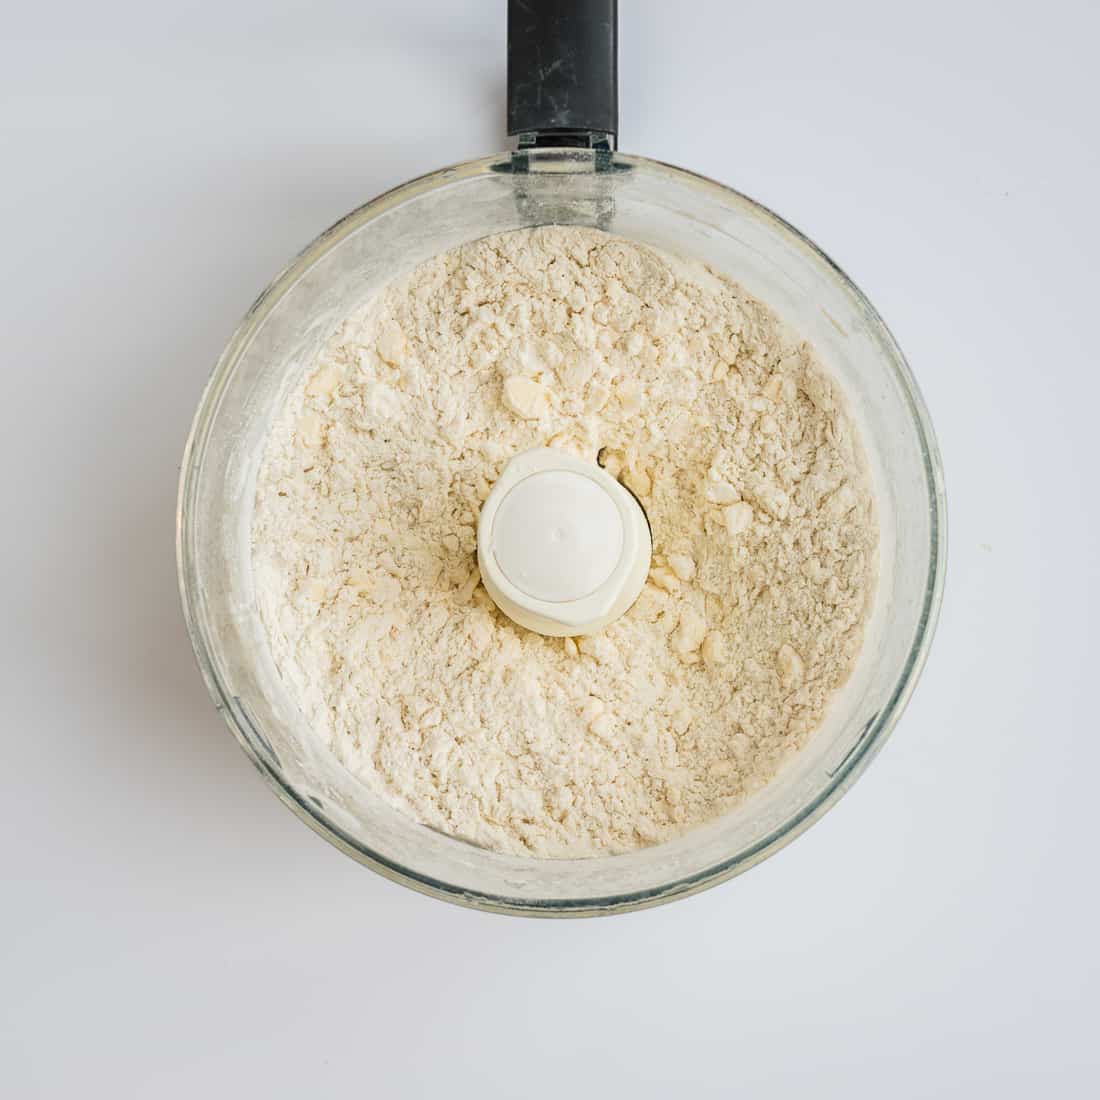
The pie crust is a doddle to make in a food processor – just make sure to keep the ingredients COLD and handle the pastry as little as possible otherwise it may get tough.
By the way the secret to slicing a pie successfully is to let it cool down completely. If you cut into it while still warm the filling will just spill out everywhere.
So wait as long as humanly possible before slicing and serve slightly warmed (in the microwave) with a large dollop of ice cream.
PERFECT HOMEMADE PIE CRUST
Full measurements and instructions can be found on the printable recipe card at the bottom of the page. Make sure your ingredients are COLD for successful pie crust.
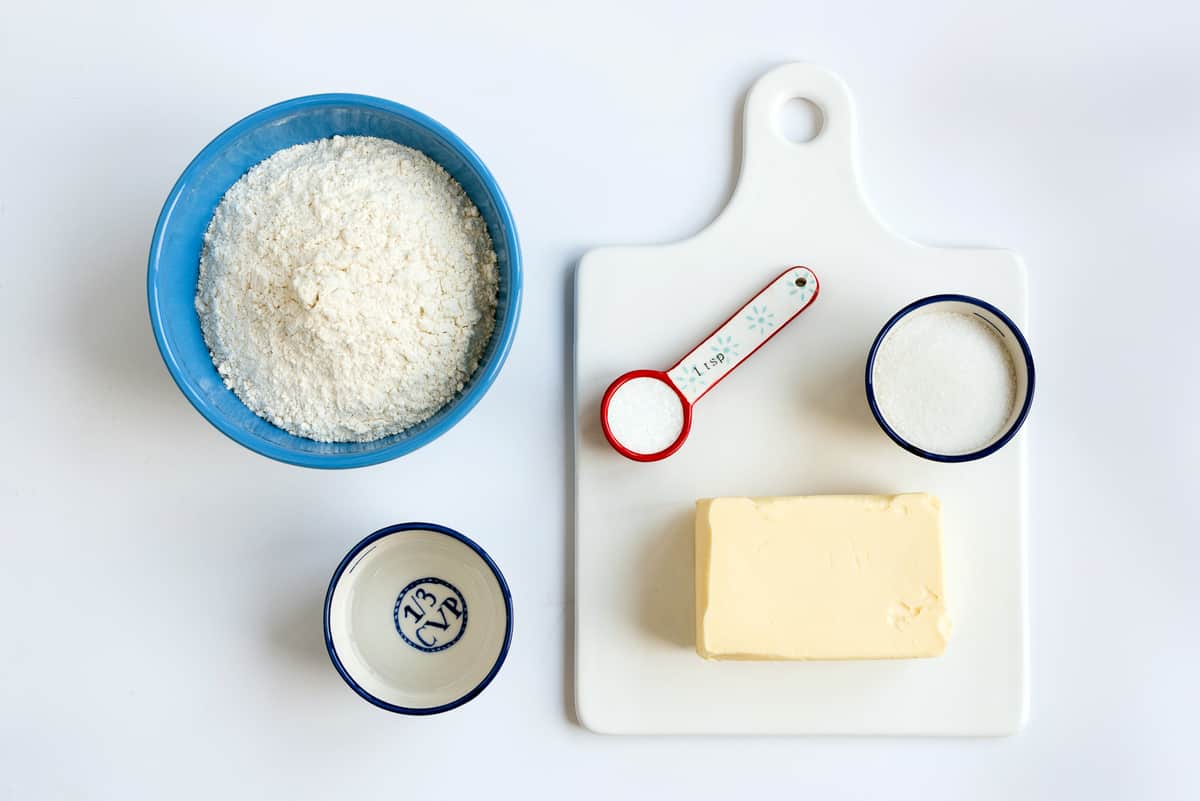
Put the flour, sugar and salt in the large bowl of a food processor (I love my trusty Magimix) fitted with plastic blade and chill for 30 minutes. Cube the butter and shortening and keep chilled.
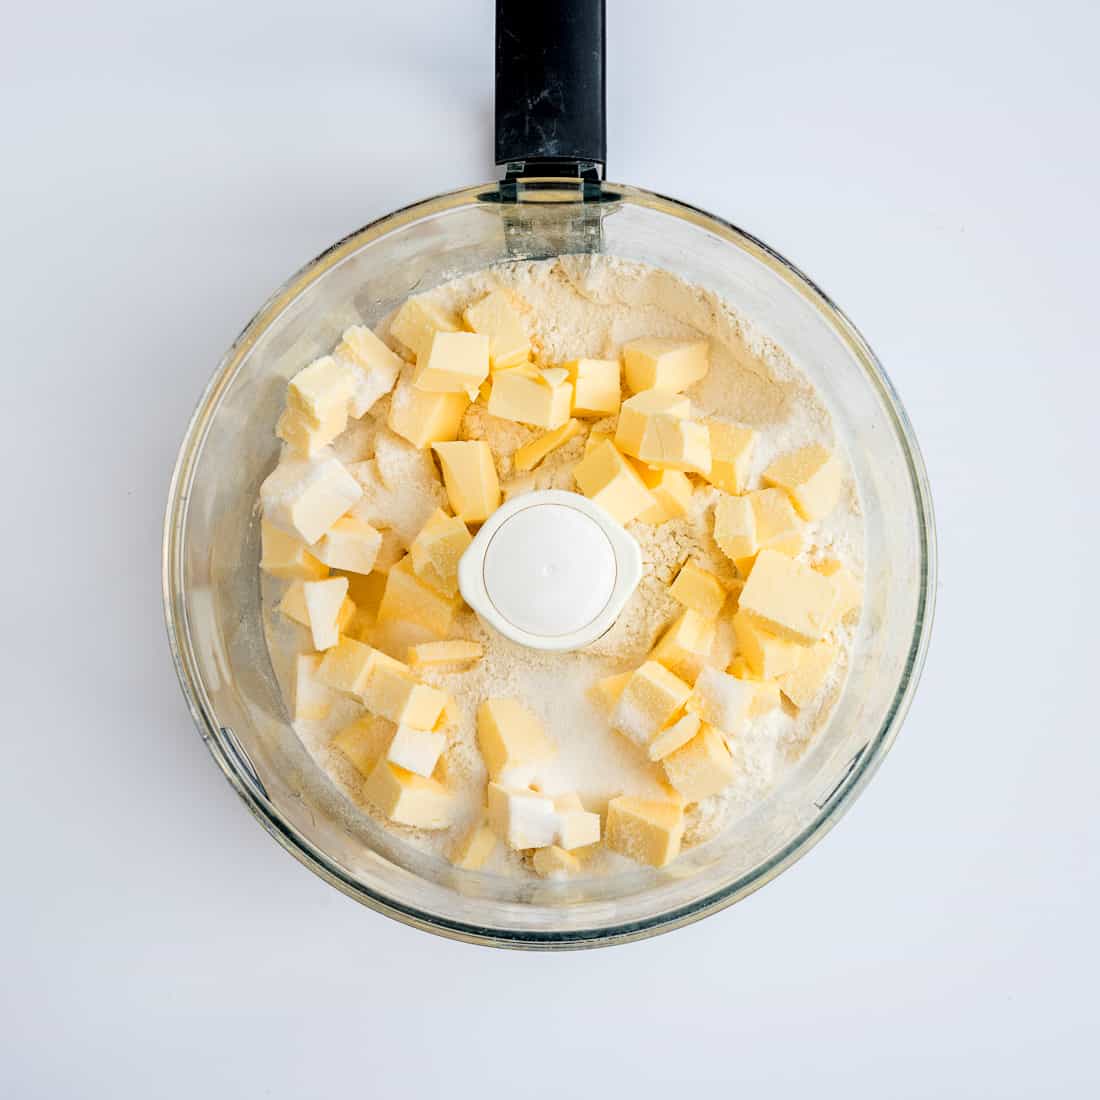
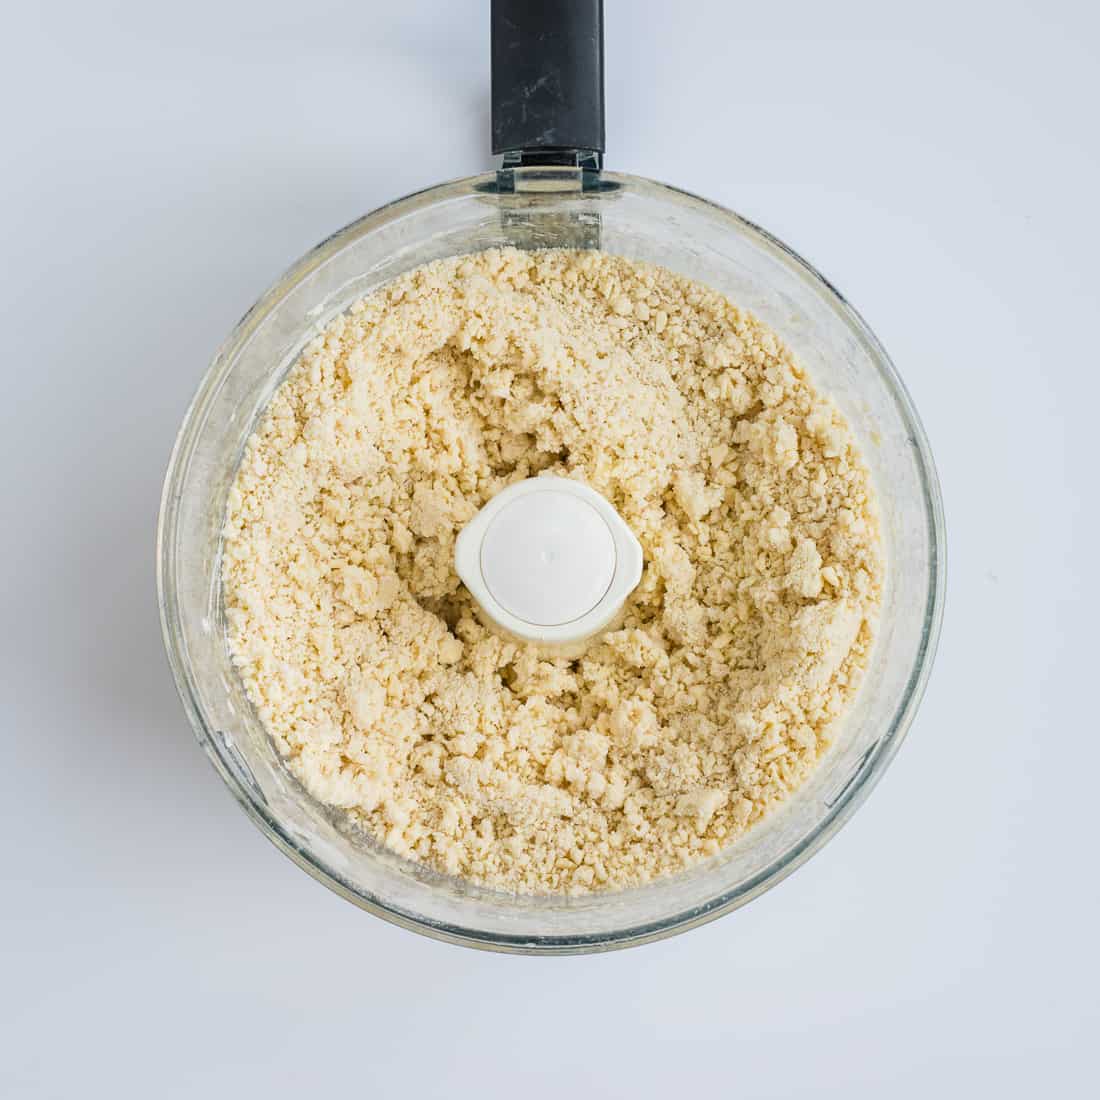
Pulse flour, sugar and salt until combined. Add the cubed butter and shortening and pulse until the mixture resembles coarse breadcrumbs.
Combine vinegar and water and add to the dough in a slow drizzle while pulsing. Stop when the dough forms clumps. You may not need to add all the water or you may need to add a touch more if dough is crumbly.
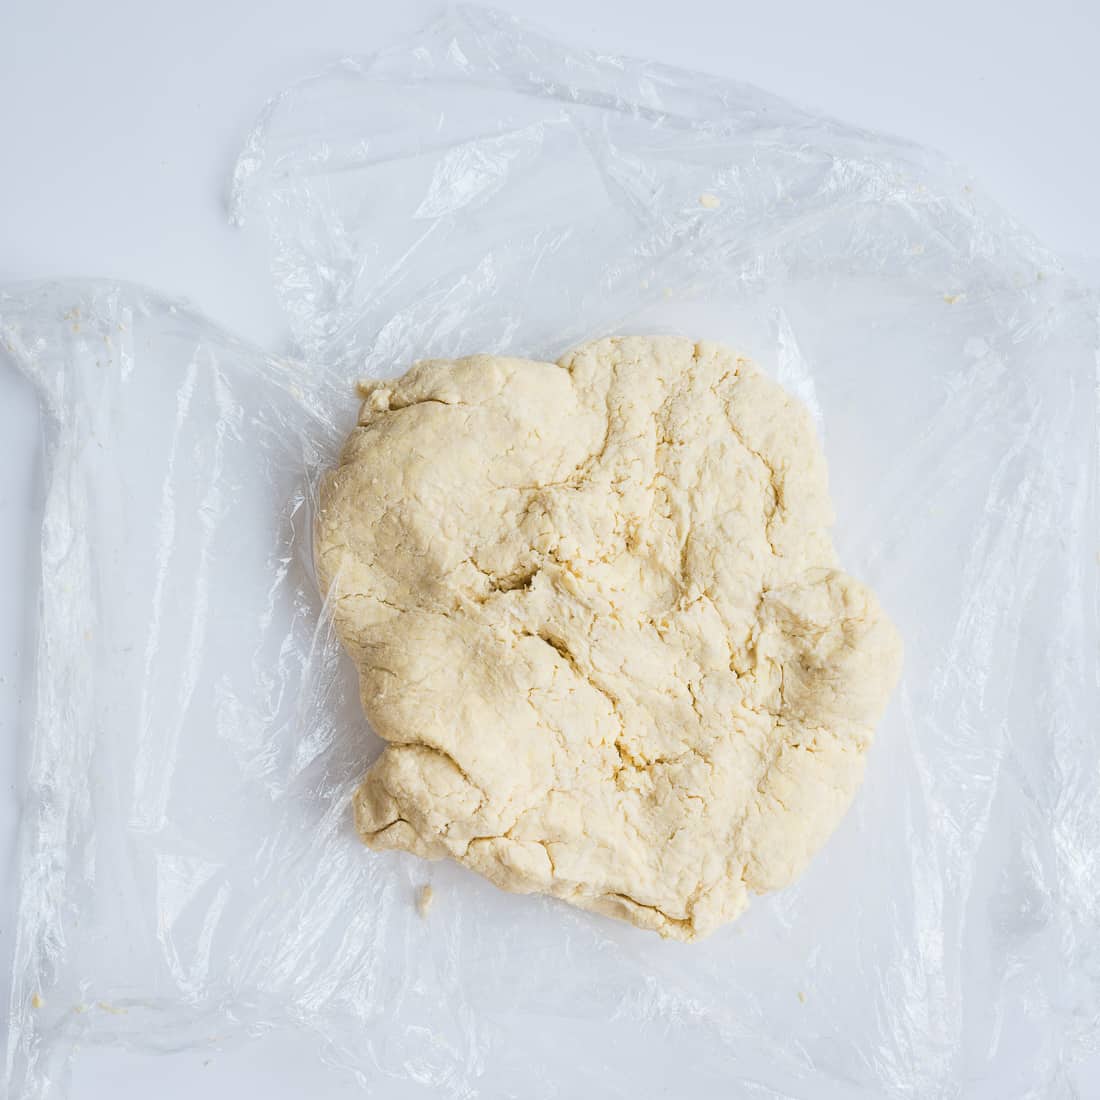
Pat the dough into two disks, cover with cling film and chill for an hour (or up to a day). Resting the dough is important so don’t skip it!
LATTICE PIE CRUST
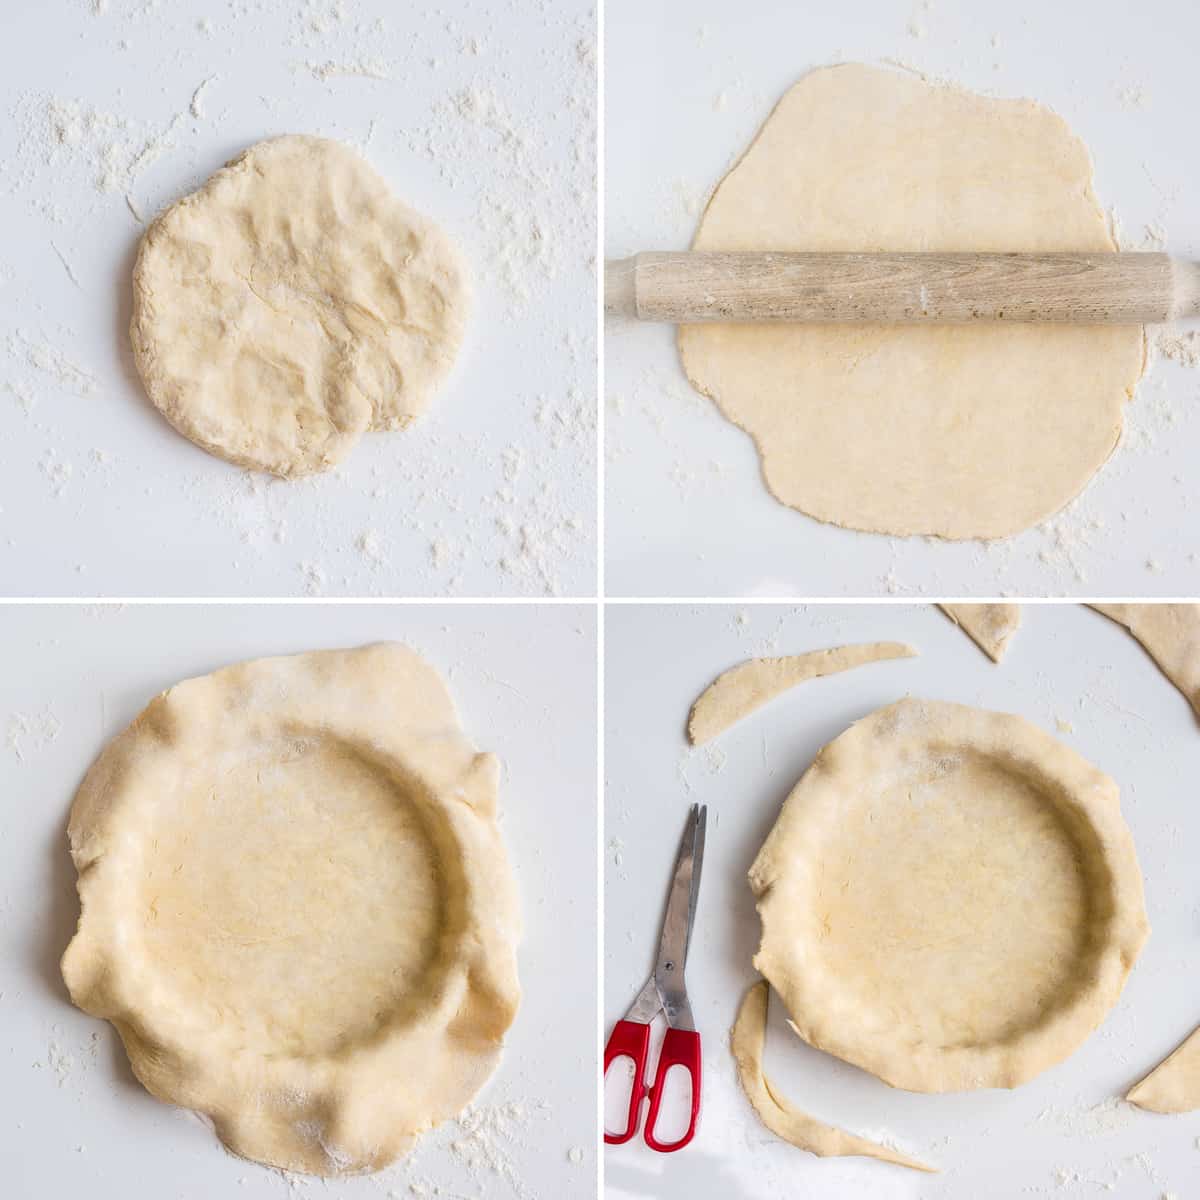
Dust your worktop and rolling pin with flour. Roll one of the dough disks out to 6mm (1/4 inch thick). Transfer onto the pie tin, leaving the pastry to hang over the edges, cover and chill for 30 minutes.
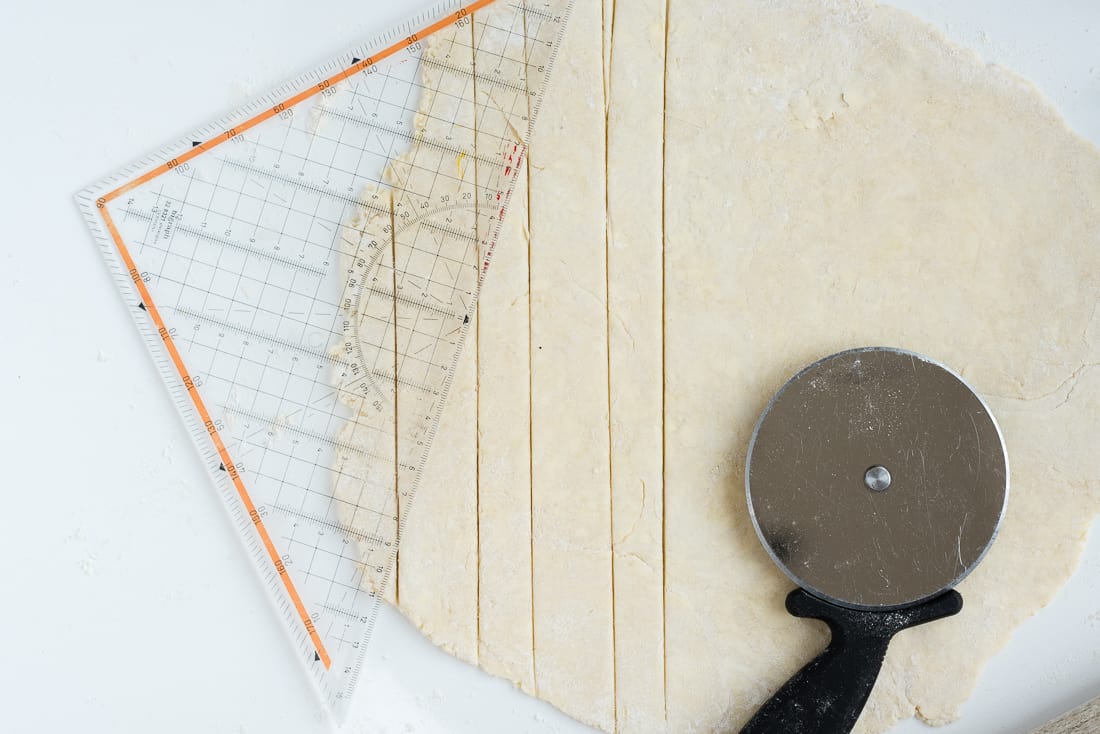
Roll out the second piece of dough onto a large piece of baking paper. Cut into wide, equally sized strips using a pizza wheel then transfer onto a baking tray and chill for 30 minutes.
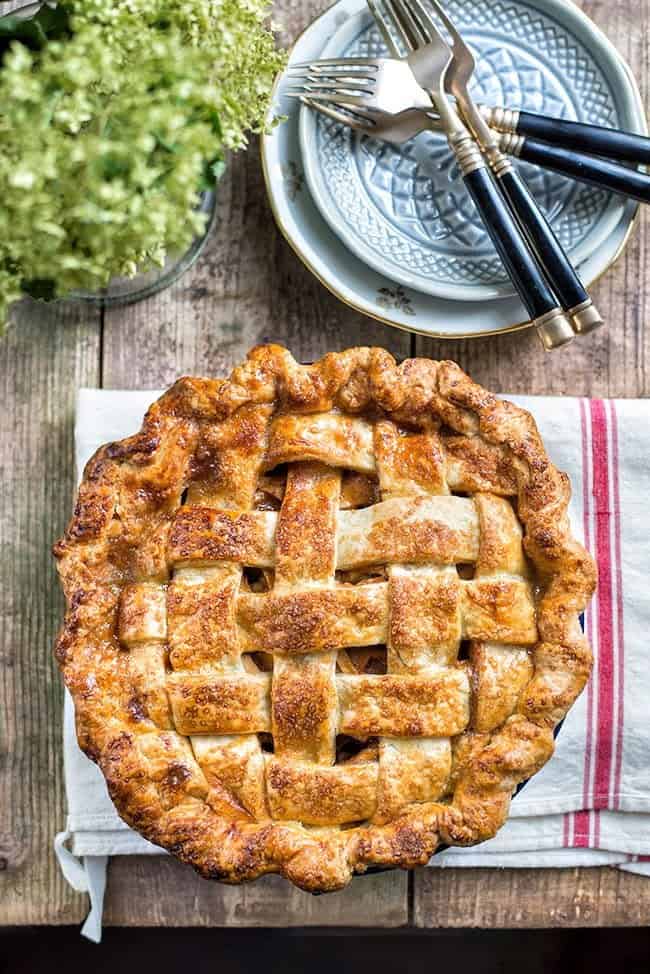
Take out the pastry strips and lay the longest ones in the centre of the pie vertically. Start placing strips horizontally, weaving them with the one vertical ones to create a lattice.
Fold the overhanging pastry over the lattice and create a fluted edge by pushing your thumb from one hand in between the thumb and index finger of the opposite.


Apple and Blackberry Crumble

Best homemade pumpkin pie from scratch

Rhubarb and Raspberry Crumble Pie
HAVE YOU MADE MY APPLE PIE RECIPE? Please leave a rating, post a photo on my Facebook page, share it on Instagram, or save it to Pinterest with the tag #supergoldenbakes and make my day!

Perfect Homemade Apple Pie From Scratch
Equipment
Ingredients
Pie Crust
- 315 g (2 ½ cups) plain flour all purpose flour
- 1 tbsp sugar
- 1 tsp salt
- 185 g (1 ½ sticks) cold unsalted butter , cubed
- 50 g (¼ cup) cold vegetable shortening , cubed
- 1 tbsp white vinegar
- 60 ml (¼ cup) cup ice-cold water (or less, as needed)
Filling
- 5 medium cooking apples (such as Bramley)
- 3 eating apples (such as Pink Lady)
- 1 lemon juice only
- 4 tbsp soft brown sugar
- 3 tbsp sugar
- 2 tbsp cornflour (cornstarch)
- 1 tbsp cinnamon
- ¼ tsp ground cloves
- ¼ tsp freshly grated nutmeg
- 2-3 tbsp salted caramel (optional) I used Bonne Maman here
- 1 egg beaten with splash to milk to glaze
- 2 tbsp Demerara sugar to sprinkle
Instructions
Make the pie crust
- Put the flour, sugar and salt in the large bowl of the Magimix fitted with plastic blade and chill for 30 minutes. Cube the butter and shortening and keep chilled.
- Pulse flour, sugar and salt until combined. Add the cubed butter and shortening and pulse until the mixture resembles coarse breadcrumbs.
- Combine vinegar and water and add to the dough in a slow drizzle while pulsing. Stop when the dough forms clumps. You may not need to add all the water or you may need to add a touch more if dough is crumbly.
- Pat the dough into two disks, cover with cling film and chill for an hour (or up to a day).
- Dust your worktop and rolling pin with flour. Roll one of the dough disks out to 6mm (1/4 inch thick). Transfer onto the pie tin, leaving the pastry to hang over the edges, cover and chill for 30 minutes.
- Roll out the second piece of dough onto a large piece of baking paper. Cut into wide, equally sized strips using a pizza wheel then transfer onto a baking tray and chill for 30 minutes.
Prepare your filling
- Peel and core the apples then either slice thinly with a sharp knife of use the widest setting on a mandoline. Keep slices small and equally sized. Toss with the lemon juice and set aside while pastry is chilling.
- Strain the apples to get rid of any juices and then toss with the spices, flour, cornflour and sugar.
Assemble the apple pie
- Pile the apples, packed quite tightly, into the prepared pie tin (mine was 20cm/8in but there was enough pastry for a slightly larger pie). Create a little mound in the centre and drizzle with the salted caramel (if using).
- Take out the pastry strips and lay the longest ones in the centre of the pie vertically. Start placing strips horizontally, weaving them with the one vertical ones to create a lattice (see here for a very helpful diagram from the Smitten Kitchen).
- Fold the overhanging pastry over the lattice and create a fluted edge by pushing your thumb from one hand in between the thumb and index finger of the opposite.
- Return to the fridge for 30 minutes then brush all over with the egg wash and sprinkle with demerara sugar.
Bake the pie
- Preheat the oven to 200C (400F) and place a heavy baking tray on the lowest shelf (do not skip this step: the filling has a tendency to bubble over).
- Put the pie in the oven for 15-20 minutes until it has started to brown nicely, then reduce the temperature to 180C (350F). At this stage you may need to cover with a foil hat to prevent further browning.
- Bake for another 30-35 minutes of until the apples are soft enough to prick with a skewer. The pie is usually ready when the filling starts to bubble over and takes on average about an hour to bake.
- Cool for several hours before serving – it can take up to 6 hours or longer for the pie to cool completely. If you serve while still hot it won’t be easy to slice.
Nutrition
Nutritional information is always approximate, and will depend on quality of ingredients and serving sizes.


now this sounds delicious, wow! gonna try this, thanks for posting this.
Simon
Oh wow, this really made my mouth water 🙂 x
I love it Lucy!!! Great blog!
Caramel and apple—a perfect match! I just wanted to let you know that I have a food photo submission site (Simply Creative Recipes) and I am linking to this post if you don't mind. You are welcome to submit your recipes to my site if you'd like. You take wonderful photos by the way!
Looks so good. The lattice work looks so pretty.
Oh my god thats yummy
Looks super-tasty.
That looks seriously good! Your food photography is fabulous too x