
Vegan chocolate gingerbread layer cake
, Updated Oct 28, 2019
This post may contain affiliate links. Please read our disclosure policy.
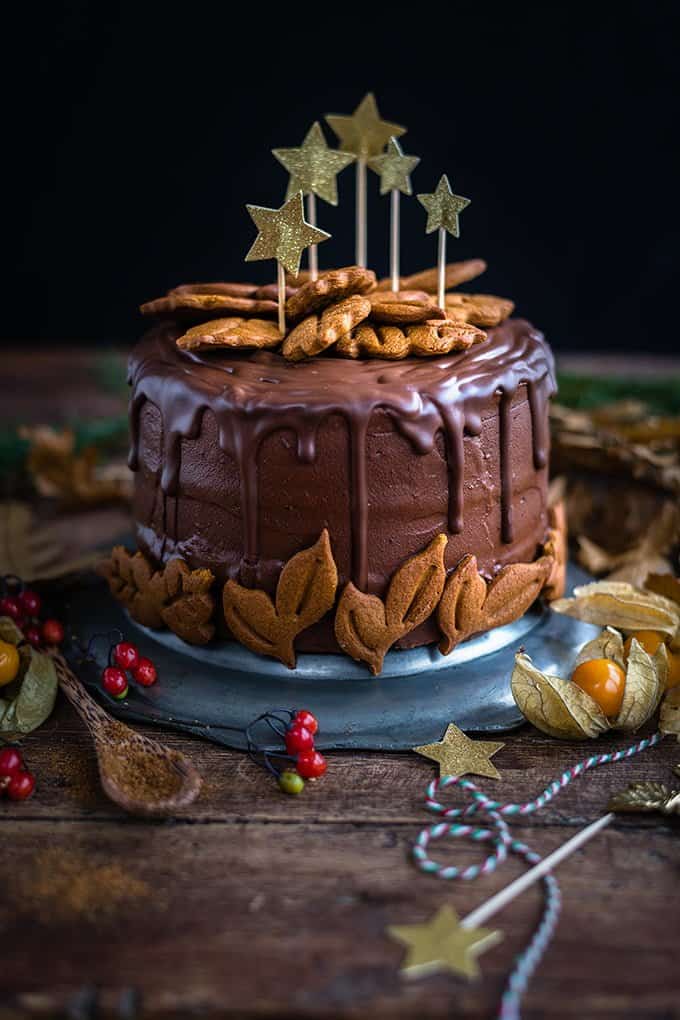
This vegan chocolate gingerbread layer cake is perfect for the holidays and a spectacular celebration cake any time of the year.
You will also love my Easy Vegan Chocolate Cupcakes

The recipe for this vegan chocolate and gingerbread cake has been stuck in my head for absolutely forever, a couple of months at least.
But time run away from me and what with getting a new rescue puppy and being extremely busy… I never got round to making the idea a reality until now.
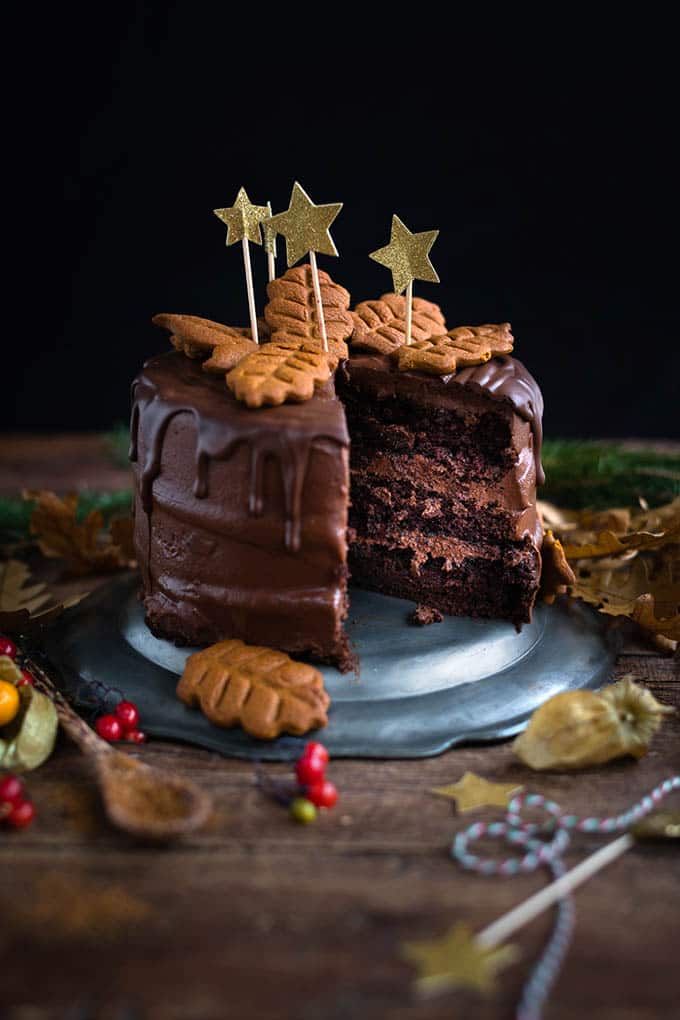
Usually recipe ideas are much better in your imagination than in execution, but this cake was exactly as I had pictured it and tasted EVEN better. Essentially it is a festive take on my vegan chocolate cake with added spices, stem ginger and a spiced (vegan) buttercream frosting.
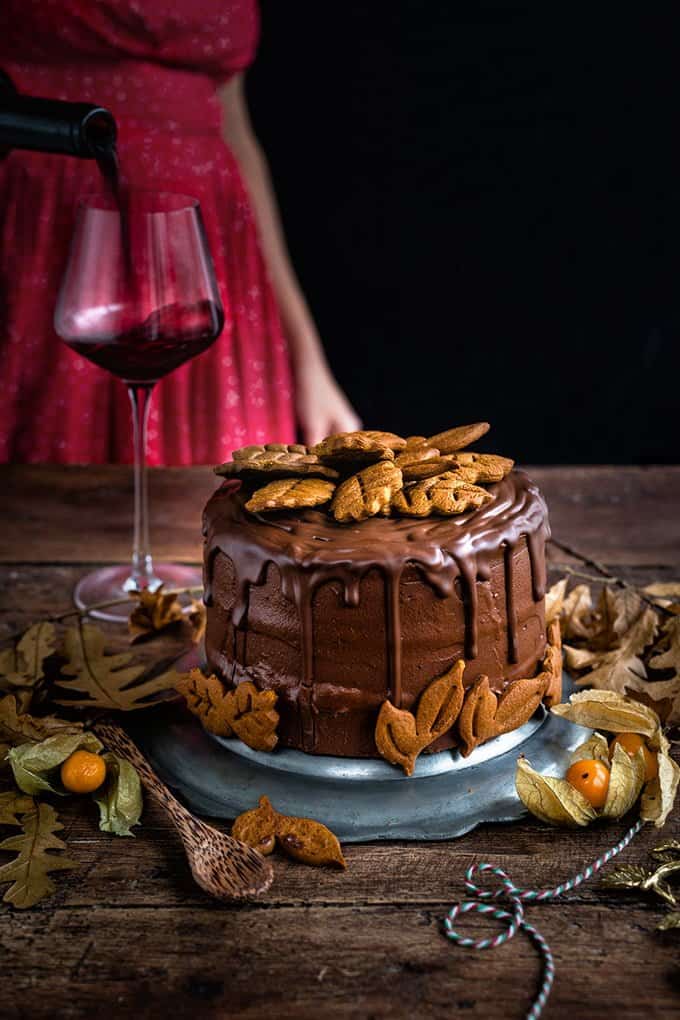
I wanted to top the cake with chocolate holly leaves originally, but my patience was in very short supply and I managed to ruin all but two of them.
So instead of chocolate leaves, I made gingerbread leaves using little leaf plunge cutters (affiliate link). I love these cheap and cheerful cutters – they are just perfect for decorating cakes and pies.
The gingerbread is vegan too – I made my usual gingerbread cookie recipe and substituted the egg with a flax egg ( 1 tbsp ground flaxseed mixed with 2 1/2 tbsp hot water until slightly gelatinous) and the butter with non-dairy spread (I used Vitalite).
You could use that or your favourite vegan cookie recipe. Alternatively you can decorate the cake with leftover buttercream and some edible glitter or festive sprinkles. Or how about sticking the vegan chocolate mousse pops on it?
But I won’t waffle on for much longer because I KNOW you have better things you want to be doing right now… last minute presents, marathon present wrapping sessions, festive menus to plan and baking this cake. Because you will love this cake, whether you are vegan or not!
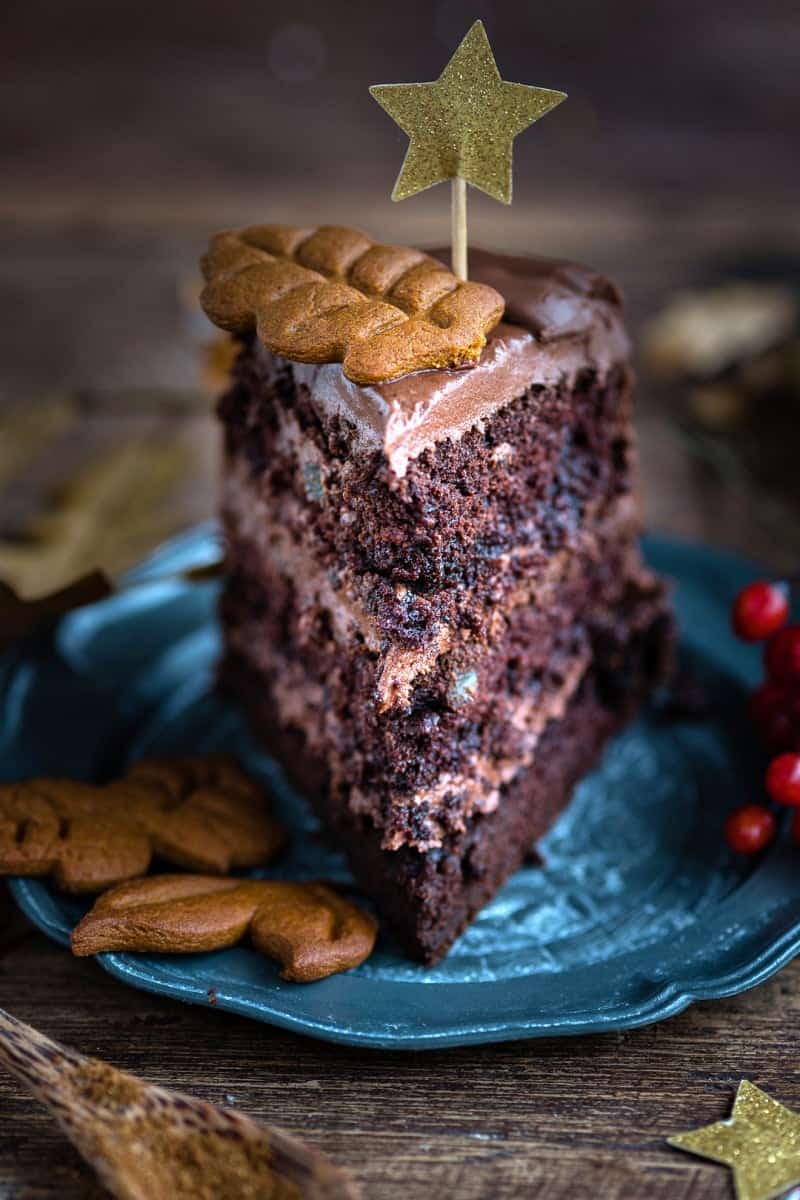
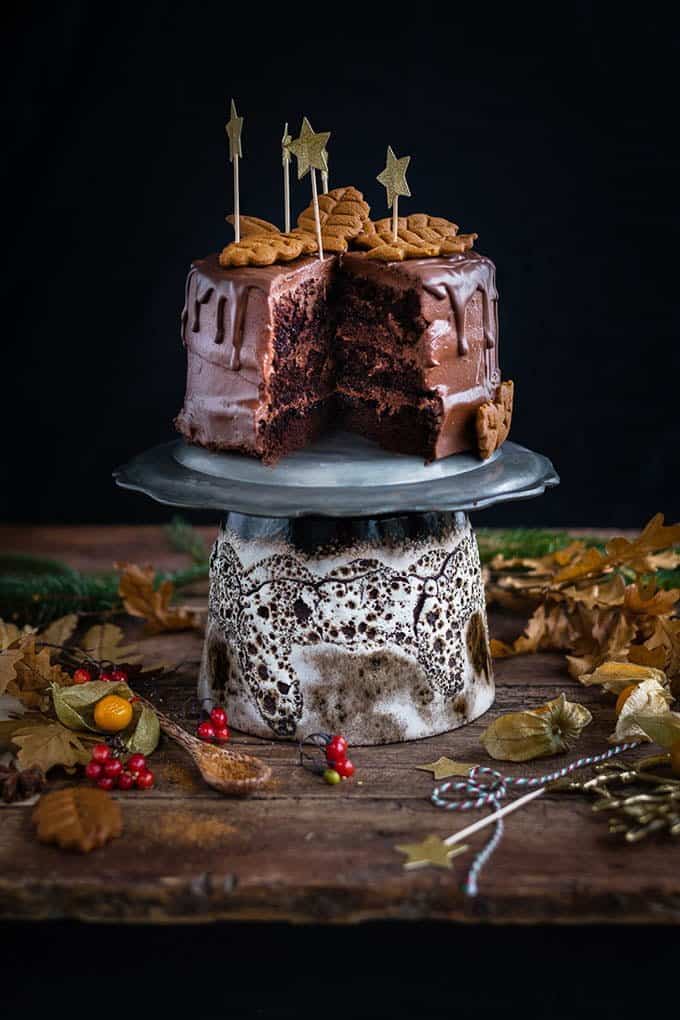
If you take out the Christmassy spices you could make this any time of the year, it is perfect for birthdays and celebrations. The cake layers are a little bit fragile so treat them with TLC when adding the filling and frosting.
I brushed the sponges with vanilla sugar syrup, but I don’t think they needed that – the cake is perfectly moist (sorry – horrible word alert) without it.
I love photographing this cake as you can probably tell! I managed to use my latest great prop love, a pewter plate I grabbed on eBay, as the base and a funky vintage plant pot from Plant Furniture as the stand 😉
Made one of my recipes? I wanna see! Tag me on Instagram and make my day 🙂
YOU MAY ALSO LIKE
- Vegan tropical celebration cake
- Earl Grey layer cake with Swiss buttercream and Earl Grey Caramel
- Chocolate layer cake with blackberry Italian buttercream
- Red velvet layer cake with vanilla and strawberry frosting
Vegan chocolate gingerbread layer cake
Ingredients
For the cake
- 260 g | 9oz | 2 1/4 cups plain (all purpose) flour
- 260 g | 9oz | 1 1/3 cup sugar
- 60 g | 8 tbsp unsweetened cocoa powder
- 2 tsp bicarbonate of soda
- 1 tsp ground cinnamon
- ½ tsp ground ginger
- ¼ tsp ground cloves
- ½ tsp salt
- 320 ml | 1 1/3 cups almond or soy milk
- 120 ml | 1/2 cup vegetable oil
- 2 tbsp white wine vinegar
- ½ tbsp vanilla extract
- 1 tbsp very finely chopped stem ginger optional
- 1 tbsp stem ginger syrup optional
Frosting and filling
- 375 g | 13oz | 3 cups icing sugar
- 50 g | 1/2 cup cocoa powder
- 1 tsp ground cinnamon
- 115 | 4 oz | 1/2 cup non-dairy spread
- 120 ml | 4fl oz | 1/2 cup warm almond or soy milk divided
- 200 g | 7oz dark vegan chocolate melted and cooled slightly
Chocolate drip
- 100 g | 3 1/2 oz dark vegan chocolate melted
- warm almond milk as needed
Instructions
- Preheat the oven to 180C (350F). Spray 3x15cm (6in) cake tins with cake release and line the bottoms with baking paper.
- Sift the sugar, flour, cocoa powder, bicarbonate of soda, salt and spices into a large bowl.
- Mix the milk, oil, vinegar and vanilla together in a measuring jug and add to the bowl. Use a balloon whisk to mix everything together until you have a smooth batter.
- Fold in the chopped stem ginger and syrup, if using.
- Divide between the prepared tins and bake for 20-25 minutes, or until a skewer inserted in the centre comes out clean and the cakes are coming away from the edges of the tins.
- Cool in the tins for 10 minutes then turn out to a wire rack to cool.
- Level the sponges using a serrated knife and a cake leveller.
- Make the frosting: put the icing sugar, non-dairy spread, half the almond milk, cocoa powder and cinnamon into the bowl of your stand mixer.
- Start mixing on low speed to combine using the paddle attachment. Increase the speed to maximum and mix for 2 minutes.
- Lower the speed and gradually add the melted chocolate. Beat until the frosting is glossy and thick, stopping the mixer to scrape the bottom and sides of the bowl.
- Gradually the rest of the milk and then continue to mix for 2-3 minutes at maximum speed, scraping the bowl as needed.
- Transfer the frosting to a piping bag fitted with a plain round tip.
- Pipe a thin layer of frosting over the bottom cake layer, top with the second, repeat, and then top with the third.
- Add a generous amount of frosting over the top and sides of the cake and smooth using a side scraper and palette knife. Chill the cake for 30 minutes in the freezer.
- Add another thin layer of frosting and smooth over the top and sides of the cake.
- Melt the chocolate for the drip. Add a little warm almond milk and mix together using a small balloon whisk until combined. Add as much milk as you need for the drip to easily flow off the back of a spoon. If it is too thick you won't get the desired 'drip' effect. Test your drip against the side of a cake tin if you are not sure, it should slowly drip down the side.
- Drizzle the melted chocolate over the perimeter of the cake using a spoon so that it prettily drips down the sides. You can fill the top of the cake too.
- Decorate with vegan gingerbread cookies, or pipe any extra frosting over the top of the cake and sprinkle with edible gold glitter.
Notes


Good morning.
I’m using this recipe as a Birthday Cake (first time making a vegan cake) I was just wondering what the ingredients would be for a 7” cake? Would I be able to put it into 1 deep 7” tin or 3 x 7” pans?
Many Thanks
Donna
Hi Donna – I think you can get away with making three 7inch layers (they will be thinner than pictured in post) or if you wanted thicker layers divide into two 7inch pans. Hope this helps