
How to Make the Perfect Pavlova
, Updated Mar 16, 2025
This post may contain affiliate links. Please read our disclosure policy.

The Perfect Pavlova should be snowy white, crisp on the outside and slightly marshmallowy on the inside. Getting it right every time is easy if you follow a few basic guidelines. Check out my step-by-step guide, recipe video and be sure to read the troubleshooting tips based on personal pavlova flops!
Check out my guide to Perfect Meringue Nests and Air Fryer Pavlova!
I have updated my popular 2017 guide on How to Make the Perfect Pavlova to include a recipe video, illustrated step-by-step guide and even MORE answers to common questions. I hope you will find it helpful in creating the best pavlova ever, the first time and every time after that!
Why is it called Pavlova?
Pavlova was created for – and named after – the Russian ballerina Anna Pavlova while she was touring New Zealand in 1926. There has since been some controversy over the origins of this dessert.
Both Australia and New Zealand have laid claim to the recipe but I will let them fight it out among themselves! What is unquestionable is that the dessert is still enormously popular in both countries and around the world.
What’s a Pavlova then?
Pavlova is a glorious dessert made simply from egg whites and sugar (meringue). The meringue shell is crisp with a unique marshmallowy texture within thanks to the addition of vinegar and cornstarch.
The egg whites are whipped until they reach soft peaks and then the sugar is added gradually until the meringue is light as air, glossy and so thick you could hold the bowl over your head without fearing it would fall out.
The meringue is then spooned or piped onto a tray and baked at a low temperature which dries it out until it becomes crisp on the outside while retaining some moisture within.
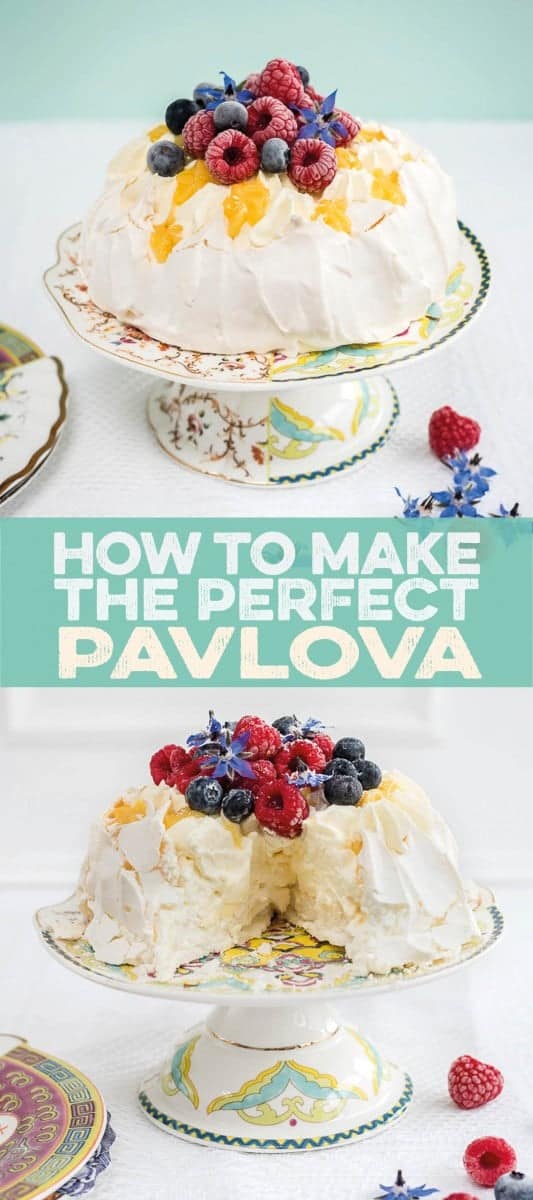
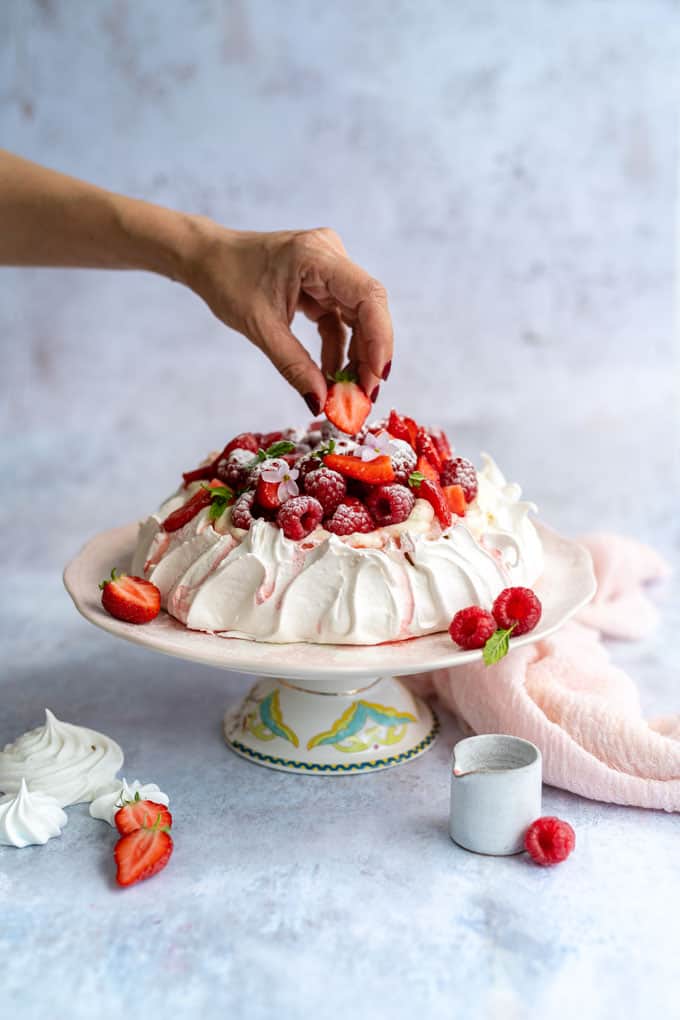
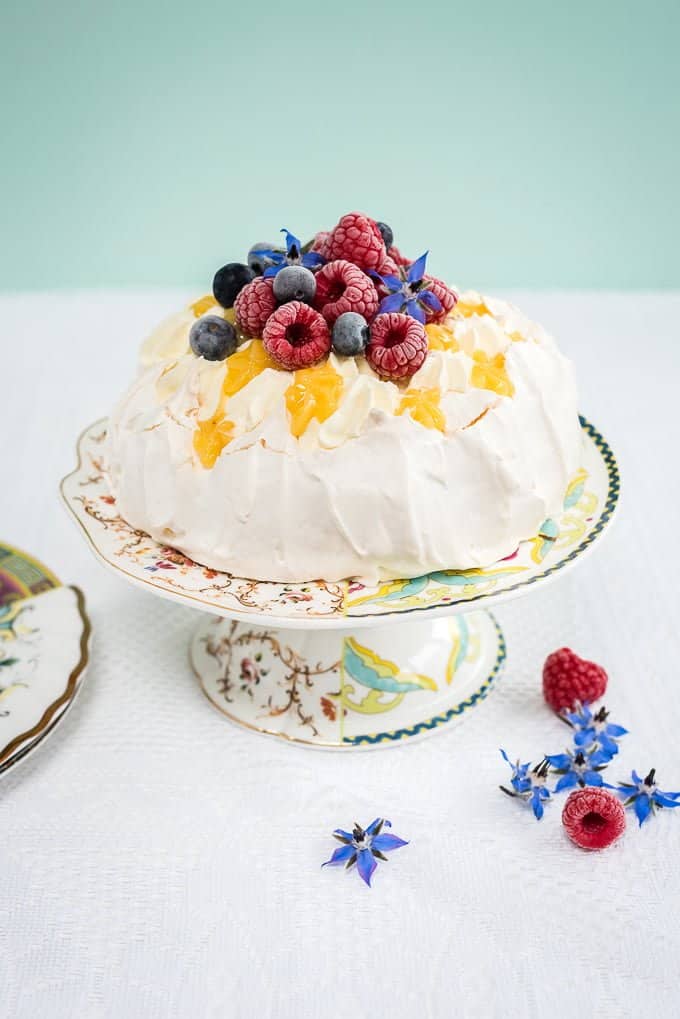
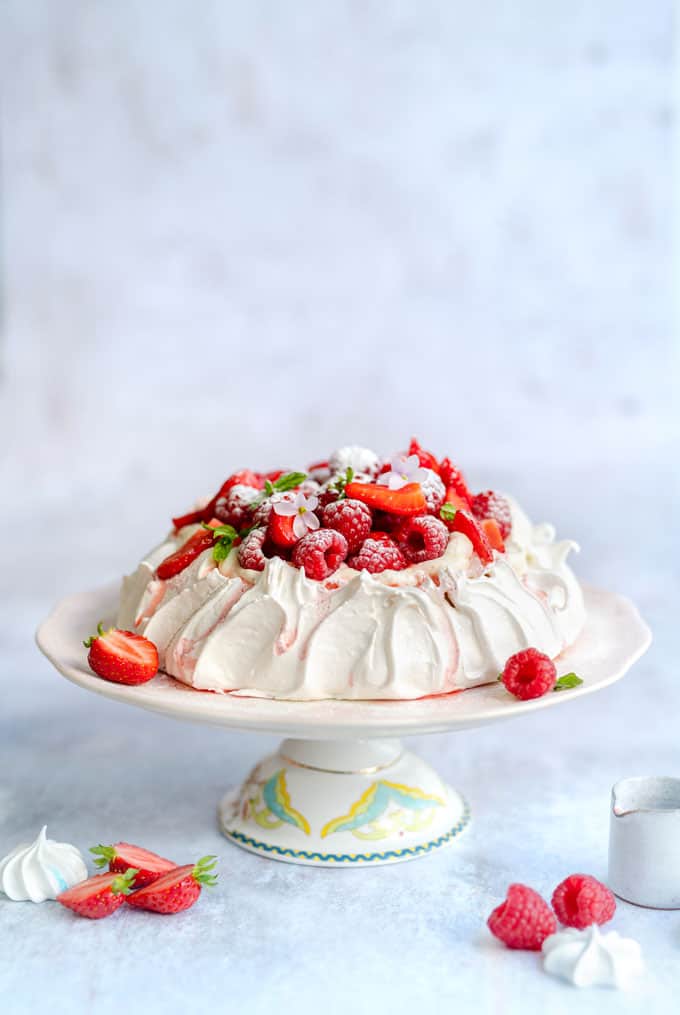
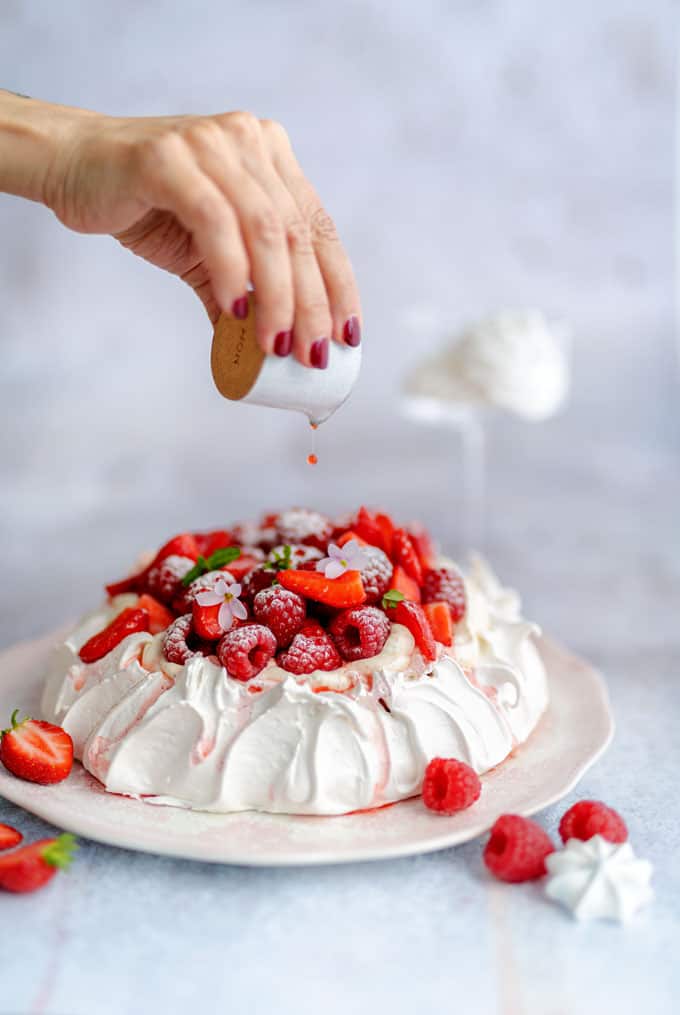
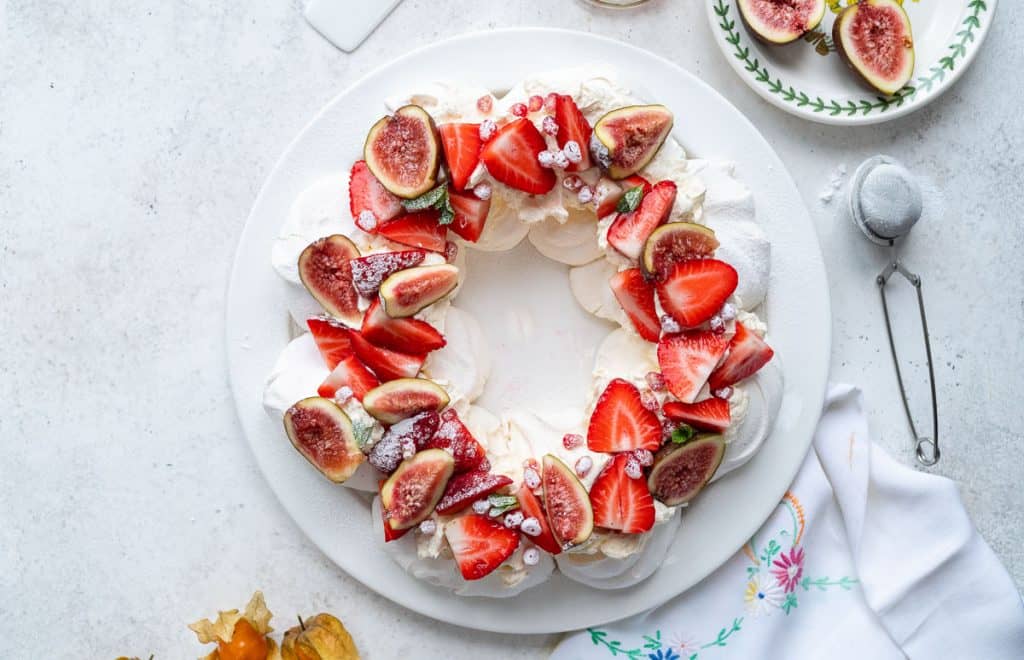
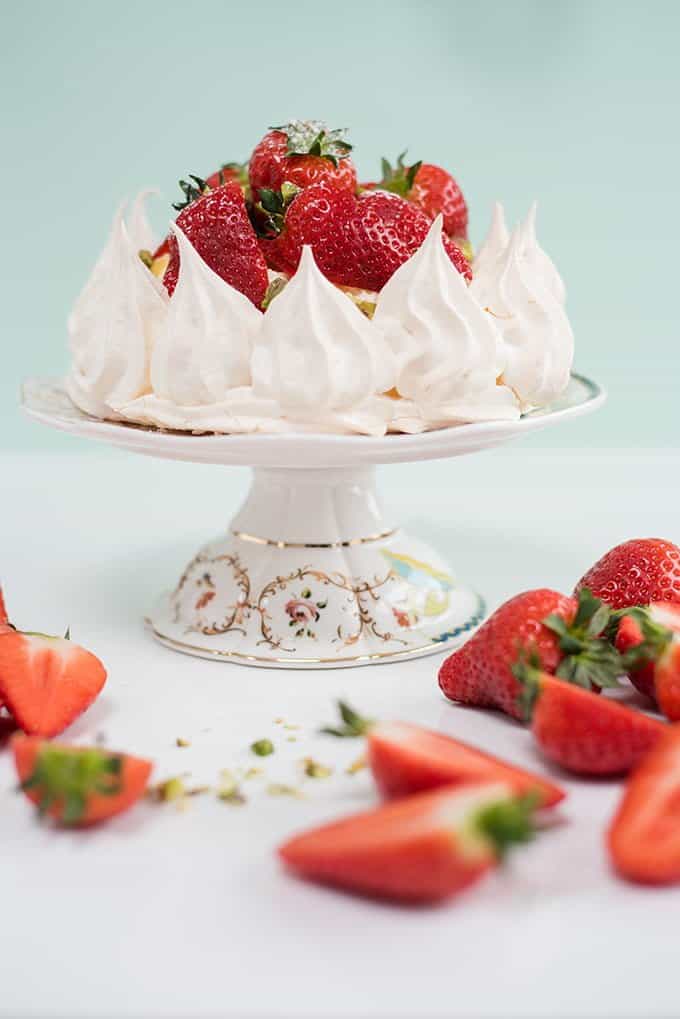
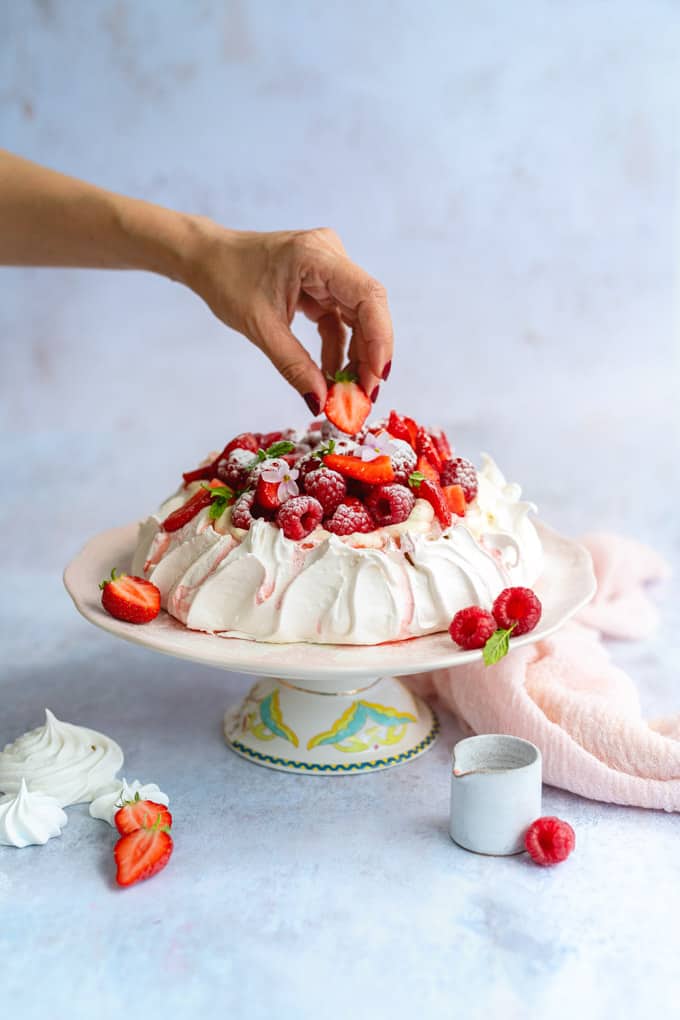
Once the pavlova shell has cooled it is filled with freshly whipped sweetened cream and fresh berries or tropical fruit which undercut some of the sweetness.
Making the perfect pavlova every time takes a little practice but once you master the recipe you will have perfect results every time!
Expert tips for perfect results
- If you find that the sugar takes FOREVER to dissolve (sometimes it does!), use my Swiss Meringue Pavlova recipe. In this version the egg whites and sugar are heated together first so the sugar dissolves and the meringue is more stable.
- Blitz the sugar in a food processor for a few seconds. You want the granules to become smaller so they dissolve more easily but not so small that you end up with powdered sugar. I use caster sugar (superfine sugar) but you can also use granulated sugar provided you process it first.
- Wipe the stand mixer with lemon juice or vinegar to get rid of all traces of grease. Make sure the whisk and any spatulas etc. are also squeaky clean!
- Weigh your egg whites! Lots of pavlova recipes go by the number of eggs instead of weight of egg whites but eggs can contain varying amounts of albumen. One large egg usually contains two tablespoons of egg white (30ml/1 fl oz) – use this as a guide when working out the ratio for your recipe (see below). For best results rely on digital scales.
- Ratio of egg whites to sugar: I prefer to go one part eggs to two parts sugar. For example 5 egg whites (150ml) will need 300g sugar. You can reduce the amount slightly if you like.
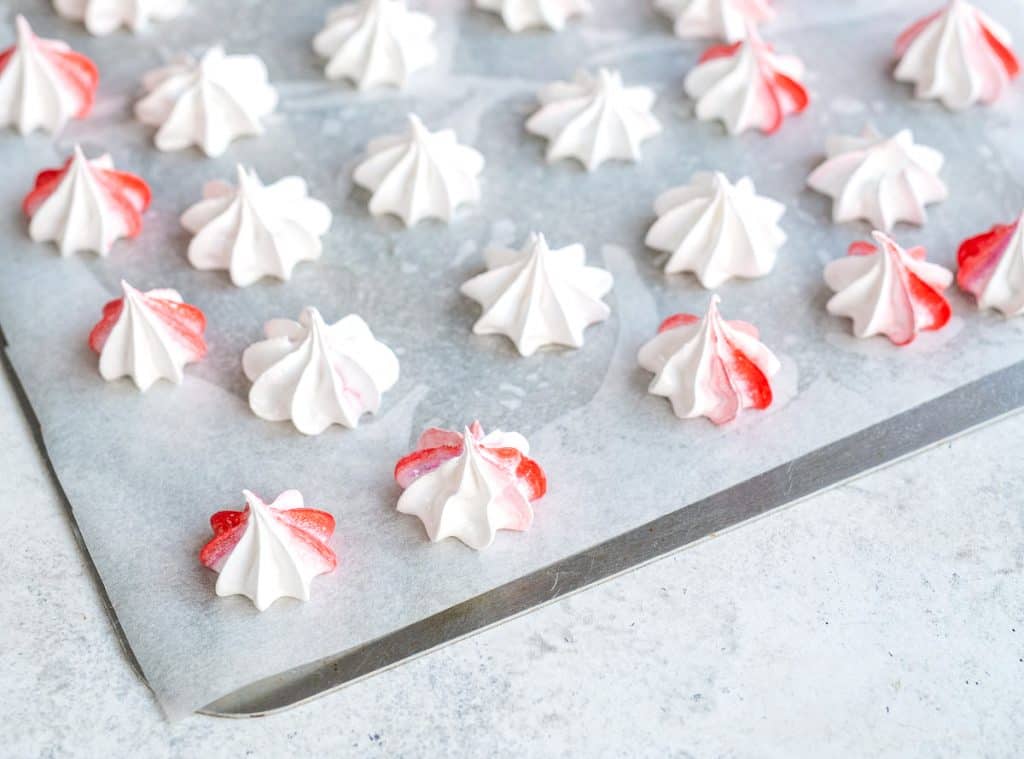
- Leftover meringue can be piped into kisses or meringue cookies. Use these to decorate your Pavlova or cakes. They can be baked at the same low temperature but they will probably be ready in 60 minutes – test one by lifting off the tray.
Choose the right oven temperature
This is a big factor in pavlova success and sometimes ovens can be a bit temperamental! Please note I have given the temperature in both Celsius and Fahrenheit so make sure you pick the right degrees for your location/oven.
- If you know your oven runs hot or cold (perhaps your cakes always burn or are always uneven?) it would be worth investing in an oven thermometer.
- If you are using a fan forced oven the recommendation is to reduce the temperature by 15-20 degrees. I prefer to turn the fan off when making pavlova or macarons.
- Avoid opening the oven while the pavlova is baking – cook for nearly 2 hours and then leave in the (turned off) oven to cool down.
- If you can’t resist checking, wait until the oven door doesn’t feel hot any more. Your meringue shell should feel crisp and dry and lift off the paper easily. If it is sticking to the paper, continue to cook for a bit longer.
Lucy’s Pro Tip
Adjusting for high altitude
According to a few forums it is best to bake at 110°C (225°F) for 90 minutes -2 hours. I have had a few readers experience issues with baking at my suggested temperature of 90°C (195°F) which I haven’t had any issues with, having tested this recipe extensively. If in doubt, bake at this slightly higher temperature.
How to make the perfect Pavlova
Take a look at this step by step tutorial – please note you will find the full recipe, including ingredients in the recipe card at the end of this post.
Make the meringue
- Preheat the oven to to 130°C (270°F) and place the shelf in the middle or lower end of the oven. Line a large baking sheet with greaseproof paper and trace a 20cm (8in) circle on it. Alternatively you can make two smaller pavlovas of 15cm (6in) but you might need to bake them on two trays.
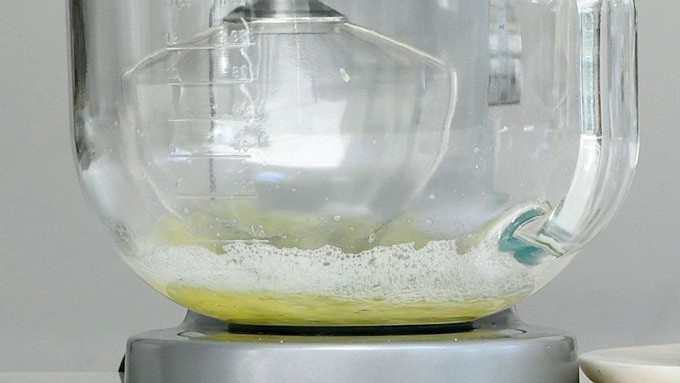
- Wipe your mixer bowl with lemon juice. Put the egg whites and cream of tartar in the mixing bowl and briefly mix together with a balloon whisk to combine. Start whisking on LOW SPEED until the egg whites start to form large and then smaller bubbles and become foamy.
- Continue whisking on MEDIUM SPEED until the egg whites have formed soft peaks. Start adding the sugar one tablespoon at a time while whisking on medium speed. Be patient, it can take as long as 10 minutes for all the sugar to be incorporated.
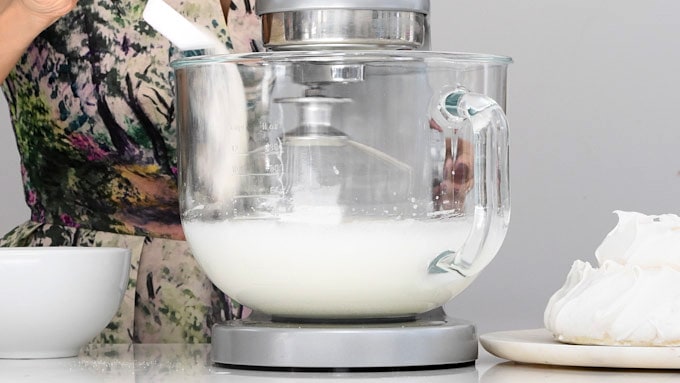
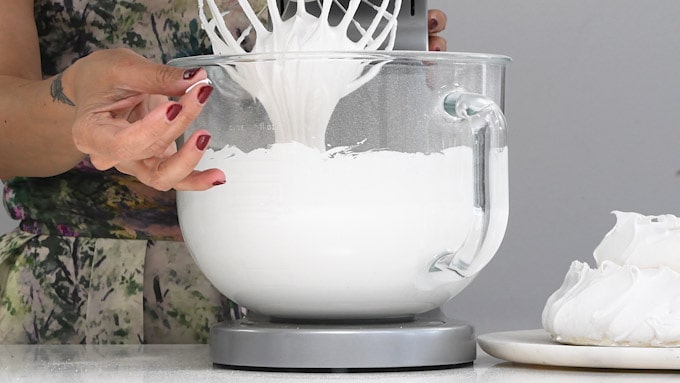
- Increase the speed to MEDIUM HIGH and continue whisking until the meringue is stiff and glossy. Feel a small amount of meringue between your fingers – if it feels gritty then the sugar hasn’t fully dissolved yet.
- Add the lemon juice (or vinegar), cornflour (cornstarch) and vanilla paste and whisk them in for 30 seconds until incorporated.
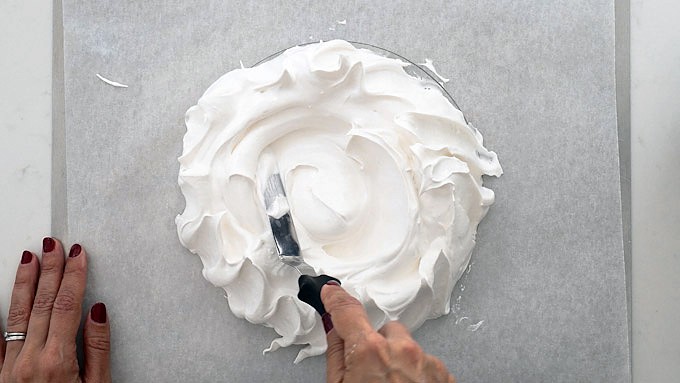
Shape your pavlova
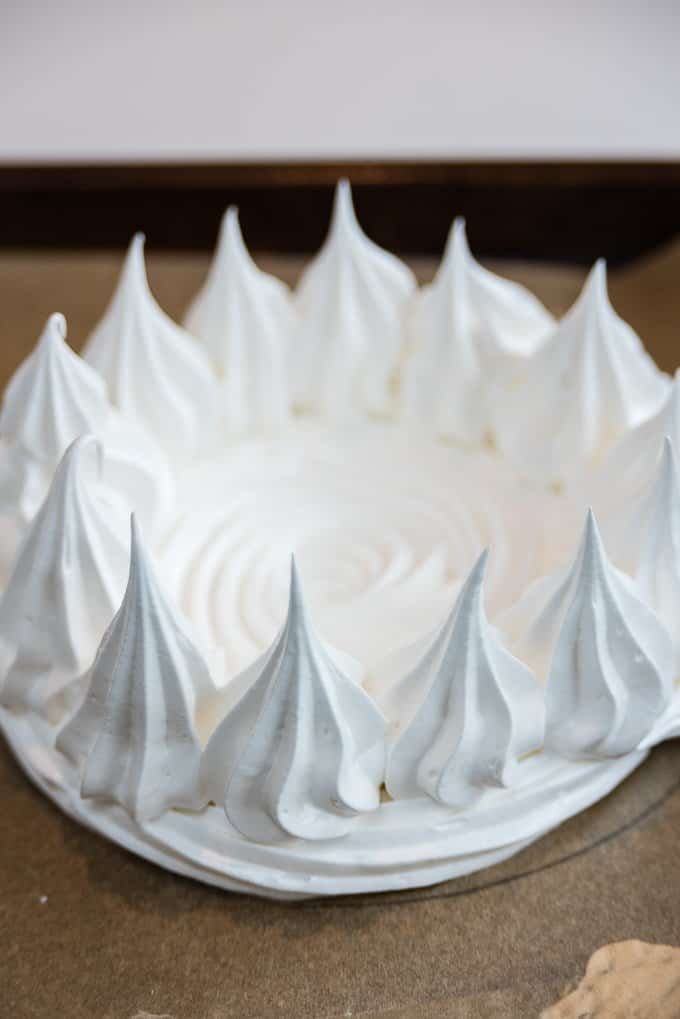
- Pile the meringue on your tray, quite high, to fill the circle you traced. Use an offset spatula to shape it, making a small indent in the centre. Alternatively you can pipe the meringue instead of freestyling for a more structured look or make mini pavlovas (meringue nests).
Bake the pavlova
- Bake for 20 minutes then REDUCE the oven temperature to 90°C (195°F) or up to 110°C (225°F) please see notes about altitude. Bake for a further 90 minutes without opening the oven door.
- Turn the oven off and leave the pavlova to cool inside the oven for 5-6 hours or overnight to avoid cracks. At this point you can store the cooled meringue shells in an airtight container for several days.
Fill and serve
- Fill your pavlova with softly whipped double (heavy) cream when you are ready to serve. Do not fill in advance as the cream will cause the meringue to soften and you will end up with an Eton mess!
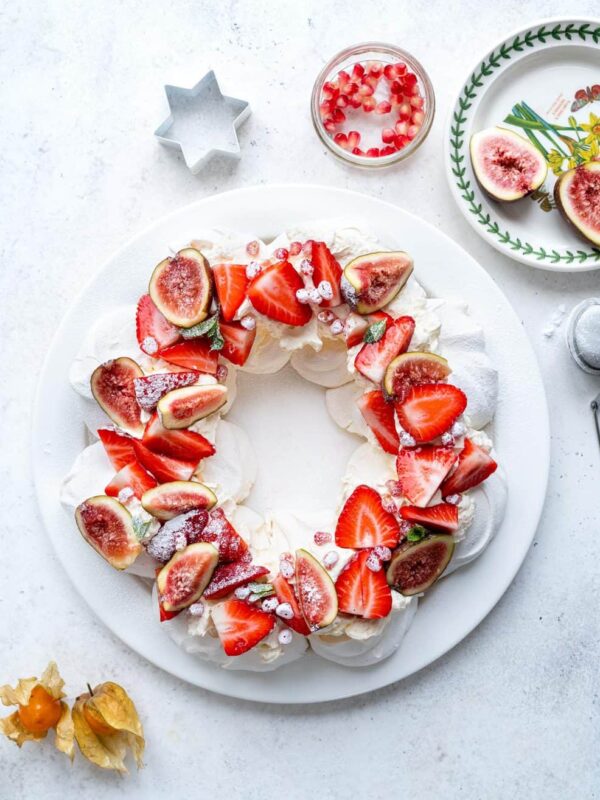
- Top your pavlova with fresh berries or tropical fruit. A little lemon curd or passion fruit jam adds a welcome tartness. Dust with powdered sugar and serve immediately.
Pavlova Tips & Troubleshooting
- My pavlova is completely flat! The culprit is usually a too-hot oven if you have followed the recipe to the letter. I usually preheat the oven to 130C (270F) but reduce the heat to as low as 90°C (195°F) once the pavlova goes in. PLEASE SEE NOTES ABOUT OVEN TEMPERATURE!
- My pavlova is brown! Your oven is too hot or has hot spots. You might need to experiment to see what temperature works best for you and your oven. If in doubt, cook at a slightly lower temperature for a little longer.
- Can you make Vegan Pavlova? Yes you can! Replace the egg whites with equal amount aquafaba (the liquid drained from a can of chickpeas) and follow the recipe in the same way.

- Do I need to add vinegar and cornflour? I have made pavlovas without either of those ingredients and they worked just fine. I prefer to use lemon juice instead of vinegar but they both work in the same way.
- Can you make a sugar-free version? Sugar helps the meringue become glossy and form stiff peaks and creates a crisp texture once baked. You CAN make a reduced sugar pavlova by replacing some of the sugar with sweetener – the meringue will not be as stiff and the texture is definitely different but not bad!
Related recipes


Have you made my Pavlova recipe? Please leave a rating, post a photo on my Facebook page, share it on Instagram with @supergolden88 the tag #supergoldenbakes and make my day!

The Perfect Pavlova | Step By Step Guide
Video
Ingredients
For the pavlova
- 1 ¼ cuos (180ml) egg whites from 6 large eggs
- ¼ tsp cream of tartar (optional)
- 1 ⅔ cups (350g) sugar caster / superfine
- 2 tbsp cornstarch (cornflour)
- 1 tbsp lemon juice
- 1 tsp vanilla extract or paste
To fill and decorate
- 2 cups (500ml) double cream
- 1 cup (125g) sugar , powdered / icing
- 1 tsp vanilla extract or paste
- 6 tbsp lemon or passionfruit curd (optional)
- 2 cups (280g) fresh berries
- sugar powdered / icing, to dust
Instructions
- Preheat the oven to to 130C (270F) and place the shelf in the middle or lower end of the oven. Line a large tray with baking paper and trace a 20cm (8in) circle on it.
- Wipe your mixer bowl with lemon juice. Put the egg whites and cream of tartar in the mixing bowl and briefly mix together with a balloon whisk to combine.1 ¼ cuos (180ml) egg whites, ¼ tsp cream of tartar
- Start whisking on LOW SPEED until the egg whites start to form large and then smaller bubbles and become foamy.
- Continue whisking on medium-low speed until the egg whites have formed soft peaks. Start adding the sugar one tablespoon at a time while whisking on medium speed. Be patient, it can take as long as 10 minutes for all the sugar to be incorporated.1 2/3 cups (350g) sugar
- Increase the speed to medium high and continue whisking until the meringue is stiff and glossy. Feel a small amount of meringue between your fingers – if it feels gritty then the sugar hasn’t fully dissolved yet.
- Continue to whisk until the sugar is fully dissolved and the meringue is stiff and glossy.Add the lemon juice (or vinegar), cornflour and vanilla paste and whisk them in for 30 seconds.2 tbsp cornstarch, 1 tbsp lemon juice, 1 tsp vanilla extract or paste
- Pile the meringue on your tray, quite high, to fill the circle you traced. Use an offset spatula to shape it, making a small indent in the cener. Alternatively you can pipe the meringue for a more structured look.
- Bake for 20 minutes then REDUCE the oven temperature to 90°C (195°F) or up to 110°C (225°F) please see notes about altitude. Bake for a further 90 minutes without opening the oven door. Turn the oven off and leave the pavlova to cool inside the oven for 5-6 hours or overnight to avoid cracks. At this point you can store the cooled meringue shells in an airtight container for several days.*** READERS BAKING AT HIGH ALTITUDE: Bake at 110°C (230°F).
- Whisk the cream, icing sugar and vanilla extract until you have soft to medium peaks.2 cups (500ml) double cream, 1 cup (125g) sugar, 1 tsp vanilla extract or paste
- Ripple the lemon curd into the whipped cream and fill the pavlova once you are ready to serve (do not fill in advance). Pile a handful of fresh berries over the top and serve with a dusting of icing sugar.6 tbsp lemon or passionfruit curd, 2 cups (280g) fresh berries , sugar
Nutrition
Nutritional information is always approximate, and will depend on quality of ingredients and serving sizes.


Have always wanted to try pavlova..thanks for the recipe. You make it sound easy 🙂
Your step by step guidance is much appreciated on making the perfect pavlova. I can’t wait to make this.
Your easy step by step directions and video will make my first time making pavlova so much easier.
I love how your pavlova looks and all the fillings you used! Looks wonderful!
Can I use bottled albumin that one can purchase from the fridge section in supermarkets-to have perfect separated and correct doze of egg white?
I have found that the results are not as good – the meringue doesn’t reach the perfect peak stage as it does if you use eggs.
If I was to make one big pavlova using this recipe how long would you recommend I leave it in the oven?
I would say the same cooking time would apply. As long as you leave it in oven until cooled down it will continue to bake in the residual heat.
That is a beautiful pavlova and the pictures are gorgeous. Love the cake stand too!
I’ve never made a pavlova before. Definitely going to have to try this!
Oh it is so delicious! And very versatile when it comes to filling it
This looks so light and perfect for summer time! I can’t wait to try it!
What a completely lovely dessert! I have never made one, I’ve always been intimidated!