Air Fryer Salt Dough Ornaments
, Updated Aug 04, 2025
This post may contain affiliate links. Please read our disclosure policy.

These Air Fryer Salt Dough Ornaments are a great way to create some gorgeous mementoes for the holiday season! It’s an easy craft project based on three simple ingredients and it allows you to make your own ornaments without any fuss or trips to the craft store.

You’ve probably already seen these all over TikTok – make your very own salt dough handprint ornaments or other homemade ornaments to decorate Christmas trees across the land! The fact is that this easy salt dough recipe makes it a fun project for the whole family and the best part is that you can bring out your homemade salt dough Christmas ornaments year after year.
Salt Dough Ingredients
- Plain / all-purpose flour: This is as basic as it gets and these salt dough decorations rely on it to work. Don’t be tempted to substitute with self raising flour, which might turn a great job into a bubbly mess in the end!
- Table salt: You could also use fine sea salt or similar, but the key is to make sure it’s not too grainy or it could change the dough’s texture.
- Water: warm water from the tap – make sure to add this to the dry ingredients gradually. Too much and you’ll end up with a sticky mess.
- Food coloring powder or gel food coloring (optional): Instead of painting your creations, you can add any food coloring to the dough for added decoration. You can also add it to the water and adjust as needed to the get the color you want. Just be aware that the colour will be quite subtle once the salt dough dries.
- Luster powder (optional): A delightful touch that allows the ornaments to catch the lights on your tree and add some extra sparkle to your Christmas.
- Ground cinnamon: If you want to add a seasonal scent to your ornaments, just add a bit of spice to the dough mixture! You can also use vanilla essence, adding it to the water first.

Recipe Tips and FAQs
Do I need specialist equipment?
You’ll just need a rolling pin and some cookie cutters (or biscuit cutters in the UK). The shape is up to you – why not create an army of gingerbread men to hang on your tree?
If you want to get even more creative, you can decorate the finished product with acrylic paint. Just make sure you apply a good coat of Mod Podge to the top of each ornament before you do – it’s glue, sealer and varnish all in one and will protect your salt dough creations from damage. I loved using a fondant stamp to personalise my salt dough ornaments to use as gift tags.

Is this salt dough suitable for younger children?
This really is the perfect craft idea for little kids. Just give them a brief overview of the recipe steps and let them get on with the job. There’s no better way to keep your kids busy during the holidays and they’re guaranteed to have so much fun.
Can I add details using a hot glue gun?
That’s not ideal as the heat may affect the dough even after the whole baking and drying process – test it on one before you commit to doing a whole batch.
How to Make Air Fryer Salt Dough Ornaments
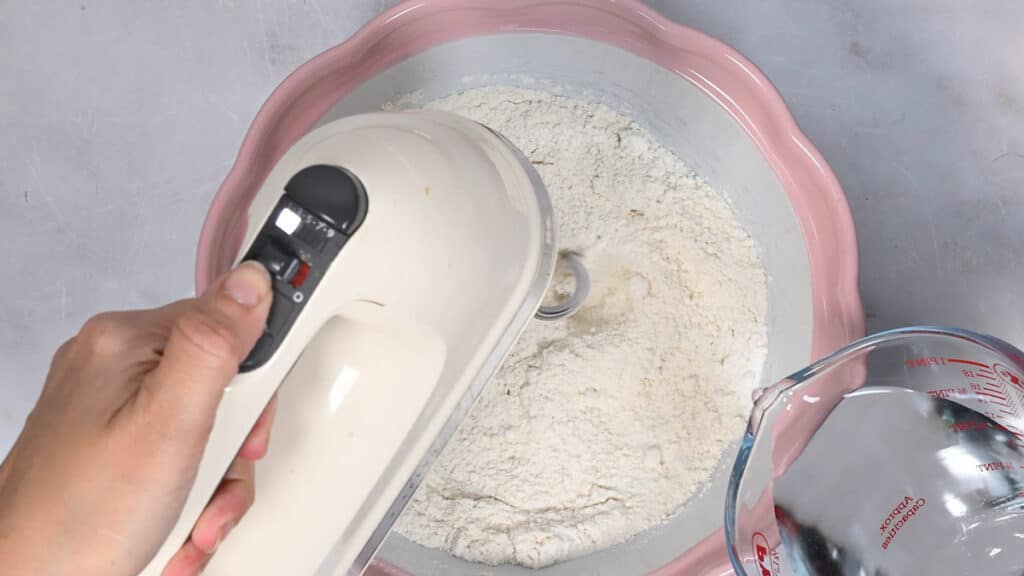
- Add the dry ingredients to a large mixing bowl or the bowl of your stand mixer. Stir or beat together to combine.
- Pour in a bit of warm water, a little at a time, and mix using a dough hook attachment. You want to add just enough water gradually so the dough reaches the right consistency – pliable and soft but not sticky.
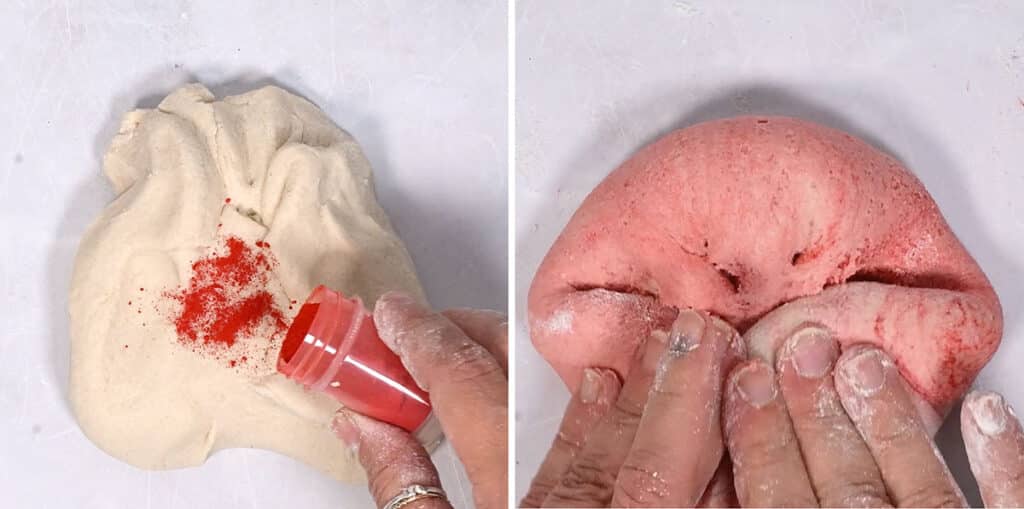
- Knead until the dough forms a ball. If you’re using food coloring powder, this is where you add it to the mix. Knead to spread the color through the dough until it’s even.
- Flatten the dough with a rolling pin. You shouldn’t need a floured work surface for this, but you might want to roll it out between baking sheets or parchment paper to avoid it sticking. I used lustre powder and ground cinnamon to prevent them from sticking.

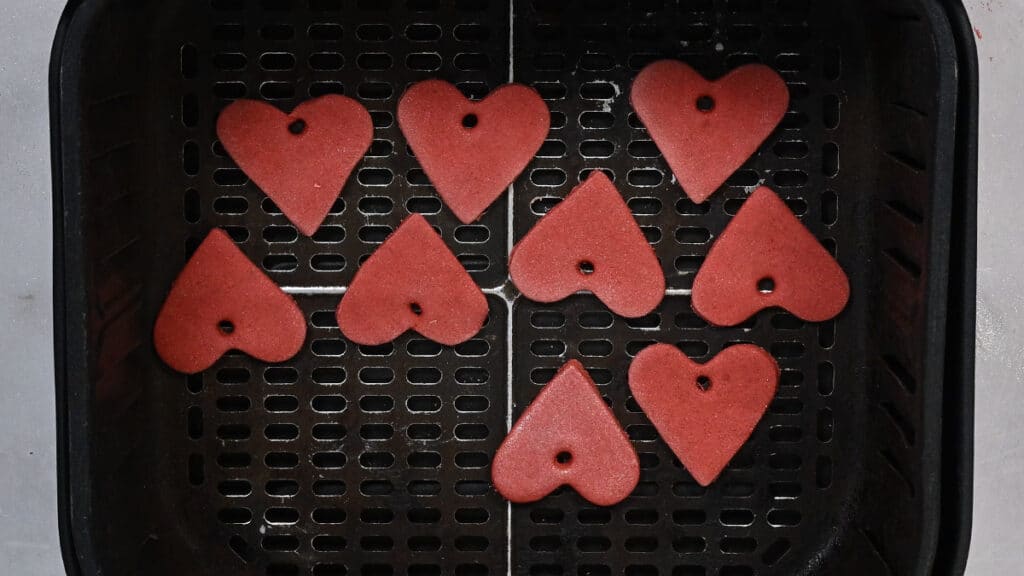
- Use a cookie cutter to cut out your preferred shapes. Gather any scraps so you can roll them out.
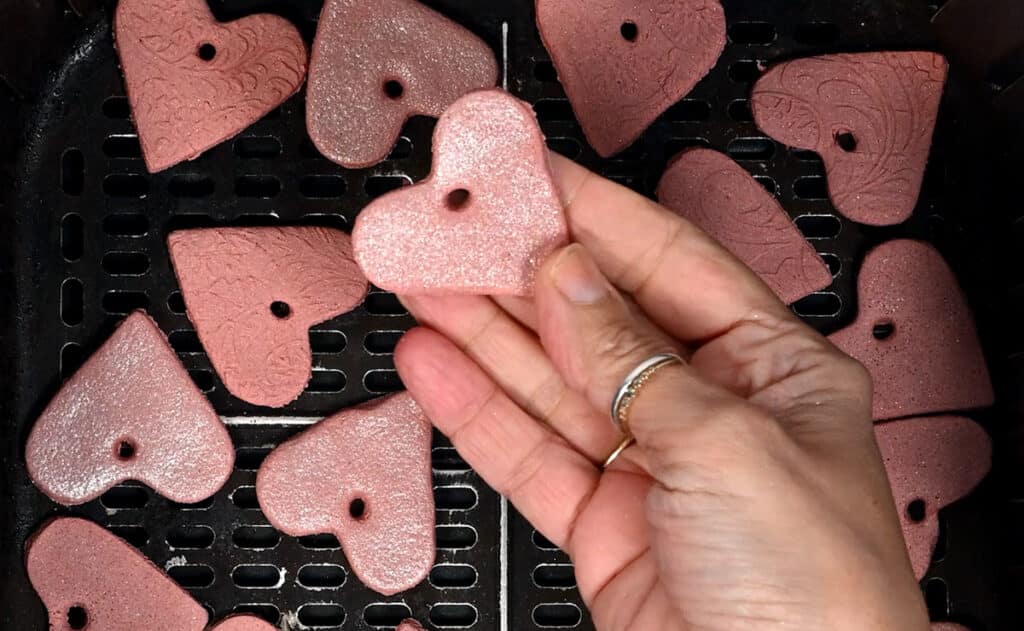
- Cut a small hole in each ornament using a straw. Add them directly to the air fryer basket, or on a liner, spaced slightly apart. Air fry for 45-60 minutes on 90°C. Doing this at nighttime is best – that way the salt dough has extra time to dry in the air fryer basket as it cools.
- Once the salt dough is completely dry you can paint your ornaments using acrylic paints or simply seal them with Mod Lodge varnish. This is the the best way to avoid any cracks or crumbling happening right at the end of the process. Thread some pretty ribbon or butcher’s twine to hang them with.
Storing Salt Dough Decorations
Keep the ornaments in an airtight container in a dry place. The varnish should preserve the ornaments well enough to keep them for years. We still have some the kids made over 10 years ago and they bring back so many memories!

HAVE YOU MADE AIR FRYER SALT DOUGH ORNAMENTS? Please leave a rating, post a photo on my Facebook page, share it on Instagram, or save it to Pinterest with the tag #supergoldenbakes and make my day

Air Fryer Salt Dough Ornaments
Video
Ingredients
For the salt dough
- 250 g (2 cups) flour, plain /all-purpose
- 250 g (1 cup) table salt
- 125 ml (1/2 cup) water, warm or as needed
Optional extracts
- Food coloring powder or gel food coloring (optional)
- Lustre powder (optional)
- Ground cinnamon
Instructions
- Add the flour and salt to a large mixing bowl or the bowl of your stand mixer. Stir or beat briefly to combine.250 g (2 cups) flour, plain /all-purpose, 250 g (1 cup) table salt
- Add a bit of warm water, a little at a time, and mix using a dough hook attachment. You want to add just enough water gradually so the dough reaches the right consistency.125 ml (1/2 cup) water, warm
- Knead until the dough forms a ball. If you’re using dry food coloring, this is where you add it to the mix. Knead to spread the color through the dough until it’s even. You can also add lustre powder for a touch of glitter and some ground cinnamon if you like!Food coloring powder or gel food coloring
- Flatten the dough with a rolling pin. You shouldn’t need a floured work surface for this, but you might want to roll it out between baking sheets or parchment paper to avoid it sticking.
- Use your cookie cutter to cut out your preferred shapes. Gather any scraps to roll out again.
- Use a straw to cut a small hole in each ornament. This is where you will thread a piece of string or pretty ribbon so you can hang it on your tree.
- Bake in the air fryer for 45- 60 minutes, or until completely dry, on 95°C (200°F). You may need to bake in batches, depending on the size of your air fryer. You can also use racks, stacked, to bake a few batches at once.
- Paint the salt dough using acrylic paint (this is optional) and dry. Apply a layer of Mod Podge and leave to dry. Thread a ribbon to hang the ornaments and keep in an airtight container.