
Homemade Pastrami | Step By Step Guide
, Updated Sep 14, 2024
This post may contain affiliate links. Please read our disclosure policy.


Making Homemade Pastrami is a week-long labour of love but the delicious results are very rewarding! Read my tips, step by step guide and watch my video tutorial on how to make pastrami at home with or without a smoker.
You will also love my Homemade Salt Beef and Air Fryer Corned Beef
Post may contain affiliate links. For more information, check my disclosure
My thanks to Thermapen for sponsoring this recipe.
A few years ago I made my first batch of homemade salt beef and I was totally hooked! Judging by how popular the recipe still is, I guess there’s a lot of salt beef fans out there.
After conquering salt beef the next step was, naturally, homemade pastrami! My husband grew up in Montreal and he still gets misty eyed about Montreal smoked beef… You have him to thank for this pastrami recipe. Make sure you check out the video to see how easy it is!
What is pastrami?
If we are going by the dictionary definition then Pastrami is “is strongly seasoned smoked beef”.
The word origin has roots in Yiddish (pastrame), Turkish (pastırma) and Romanian (pastramǎ) – pǎstra meaning to preserve. Making pastrami was a way to preserve meat by salting it.
What is pastrami made from?
Pastrami can be made from beef, mutton, even turkey. The more well-known New York style pastrami is usually made from beef, usually a large flat piece of brisket ideally from the navel end.
I used a flat piece of lean brisket with most of the fat trimmed off. After looking online for a suitable large piece – over 2kg – around 5 pounds – I finally got lucky at Donald Russell’s who supplied the meat I used in this recipe. It is worth calling and placing a special order.
Pastrami VS corned beef
In North America, corned beef is made from brisket which is brined for up to a week then boiled and steamed.
Pastrami is also made from beef that is brined but after curing it is rubbed with a dry spice mix, smoked then steamed.
In the US you can find pieces of corned (cured) beef for sale which can be used as the basis of homemade pastrami – skipping the brining process and follow the recipe from stage 2 onwards.
In the UK you might be able to find ready brined meat that is suitable for pastrami at a kosher butcher. By the way ‘corned beef’ is something entirely different in the UK! Let’s just say you couldn’t possibly use it to make pastrami.
What is the difference between pastrami and Montreal smoked meat
Pastrami and Montreal smoked meat share a lot of similarities. Some say the difference lies in the spices used in the brine and spice rub, or the cut of meat, others insist that it’s the smoking that makes them different.
I would suggest visiting New York famous Katz’s Deli, considered by many to be the home of pastrami and then making a pilgrimage to Montreal’s Schwartz’s Deli to determine the differences! And yes, I have visited them both;)
Homemade pastrami – here’s what you will need
Take a look at my affiliate Amazon list to see the products I have used
- A large container – I used a 10 litre foodsaver from Amazon. Bear in mind whatever container you use that it needs to be large enough to contain 5 litres (quarts) of brining solution, the beef (2.25kg/5 pounds) plus something to weigh the meat down so it stays immersed.
- Prague Powder No 1 – this curing salt will give the pastrami its characteristic red colour. Prague powder is usually tinted pink to distinguish it from regular salt and it contains 6.25% sodium nitrite 93.75% salt. Sometimes called Instacure #1 or Pink Curing Salt #1 – the brand is not important, so long as it contains 6.25% sodium nitrite.
- Spices and salt (ideally kosher salt) to use in the brine and spice rub (see below)
- Wood chips: something fairly neutral like oak or alder
- A digital thermometer – I use my trusty Thermapen which has an auto-rotating display that can be used in any position, in either hand. The backlit display senses varying light levels and you get an accurate temperature reading in just 3 seconds
- Digital scales – ideal for accurately measuring the Prague Powder
- A smoker is useful but not essential. I have used the oven smoke method in this recipe – see notes for using an electric smoker
- A deep roasting tin with rack
- Plenty of aluminum foil
- Food grade gloves (optional)

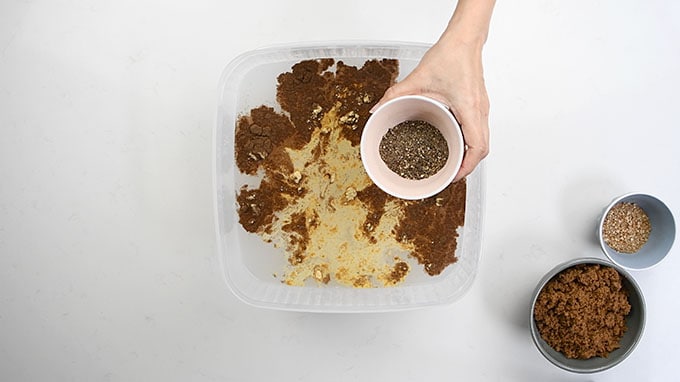
Brining solution
Combine the following in your container until the sugar and salt have dissolved completely. Cool the brine before adding the meat. You could use half the volume of hot water to dilute the salt/sugar and then cool it down by adding cold water or ice.
- hot water
- Prague Powder no 1 (not to be mixed up with Himalayan pink salt!)
- (kosher) salt
- brown sugar
- black peppercorns
- coriander seeds
- ground allspice, ground ginger
- bay leaves and thyme sprigs
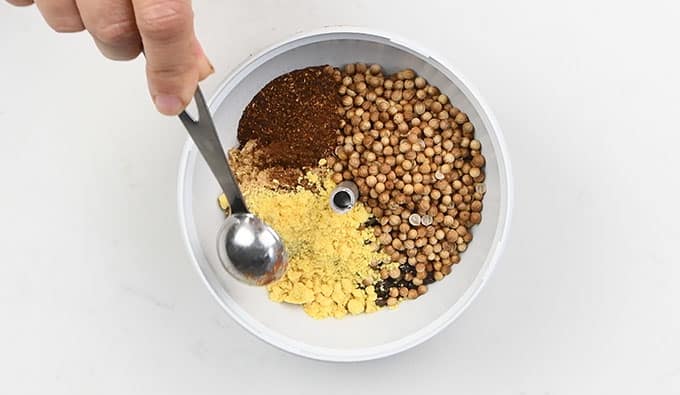
Pastrami spice rub
You can grind the following spices in a spice grinder, a pestle and mortar or a mini food processor to create your spice rub. This is rubbed onto the meat after it has completed the brining process. The spice rub adds flavour, colour and heat to the pastrami, feel free to experiment and customise the blend.
- black peppercorns
- coriander seeds
- Demerara (Turbinado) sugar
- smoked paprika
- garlic granules
- Ancho chilli powder
How to make homemade pastrami
Making pastrami is a lengthy process but it is not particularly difficult. The only requirement is patience – if you are all about instant gratification then this is not the recipe for you. The process is divided into a few distinct stages and it can take the better part of a week.
Stage 1: Brining the meat (4 days)
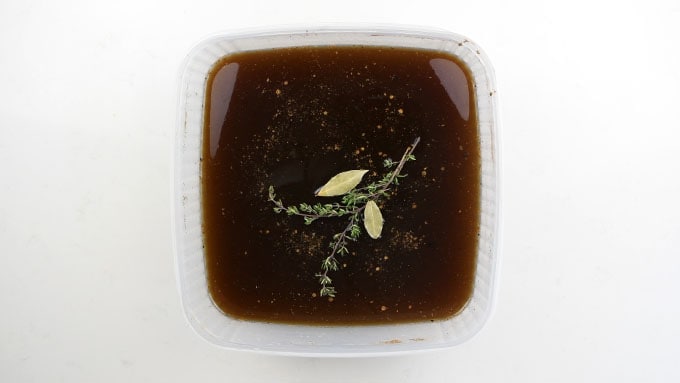
Step 1. Combine all the brine ingredients with hot water in a suitable container and stir until the salt and sugar dissolve. Leave to cool.
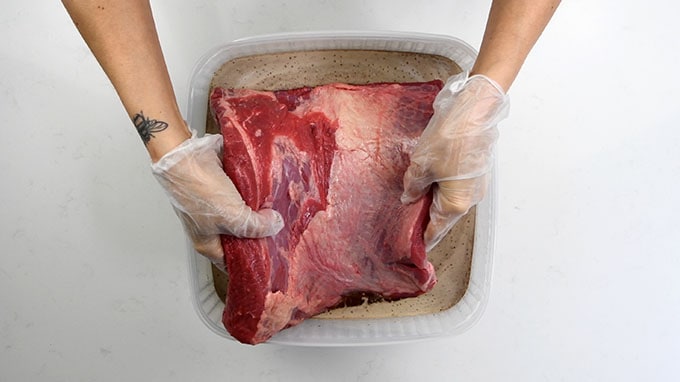
Step 2. Immerse the brisket in the cold brine. Weigh it down to make sure it stays submerged (I used an inverted lid).
Step 3. Place the container in the fridge and leave for four days. If you can, flip the meat over every day – I didn’t bother this time.
Stage 2: Rinsing and soaking to remove most of the salt (2 hours)
If you are using corned beef then start the recipe from stage 2.
Step 1. Remove the brisket from the brine and rinse really well with cold water.
Step 2. Discard the brine, fill the container with cold water and immerse the brisket again. Leave to soak for 2 hours, replacing the water every half hour. Don’t forget this step or your pastrami will be too salty.
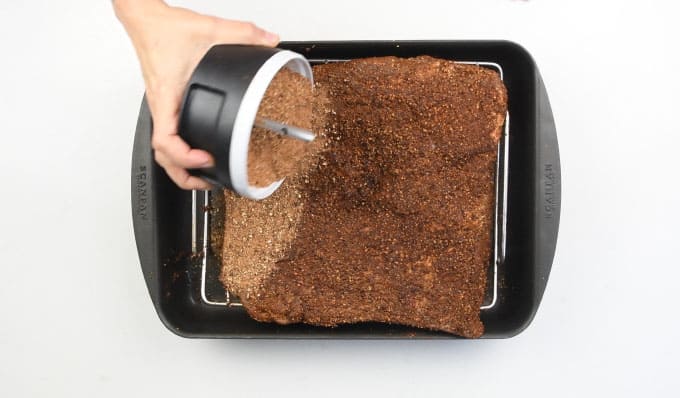
Stage 3: Adding the spice rub (8 hours /overnight)
Step 1. Put all the ingredients for the spice rub in a spice grinder, pestle and mortar or mini food processor and grind until you have a slightly coarse rub.
Step 2. Pat the brisket dry with paper towels. Rub the brisket with the spice run, pressing down on the surface so it adheres. Carefully transfer to a large tray and leave in the fridge overnight. You can tent the brisket with foil but don’t wrap it or the spice run will fall off.
Stage 4. Smoking the meat (5-7 hours) possibly chilling overnight
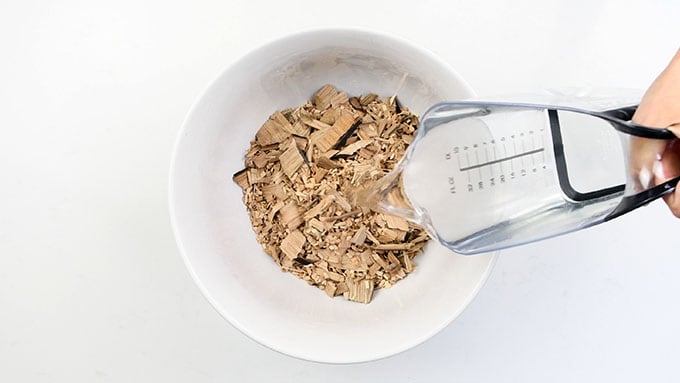
Step 1. Take the brisket out of the fridge and leave to come to room temperature for 2 hours. Mix your wood chips with plenty of water and leave to soak.
Step 2. Line a deep roasting tray with foil, letting it some length of it hang over the sides. Make sure there aren’t any gaps by overlapping lengths of foil.
Step 3. Preheat the oven to 120°C (245°F) and place the shelf on the bottom rack.
Step 4. Line the bottom of the tray with the soaked wood chips. Turn the rack over so that it is raised over the wood chips by a few inches. Place the brisket fat side up on the rack.
Step 5. Bring the overhanging foil over the top to create a sort of tent, to allow the smoke to circulate. Crimp the edges so that it is airtight.
Step 6. Place the tray on the stove and heat on medium-high for five minutes to start the smoking process. There won’t be a lot of smoke (or any if you have done a thorough job with the foil). You will hear the steam inside, don’t be tempted to open to look.
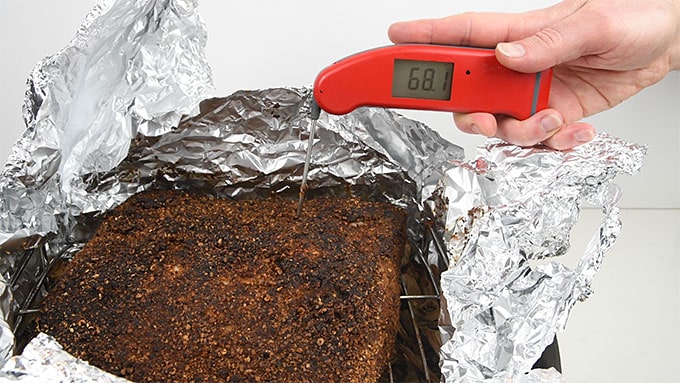
Step 7. Place in the oven and smoke for 4-6 hours, or until the brisket registers 70°C (160°F) on your Thermapen.
NOTE: Now you have two options – if you have 2-3 hours you can steam your brisket now. If not you can cool the brisket and store in the fridge to steam the following day. Remove from the tray, wrap loosely with foil and store in the fridge. Discard the foil and wood chips and clean your roasting tray and rack.
Stage 5. Steaming the pastrami (2-3 hours)
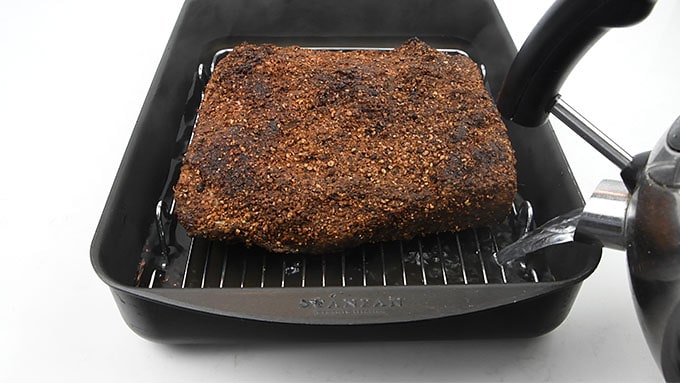
Step 1. When you are ready to steam the brisket, preheat the oven to 160°C (325°F). Place the rack over the roasting tin and position the brisket over it, fat side up.
Step 2. Fill the roasting tin with boiling water until it comes halfway up the thickest side of the brisket. Cover the roasting tray tightly with two layers of foil, leaving a little space over the brisket.
Step 3. Steam in the oven for 2-3 hours, until the pastrami registers 70°C (160°F) on your Thermapen. Note: the recommendation in the US is for the temperature to be 75°C = 167°F).
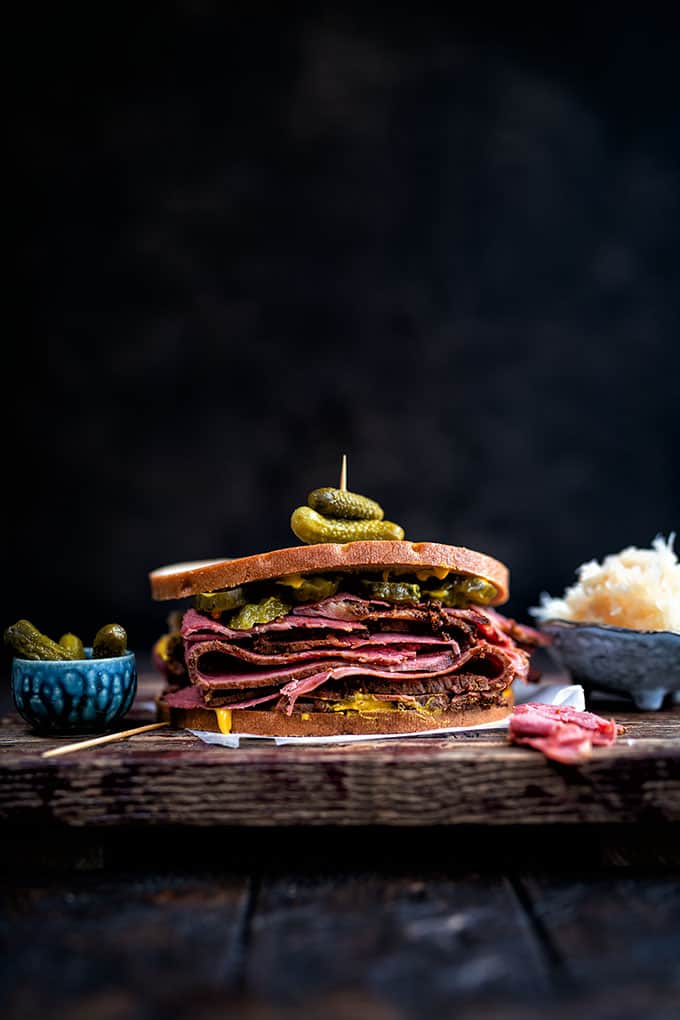
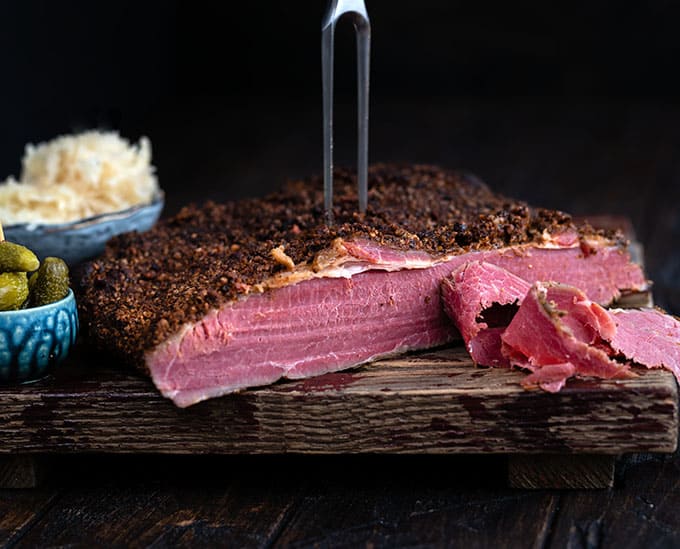
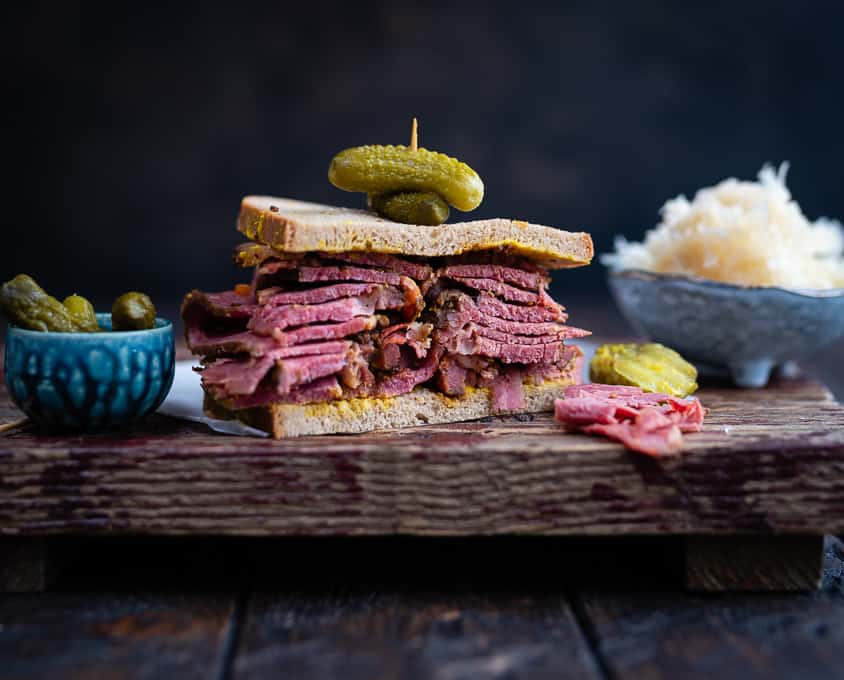
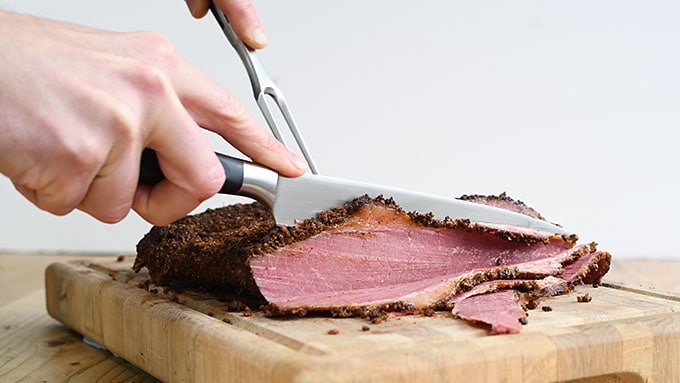
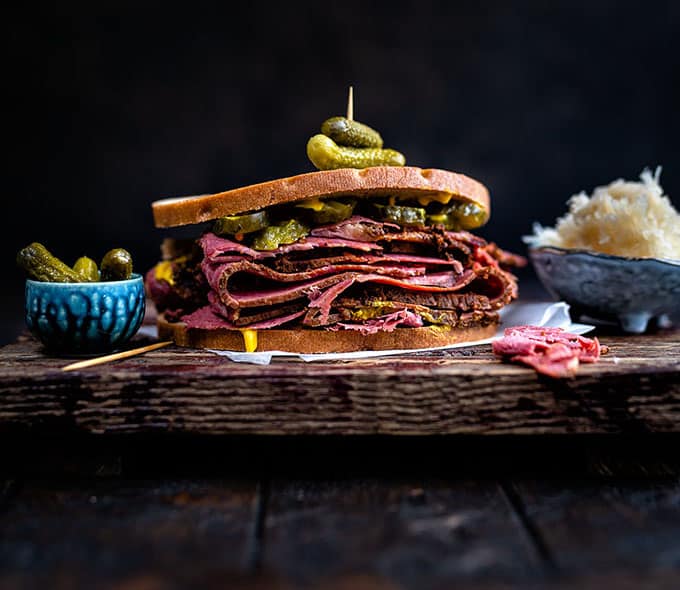
Step 4. Use a sharp knife and cut into thin slices, cutting against the grain. Serve over rye bread smeared with mustard and top with pickles.
Storing and freezing pastrami
To be totally honest, homemade pastrami doesn’t last long in our house. We usually eat our fill of pastrami sandwiches soon as it is cool enough to slice! Any leftover pastrami can be kept in the fridge, tightly wrapped, for up to a week, slicing as you go.
According to my research can also freeze pastrami, whole or sliced. Wrap it well and put in freezer bags and use within three months.
Have you made my homemade pastrami?
Post a photo on my Facebook page, share it on Instagram, or save it to Pinterest with the tag #supergoldenbakes. I can’t wait to see your take on it!

Homemade pastrami
Video
Ingredients
You will need
- 2.25 kg | 5 pounds flat brisket
- 1 x 10 litre container
- 4 cups wood chips (Oak or Alder)
- 1 large roasting tray with a rack
- Foil
For the brine
- 5 litres | quarts hot water
- 30 g | 2 tbsp Prague Powder no 1
- 600 g | 1 pound 5 oz salt
- 250 g | 9oz brown sugar
- 2 tbsp ground black peppercorns
- 2 tbsp ground coriander seeds
- 2 tbsp allspice
- 1 tbsp ground ginger
- 2 bay leaves
- 2 thyme sprigs
For the spice rub
- 30 g | 1/4 cup tbsp black peppercorns
- 2 tbsp coriander seeds
- 1 tbsp Demerara (Turbinado) sugar
- 2 tsp smoked paprika
- 1 ½ tsp garlic granules
- 1 tsp mustard powder
- 1 tsp Ancho chilli powder
To serve
- Rye bread
- mustard
- pickles
- Sauerkraut
Instructions
STAGE 1: Brining (4 days)
- Combine all the brine ingredients with hot water in a suitable container and stir until the salt and sugar dissolve. Leave to cool.
- Immerse the brisket in the cold brine. Weigh it down to make sure it stays submerged (I used an inverted lid).
- Place the container in the fridge and store for four days, flipping over daily.
STAGE 2: Rinsing and soaking (2-3 hours)
- If you are using corned beef start the recipe from this step onwards.
- Remove the brisket and rinse really well with cold water. Discard the brine and fill the container with cold water and immerse the brisket again. Leave to soak for 2 hours, replacing the water every half hour. Don’t forget this step or your pastrami may be too salty.
STAGE 3: Adding spice rub (8 hours /overnight)
- Put all the ingredients for the spice rub in a spice grinder, pestle and mortar or mini food processor and grind until you have a slightly coarse rub.
- Pat the brisket dry with paper towels. Rub the brisket with the spice run, pressing down on the surface so it adheres. Carefully transfer to a large tray and leave in the fridge overnight. You can tent the brisket with foil but don’t wrap it or the spice run will fall off.
STAGE 4: Smoking (oven method) 5-6 hours
- Take the brisket out of the fridge and leave to come to room temperature for 2 hours. Mix your wood chips with plenty of water and leave to soak.
- Line a deep roasting tray with foil, letting it some length of it hang over the sides. Make sure there aren’t any gaps by overlapping lengths of foil.
- Preheat the oven to 120°C (245°F) and place the shelf on the bottom rack.
- Line the bottom of the tray with the soaked wood chips. Turn the rack over so that it is raised over the wood chips by a few inches. Place the brisket fat side up on the rack.
- Bring the overhanging foil over the top to create a sort of tent, to allow the smoke to circulate. Crimp the edges so that it is airtight.
- Place the tray on the stove and heat on medium-high for five minutes to start the smoking process. There won’t be a lot of smoke (or any if you have done a thorough job with the foil). You will hear the steam inside, don’t be tempted to open to look.
- Place in the oven and smoke for 4-6 hours, or until the brisket registers 70°C (160°F) on your Thermapen.
STAGE 5: Steaming (2-3 hours)
- Now you have two options – if you have 2-3 hours you can steam your brisket now. If not, you can cool the brisket and store in the fridge to steam the following day.
- Remove from the tray, wrap loosely with foil and store in the fridge. Discard the foil and wood chips and clean your roasting tray and rack.
- When you are ready to steam the brisket, preheat the oven to 160°C (325°F). Place the rack over the roasting tin and position the brisket over it, fat side up.
- Fill the roasting tin with boiling water until it comes halfway up the thickest side of the brisket. Cover the roasting tray tightly with two layers of foil, leaving a little space over the brisket.
- Steam in the oven for 2-3 hours, until the pastrami registers 70°C (160°F) on your Thermapen. Leave to stand for 10-15 minutes.
- Use a sharp knife and cut into thin slices, cutting against the grain.
- Serve over rye bread smeared with mustard and top with pickles.
Notes
ALL IMAGES AND CONTENT ON SUPERGOLDEN BAKES ARE COPYRIGHT PROTECTED. IF YOU WISH TO SHARE THIS RECIPE, THEN PLEASE DO SO BY USING THE SHARE BUTTONS PROVIDED. DO NOT SCREENSHOT / POST RECIPE OR CONTENT IN FULL.


I have used this recipe and it is superb. My family absolutely love it
Making my second batch a couple of weeks later
What I would like to know is, can you use the brining solution twice in a row? I have extra meat and want to use for the same recipe
Hi Lorna, I would be concerned about possible bacteria growth even with the Prague powder. I think you need to make a new batch x
Making this recipe now, question do you use whole allspice berries or ground allspice? thanks.
ground or whole, both are fine they are used in the brine. If you have whole berries you can smash them up a bit in a pestle and mortar or spice grinder
how do you reheat for sandwich
Hi Richard, you can reheat in the microwave for a few seconds
It says to bring the temp to 160 in the smoker, but then to bring it to 160 again after 2-3 hours of steaming. Can you clarify this? Thanks!
Yes Julie that’s right. Bear in mind that one option is to chill overnight then smoke.
This is gorgeous and looks so incredible! Can’t wait to try!
I would have never thought to make homemade pastrami but I grew up eating Rueben’s and crave them still. You give so many detailed directions, I know that I even I could handle this. Your photos are gorgeous!
I never really understood the difference between corned beef and pastrami so this was such a good read. Thanks for sharing this delicious recipe.
Absolutely gorgeous photos! I have actually never tried a pastrami before. This really makes me want to try one.
Lucy your dedication to your work is outstanding. I really would love to make this, pinned for when I can.